So, I refuse to buy furniture full price (except for couches). I went to an antique store in town back in March. I was looking for some type of a bench seat to put at the end of my bed for Dave to sit down on to put on socks in the morning. When I got the shop, the owner brought me out back and directed me to this hideous long "coffee table"- had I not been perusing before and after furniture redo's online already, I would have snubbed my nose and walked away. Instead, I asked how much- she said "$10", so out I walked with this UGLY thing:
It has literally sat in my garage for the past 7 months, collecting dust. I finally decided to get it out and paint it before the cold weather settles in. I started by having Dave take that ugly looking slider door off the front, then by putting on one coat of primer. I use Benjamin Moore wall primer- I have a gallon of it- this is the fourth thing I've primed with it, and I'm still not even 1/3 way done, so it was worth the investment.
I let it sit over night to dry and the next day, I painted it with Benjamin Moore paint- Margarita was the color. I only bought a pint, and for two coats, I had about 1/4 of the can left.
The original intent was to go at the foot of my bed, but Hazel cannot keep her stuff together, and judging by the way stuff was gathering in her room, she needed something in there to help her keep her stuff organized, don't you agree?
And the after. I love the way this looks in here, don't you?
I am planning on making a pillow for the top of the bench so she can sit in read in comfort, but for now, I don't think she minds at all.
If you're looking for something to jazz up a room, or need something that serves a useful storage purpose, put down the Pottery Barn catalog and start looking around- you never know what removing a door or hardware, along with adding a fresh coat of colorful paint can do to a once ugly piece!
Showing posts with label home design. Show all posts
Wednesday, October 24, 2012
Wednesday, August 8, 2012
Time to Get Organized on Tuesday: A Before and After
So, I vowed to do a 30 minute clean-up a day in my house no matter what. There were a few days that we missed, but we made it up by doing 60 minutes the next day. So here's my first update.
The upstairs hallway. It has not been empty since we got our shipment last August. My goal is to have the whole house purged before our 1 year anniversary. Take a look at the dramatic difference to this hallway in 35 minutes last Sunday:
Now we can easily walk (or run) down the hallway in daylight or dark without fear of tripping on something. (I'm loving those reflections on the freshly mopped floor- which was so easy to do with nothing in my way ;)
How did we do it?
I started by making piles of like items that went to the same area- each kid was assigned a task and when they were done, they would come back for more. If they whined, they were given an extra minute of work. There were books that had been unpacked, but never put away, boxes of winter clothes that needed to be taken to the basement, toys that needed to go bye bye, and baby clothes that no longer fit. Everything found a spot or went to good will.
I'll tell you what, I'm liking the results and I know that less is more! I felt so much stress everytime I walked up and down that hallway and now I feel peaceful. In fact, I just discovered it'd make a great place for me to get some photos.
The upstairs hallway. It has not been empty since we got our shipment last August. My goal is to have the whole house purged before our 1 year anniversary. Take a look at the dramatic difference to this hallway in 35 minutes last Sunday:
Now we can easily walk (or run) down the hallway in daylight or dark without fear of tripping on something. (I'm loving those reflections on the freshly mopped floor- which was so easy to do with nothing in my way ;)
How did we do it?
I started by making piles of like items that went to the same area- each kid was assigned a task and when they were done, they would come back for more. If they whined, they were given an extra minute of work. There were books that had been unpacked, but never put away, boxes of winter clothes that needed to be taken to the basement, toys that needed to go bye bye, and baby clothes that no longer fit. Everything found a spot or went to good will.
I'll tell you what, I'm liking the results and I know that less is more! I felt so much stress everytime I walked up and down that hallway and now I feel peaceful. In fact, I just discovered it'd make a great place for me to get some photos.
Tuesday, January 31, 2012
DIY Tutu Organizer Kids' Shelf
OK, you can totally tell I had a lot of boys before I had a daughter. She has a LOT of tutus. And, no I don't force them on her, she loves to wear them, I just might have gone overboard on the number I bought. They are very puffy and take up a lot of room, drawer space is limited, so this is where I've been storing them.
Last fall, I began searching for ideas how other people stored tutus and found nothing. In the process, I came up with my own idea (I have had the materials since last October, just finally got around to doing it last weekend).
I started with a photo ledge that I bought at IKEA for $10:
I took some old dolls and had my husband screw them on to the front of the shelf (my plan was to have them seated on the shelf and their legs would hold the stuff up, but he didn't like the idea of them sitting with their legs open and the glue took too long to dry. Another idea my dad had was adhesive velcro so you can change out the toy if you want):
The original idea was for the arms to hold up the stuff, but the arms are movable and the weight of the tutus make them fall down to the dolls' sides. So, I used drapery clips and hung them on the wings of the dolls, then, clipped the tutus to them.
Rapunzel is dual purpose, her hair is housing some of our favorite barrettes:
Not only can we hang stuff from the front, but we can put stuff on the shelf:
Princess peach seriously looks frightened that she's going to fall off.
Last fall, I began searching for ideas how other people stored tutus and found nothing. In the process, I came up with my own idea (I have had the materials since last October, just finally got around to doing it last weekend).
I started with a photo ledge that I bought at IKEA for $10:
I took some old dolls and had my husband screw them on to the front of the shelf (my plan was to have them seated on the shelf and their legs would hold the stuff up, but he didn't like the idea of them sitting with their legs open and the glue took too long to dry. Another idea my dad had was adhesive velcro so you can change out the toy if you want):
The original idea was for the arms to hold up the stuff, but the arms are movable and the weight of the tutus make them fall down to the dolls' sides. So, I used drapery clips and hung them on the wings of the dolls, then, clipped the tutus to them.
Rapunzel is dual purpose, her hair is housing some of our favorite barrettes:
Not only can we hang stuff from the front, but we can put stuff on the shelf:
Princess peach seriously looks frightened that she's going to fall off.
Monday, January 16, 2012
Valentine's Handprint Canvas Wallhanging
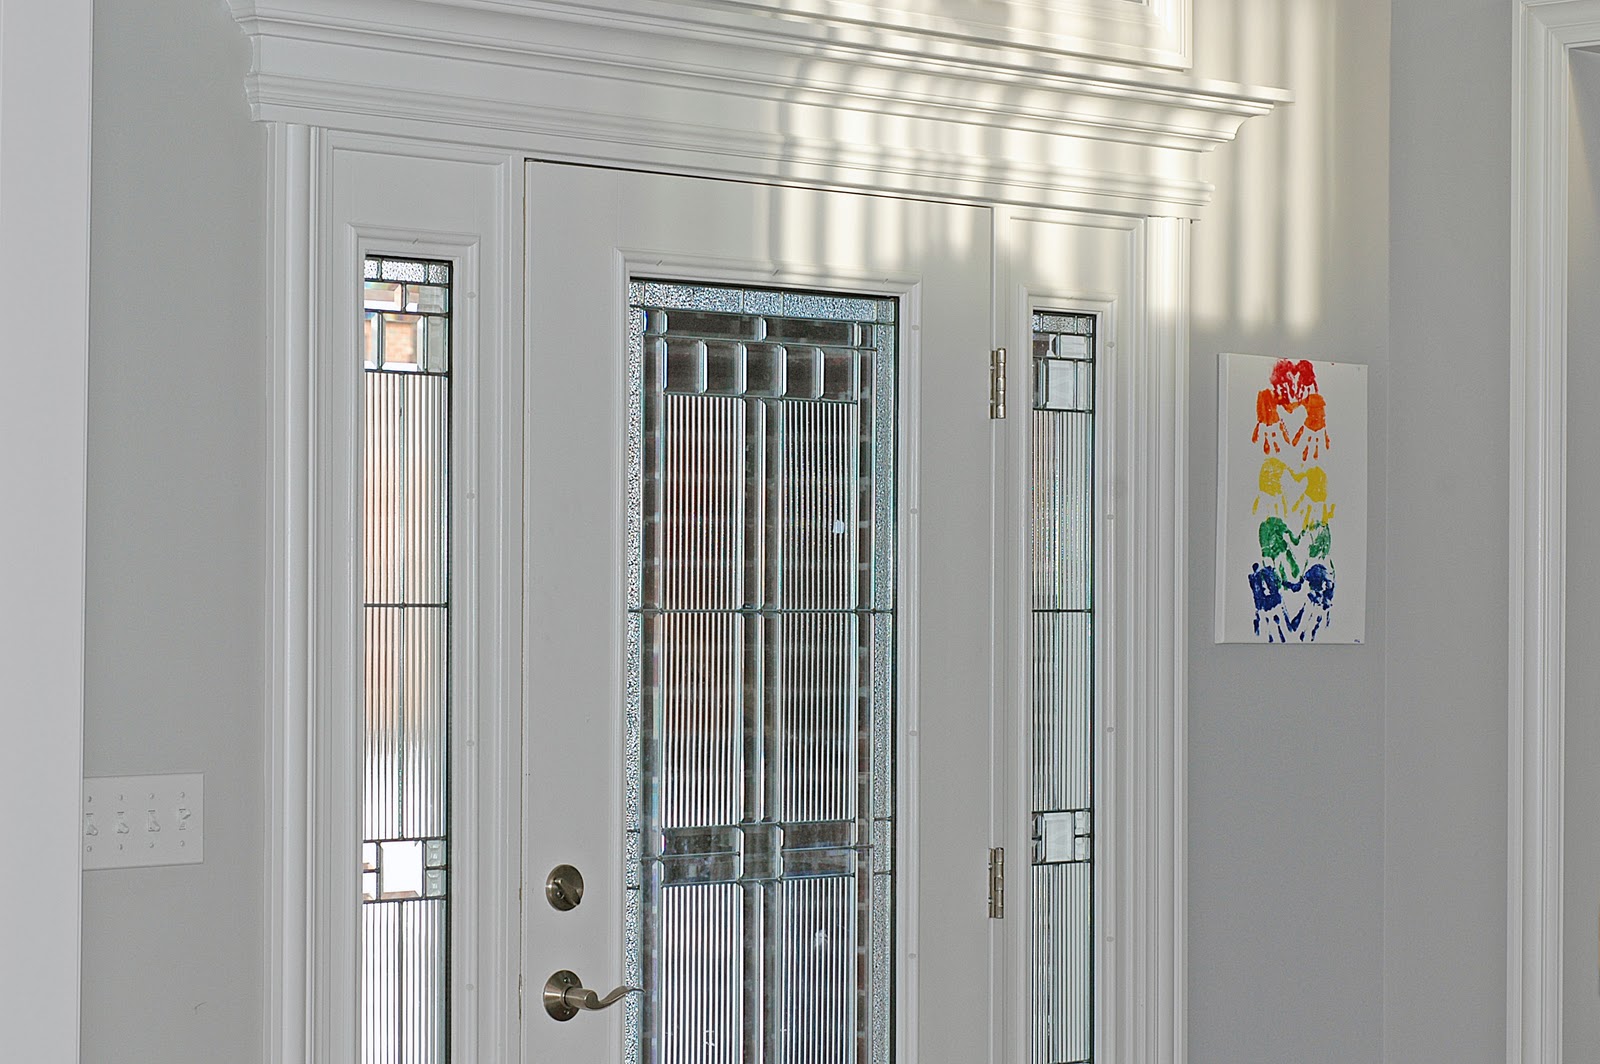
Every year I like to do a craft with a kids that involves their hand prints. I initially bought this canvas to make a handprint Christmas tree wall hanging, but I never got around to taking it out of the bag. My entry way is quite drab, grey paint with white trim- we are slow for hanging up decorations, so I thought a nice bright canvas would make the area more fun and inviting.
Using acrylic paints that I already had, I painted the kids' hands, one at a time and pressed them onto the canvas. You can buy the canvas at Michael's with a 50% off coupon and it's not that expensive.
I started at the top with the baby- holding her fingers slightly spread out and tilted her hand slightly, so that when they were both on, they'd form a heart shape between the thumb and pointer finger, when the hands are upside down.
After everyone's hand prints were on, I used my colored sharpies and wrote their names on the inside of their hearts. I put the year in the bottom right hand corner and hung it up. This was an easy, cheap, and quick way to add some personal touch to our new home.
I love how the color pops in my entryway, I get to look at this everytime I come down the stairs :)
Using acrylic paints that I already had, I painted the kids' hands, one at a time and pressed them onto the canvas. You can buy the canvas at Michael's with a 50% off coupon and it's not that expensive.
I started at the top with the baby- holding her fingers slightly spread out and tilted her hand slightly, so that when they were both on, they'd form a heart shape between the thumb and pointer finger, when the hands are upside down.
After everyone's hand prints were on, I used my colored sharpies and wrote their names on the inside of their hearts. I put the year in the bottom right hand corner and hung it up. This was an easy, cheap, and quick way to add some personal touch to our new home.
I love how the color pops in my entryway, I get to look at this everytime I come down the stairs :)
Sunday, September 4, 2011
Busy Creating: Hand Painted Ceiling Fan
Okay, I know I just posted about moving into my new house like 30 seconds ago, but I have been DYING to post this!!!!
When picking out ceiling fans for my kids' rooms, I wanted something colorful and fun. This is what I wanted, but it was too much money.
I found an idea online here, to paint your own design. Who would have thought???!!! The very next day, I was at the light store buying cheap contractor's white fans and then at WalMart buying painter's tape and small bottle of acrylic paint.
I painted one fan for Owen and Hazel's room and one for Maeve's. I did it on the floor of Dave's tiny apartment because I just couldn't wait.
Here's what I did:
Lay out the white blades on paper:
Use painter's tape to create a nice straight line to paint. I placed three pieces of tape, took out the middle one, then continued up the blade until I had every other line covered with tape and every other one exposed white and ready to paint.
For Owen and Hazel's, I used a rainbow pattern, the same on each blade. When it was done, we coated it with mod podge sealant to protect the paint in case it needed to be cleaned.
Three months after I painted it, I finally got to see it hung:
I was hoping in action it would make a rainbow, and CHECK THIS OUT:
I just want to lie on the floor and look at it all day long!
Here's Maeve's, it goes with the colors in the curtains that I made for her.
Don't you just want to go buy a fan and paint your own?
When picking out ceiling fans for my kids' rooms, I wanted something colorful and fun. This is what I wanted, but it was too much money.
I found an idea online here, to paint your own design. Who would have thought???!!! The very next day, I was at the light store buying cheap contractor's white fans and then at WalMart buying painter's tape and small bottle of acrylic paint.
I painted one fan for Owen and Hazel's room and one for Maeve's. I did it on the floor of Dave's tiny apartment because I just couldn't wait.
Here's what I did:
Lay out the white blades on paper:
Use painter's tape to create a nice straight line to paint. I placed three pieces of tape, took out the middle one, then continued up the blade until I had every other line covered with tape and every other one exposed white and ready to paint.
For Owen and Hazel's, I used a rainbow pattern, the same on each blade. When it was done, we coated it with mod podge sealant to protect the paint in case it needed to be cleaned.
Three months after I painted it, I finally got to see it hung:
I was hoping in action it would make a rainbow, and CHECK THIS OUT:
I just want to lie on the floor and look at it all day long!
Here's Maeve's, it goes with the colors in the curtains that I made for her.
Don't you just want to go buy a fan and paint your own?
Subscribe to:
Posts (Atom)