Showing posts with label whoopie pies. Show all posts

Monday, June 2, 2014

Carrot Cake Whoopie Pies

Over the past few months (year), I have been up and down with my baking.  I have given up sugar for a spurt here and there.  My son has given up sugar for a month here and there, and I have noticed changes in him for the better when he does.

Well, that's part of the reason why I haven't been on here.  It is very hard to have a blog to inspire people to bake and cook from scratch when I am also trying to inspire people to eat less sugar and live a healthy lifestyle.  I'm stuck in the middle.

I'm hoping that those of you who follow me are at the same point and that I am inspiring you to stop buying processed foods and start making your own from home.  I just can't shake eating sugar and sweets and at the times when I have completely given it up, the day I'm done, I just want to eat cookies.  I find that when I bake, I am happy.  When I find a delicious recipe from scratch that I love, I want to share it.  I want to inspire you to get in the kitchen and cook- I hope that you will learn something new and bring it to the table for your family to enjoy.

I am spending more and more time in my kitchen these days, trying to use all fresh ingredients and making more and more on my own.  I seem to make a dessert on the weekends and try to make it last through the week, unless I find a rare gem, like this, which it was made on Sunday for Easter, then again on Tuesday for dessert for the rest of the week.

OK, fine, then again a few weeks later, because after all, there are carrots in them, so they are kind of healthy...  If you have a BBQ or party to go to this summer, I highly recommend bringing these.  You they will not disappoint.
Carrot Cake Whoopie Pies-
1 1/2 c all purpose flour
1/2 tsp baking soda
1/2 tsp baking powder
1/4 tsp salt
1/2 tsp ground cinnamon
1/4 tsp nutmeg
1 cup brown sugar
1/2 cup (1 stick) unsalted butter- room temp (important)
1 egg - room temperature (important)
1 tsp vanilla
1 cup old fashioned oats
1 cup finely shredded or grated carrots

Filling:
3 oz cream cheese, room temp
1/4 cup ( half stick) unsalted butter- room temp
1 tsp vanilla
2 cup confectioners sugar

1) Preheat oven to 350'.

2) In small bowl, whisk together flour, baking soda, baking powder, salt, cinnamon, and nutmeg.  Set aside

3) In bowl of mixer, beat butter for 2 min until creamy- add in brown sugar and beat again on medium until fluffy.  Scrape down sides.

4) Add egg and vanilla, beat until incorporated, about 1 minute.  Scrape down sides.

5) Add in dry ingredients and mix until just incorporated, scrape down sides of bowl.  Add in oats and carrots, mix until incorporated.  Scrape bowl, then mix one final time.

6) Drop 1 TBSP sized rounds of batter onto cookie sheet.  Bake approx 11-14 minutes.  Halfway through baking, rotate cookie sheet.  Depending on your oven, the cooking time will vary.  Smaller cookies will take about 11 min, whereas larger will take up to 14.

7) Remove cookies from oven and let cool.  Set cookies onto baking rack to cool completely before filling.

8) Prepare filling:  Beat cream cheese and butter in bowl of stand mixer for 8 minutes, will be light and fluffy- I promise, mix for the whole 8  minutes on medium-high.  Add vanilla and confectioners sugar and beat again for 8 more minutes, stopping halfway through to scrape sides once.  Put filling into a bag and pipe onto a cookie, press another cookie on top to make a sandwich.

Makes approx 20 small whoopie pies.

Adapted from Annie's Eats.


Tuesday, August 7, 2012

S'mores Whoopie Pies

I've been wanting to make this recipe for over a year now.  I tend to have recipes in my head and then impulsively decide it is time to make them.  Last summer, I decided to make them, but one of the ingredients in the cake part of the pie was Graham Flour.  I did not have that, so I could not make them.  I finally bought some and then let it sit pretty in the pantry for about six months.  It's been so dry here that I wasn't too keen on setting up our fire pit on our sorry looking lawn.  When we were having my son's friends over for dinner, I knew these would be the perfect alternative to actual fire roasted s'mores.

The first one I bit into was okay, the next day, I had one for breakfast and it was really good, and finally on the second day- they were AWESOME!  Even my husband at first said, they are the second best type of Whoopie Pie I've made, then he changed his mind the second day to the best.  I'm not sure what it is, maybe the flavor of the graham flour marinates itself into the cake more as each day passes, but they just kept getting better and better!

If you are looking for a fun summer inspired treat, try these today, they won't disappoint!

S'mores Whoopie Pies:

Oven:  375'

1 1/2 cups graham flour (**)
3/4 cup all purpose flour
1/2 tsp baking powder
1 tsp baking soda
1/2 tsp salt
4 TBSP unsalted butter
4 TBSP shortening (CRISCO)
1 cup brown sugar
2 eggs
1/2 cup buttermilk
2 TBSP milk
1 tsp baking soda
1 tsp white vinegar
1 tsp vanilla
**(If you can't find graham flour, you can use whole wheat flour, I was also thinking part whole wheat/part fine graham cracker crumbs)

Marshmallow Icing:
3/4 cup marshmallow fluff
6 TBSP unsalted butter
1 1/2 cups confectioner's sugar
2 tsp vanilla extract

Chocolate Ganache:
2 oz semi-sweet chocolate
1/4 cup heavy cream
1 TBSP light corn syrup

1) Preheat the oven to 375'.  Line a baking sheet with parchment paper and set aside.

2) In a bowl, whisk together graham flour, all purpose flour, baking powder, 1 tsp baking soda, and salt.  Set aside

3) Cream butter, shortening, and brown sugar in bowl of mixer with paddle attachment.  It should be light and fluffy.  Scrape down sides, add in eggs, mix, then add in butter milk, mix, then scrape sides again.

4) In a liquid measuring cup, mix 1 tsp baking soda, milk, and white vinegar.  Add this mixture to the mixing bowl, along with the flour mixture.  Mix on low until combined.  Add in vanilla, mix on medium for about two minutes, scrape down sides, and mix once more.

5) Using a spoon, drop batter onto prepared cookie sheet.  Leave about 2 inches in between each.  Bake 10-12 minutes, rotating sheet halfway through.  Tops will be golden brown.  Let cool and remove to a wire baking rack.  Let cool completely before filling.  I was able to make 36 cookies, which makes 18 whoopie pies.

For the Marshmallow Icing:

1) Beat Marshmallow fluff and butter in mixing bowl with paddle attachment.  Add in powdered sugar and vanilla, mix about 3-4minutes on medium until light and fluffy.  Using a spoon, scoop a dollop of icing into the center of a cookie.  Use the back of the spoon to spread it out to the edges of the cookie- repeat until you have half the cookies frosted. **You could also use straight up Marshmallow fluff in a pinch.

For the Chocolate Ganache:  

1) Break up 2 oz chocolate (I used Ghiradelli semi-sweet).  Place the chocolate in a heatproof bowl.  Heat cream in small saucepan until boiling.  Remove and pour over the chocolate.  Let this sit for about 5 minutes while the chocolate softens.  Using a whisk, stir the chocolate and cream until combined and smooth.  Add corn syrup, whisk to combine and let sit about 5 minutes.  Scoop a small amount of chocolate onto the marshmallow icing on the cookie- use the back of the spoon to spread it out.  Place a top on the cookie and you have a whoopie pie ready to eat!

Source:
Graham Whoopie Cake adapted from Whoopie Pies by Sarah Billingsley and Amy Treadwell
Marshmallow Icing adapted from How Sweet Eats
Chocolate Ganache adapted from Pastry Queen by Rebecca Rather

Which one do you want?


Friday, September 30, 2011

Busy Cooking: Apple Whoopie Pies with Vanilla Bean Filling

OH.MY.GOD!  These are soooo good!  Last weekend, we went apple picking for the first time in five years.  Most of our kids had never been before.  The place we went to was a TOTAL ripoff (the money we saved from not picking in five years was just spent on this one trip).  Don't ever go to an orchard that makes each person buy a bag, even the little little kids.  Needless to say, we had fun, got six bags of apples, McIntosh or not, they're still delicious.

On the drive up to the orchard, I was ripping pages out of the Better Homes and Gardens Fall Baking magazine.  This recipe jumped out at me and I couldn't wait to get home to make it.  I wanted to make it that night, but we got home too late.  Combining lots of cinnamon, homemade applesauce, and vanilla bean filling, these are quite possibly the best whoopie pies I have ever made/eaten!

As I was sampling the first one, I was thinking how a cinnamon icing would be delicious inside too, I pulled down a jar of cinnamon red hots and stuck one inside.  MAGICAL!  My assistant helped me pop one red hot in the center of each pie.  (Note:  you do not need to completely fill the pies with icing, I just pipe around the edges- when you bite, it squeezes in and fills the rest.)
Oven: 350

Whoopie Pies:
2 cups brown sugar
3/4 cup (1 1/2 sticks) unsalted butter
2 eggs
1 tsp vanilla
1 1/2 cups Homemade Applesauce (or jarred)
3/4 cup heavy cream
2 3/4 cup flour
1 TBSP cinnamon
1 tsp baking soda
1 TBSP baking powder
1 tsp salt

Vanilla Bean Icing:
3 1/2 cups confectioner's sugar
3-5 TBSP whole milk
1/2 tsp vanilla
1 vanilla bean
1/2 cup (1 stick) butter

Homemade Applesauce:
1/2 cup apple cider or apple juice
5 large or 10 small apples
1/2 cup sugar
2 tsp cinnamon

If you are going to make the homemade applesauce, which I HIGHLY recommend (it's sooo good), do this part first.  Core and peel the apples (you can leave the peel on, it will soften and make your sauce a pinkish color).  Put the cider, sugar, cinnamon, and apples into a dutch oven over medium heat.  Bring to a boil, reduce heat to low, and let simmer 45-60 minutes or until apples are soft (mine were done in 25 minutes).  Put apples and 1-2 ladles of the juice into a blender or food processor and puree.  You can add more juice if it's not the consistency you want.

For the whoopie pies:
1) Preheat the oven, then line your baking sheets with parchment paper.  I would recommend the parchment paper if you have it, the whoopie pies are sticky because of the applesauce, so it makes it very easy to get out of the pan.

2) In a medium bowl, combine flour, cinnamon, baking powder, baking soda, and salt.  Set aside

3) Put brown sugar and butter into bowl of mixer and beat on medium high until fluffy and light tan.  Scrape down sides.

4) Add in eggs and vanilla, beat until combined.  Scrape down sides.

5) Add in heavy cream and applesauce, beat until combined.  Scrape down sides.

6) Slowly add in the dry ingredients, scrape down sides, give one final quick mix.

7) Using a cookie scoop or spoon, drop batter onto prepared cookie sheets.  I used a small cookie scoop and only filled it half way, the small whoopie pies I made were about 2 inches wide, they were quicker to cook than the larger ones.  Space them about 2-3 inches apart to account for spreading while baking.

8) Bake until they are a dark golden brown color.  The recommended time in the recipe called for 10-12 minutes, mine were pale colored and raw in the centers.  I ended up cooking for 20-22 minutes, you just kind of have to watch that first batch and adjust for the way your oven cooks.  When you see the dark golden color in my pictures you'll know they're done.

9) Let cool completely on a cooling rack.

10) While they are cooling, mix up the icing.  Put butter in bowl of mixer, beat to soften, then add the confectioner's sugar 1 cup at a time.   Take the vanilla bean, cut it lengthwise, scrape the seeds into the bowl.  Add in the vanilla, and then the milk until your desired consistency.  Make sure to add the milk slowly, because even 1 TBSP too many can result in runny icing.  Be sure to scrape down the bowl periodically too, butter can often cake to the bottom of the bowl.

11) Choose your favorite pastry tip, put it in a decorating bag or ziploc, put in a cup for stability, and fill with the icing.  Swirl the icing around the outside edges of the pies, then add a top. You can also just put a scoop of icing in the center of a whoopie pie and press the top on to spread it out.

Add a red hot if you have them and want to add some zing!
12) Eat them and try to contain yourself, I seriously ate 6 yesterday!

Thursday, July 14, 2011

Busy Cooking: Strawberry Milk Whoopie Pies

I found a new blog I love, it's sprinklebakes!  She makes yummy sprinkly cakes and treats.  The day I found her blog, she had these strawberry milk whoopie pies as her most recent post.  How could I resist?? I love whoopie pies almost as much as cupcakes and the sprinkles add such fun color (not to mention, I have about a lifetime supply of strawberry quik in my house).

Oven:  375

Whoopie Pies:
2 1/4 cup flour
1 1/2 tsp baking powder
1/4 tsp salt
8 TBSP crisco
1 cup strawberry quick powder
1/2 cup brown sugar
1 egg
1 egg white
1 cup heavy cream
2 TBSP milk
1 tsp baking soda
1 tsp white vinegar (*when I made mine, I was out of white vinegar, I used cider vinegar and the smell and taste were not noticeable at all)

Filling:
1 stick butter (1/2 cup)
3 cups confectioner's sugar
2-3 tsp milk
1 tsp vanilla

1) Preheat the oven

2) In bowl of mixer, combine crisco, strawberry milk powder, and brown sugar- mix with paddle attachment until crumbly.  Meanwhile, mix together flour, baking powder, and salt in small bowl, set aside for later.

3) Add egg and egg white to the sugar mixture, beat well.  Add heavy cream, mix until smooth.

4) In another small bowl, mix together milk, baking soda, and vinegar- will foam slightly.

5) Put baking soda mix on top of sugar mixture, then put flour mixture on top of this.  Slowly stir, scrape down sides of bowl, stir again until combined.

6) Use a small cookie scoop, drop dough evenly spaced on a cookie sheet covered with parchment paper.

7) Cook for 7-10 minutes or until a toothpick inserted in center comes out clean.

8) Let cool on cookie rack, while cooling, make frosting.

9) To make frosting filling, beat butter in mixer with paddle attachment, add in confectioner's sugar and vanilla, beat until combined.  Add in milk, if necessary, add in more milk 1/2 tsp at a time for desired consistency/taste.

10) Put icing in a pastry bag with your favorite tip (or a ziploc with the corner cut off.  Squeeze icing around the outside edges of the whoopie pie and spiral it into the center.  Place another pie round onto the top and press lightly to make the "sandwich".  Roll edges in sprinkles if you like.

11) For sprinkle garnish, use some leftover filling, add milk to make it the consistency of glue, brush it on and dip in sprinkles.
Which one do you want?
The sprinkles just make it look so pretty!

The kids did all the sprinkle work and had a lot of fun doing it too (oh and even more fun eating them!).

What a fun way to make treats even more special for the kids!

Thursday, December 16, 2010

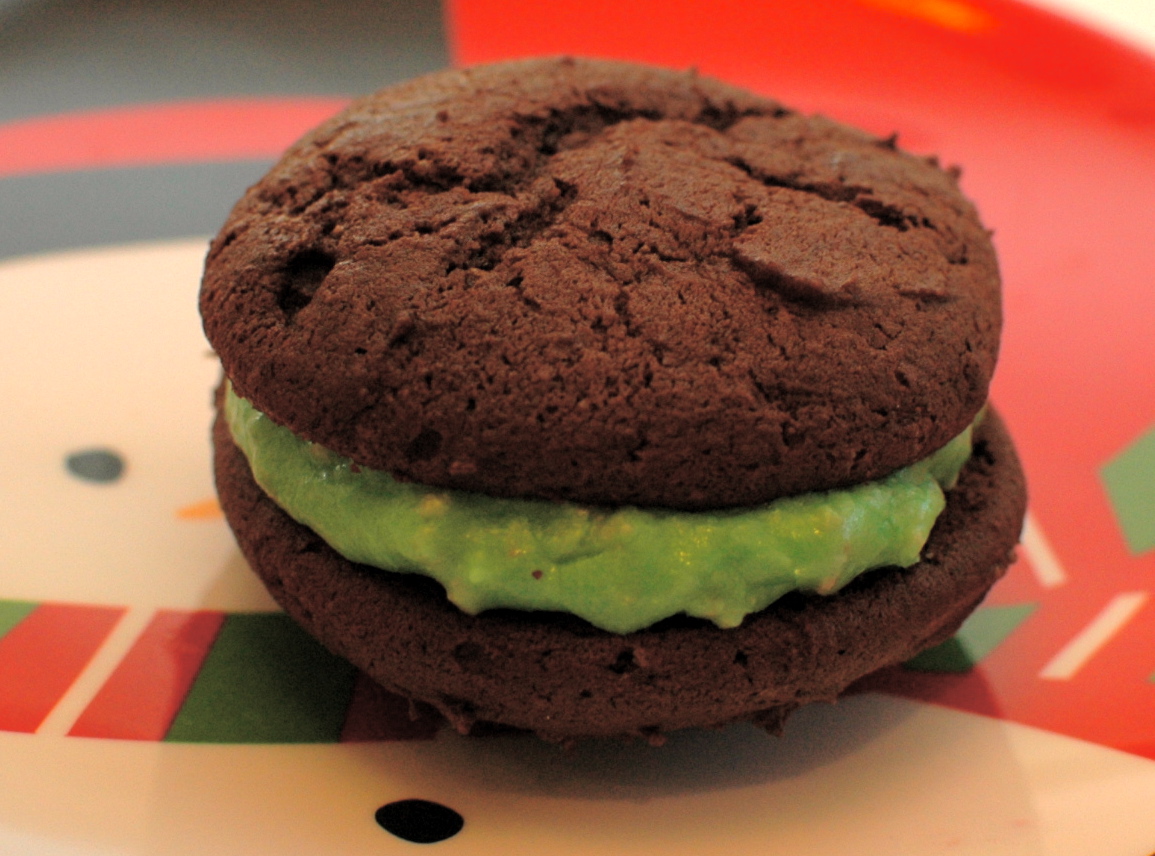
Peppermint Whoopie Pies


A holiday favorite in my family is whoopie pies.  I always remember being afraid to eat too many because they are my dad's favorite.  I finally got the recipe a few years ago from my aunt and have been making them every Christmas ever since.  Several years ago, for one of my kids' birthdays, I had a bag of Candy Cane Hersey Kisses lying around leftover from Christmas and stirred up this delicious peppermint version of Whoopie Pie.

For the month of December, I decided each week to do make some sort of peppermint recipe for our dessert.  Last week it was these Whoopie Pies.

Have you seen these in the stores? I usually stock up with like 6 bags for the year, I have used them as add ins for ice cream, toppers for chocolate cookies, and crushed up to make peppermint icing.

These are dangerous so to avoid eating the whole batch yourself, you should not make them unless you have a party to go to.

Whoopie Pies:  
OVEN:  350'
1/2 cup Crisco
1 cup Sugar
2 egg Yolks (I only had one egg, so I used 1 whole egg)
1 cup Milk
2 cups Flour
1/2 cup Cocoa Powder
1 1/2 tsp Baking Soda
1/2 tsp Baking Powder
1/2 tsp Salt
1/2 tsp Vanilla

Icing:
2 1/2 cups confectioner's sugar
1/3 bag Candycane Hersey Kisses (wrappers removed and chopped up- I did mine in my food processor)
1/2 tsp peppermint extract
2-4 TBSP milk
6 TBSP butter

For the whoopie pies, cream the sugar and crisco until fluffy. Mix in egg.  Add in cocoa and vanilla, mix.  Mix together flour, baking soda, baking powder, and salt in separate bowl.  Alternate additions of dry ingredients with milk.  Spoon dough onto baking sheet, bake for about 10 minutes in preheated oven.  The tops will crack slightly.  You can carefully insert a cake tester in the top to see if it comes out clean.  If they are cooked too long, they will just be slightly hard.  Let cool for a few minutes before moving from baking sheet to cooling rack.

For the icing, cream the butter with about 1/2 cup confectioner's sugar.  Add in peppermint extract and 1 TBSP milk.  Add in crushed candies.  Continue alternating milk and sugar additions until you reach desired consistency/flavor.  I wanted the icing thick, but spreadable, slightly thicker than pudding (so it won't leak out the sides).  To make it more festive, I added some green food coloring to the icing.

After the cakes cool, scoop a heaping spoonful of icing in the center of one and press another cake on top.

Look at the center, can you see all the pieces of candy in the icing?:
May you find an excuse to make these soon :)

Friday, October 22, 2010

Pumpkin Whoopie Pies


A few years ago, my sister made pumpkin whoopie pies for a cookie exchange that we had.  I couldn't believe how good they were and that I'd never heard of them before.  Growing up, the only whoopie pies I'd ever known were chocolate with vanilla icing.

My son came home last week with a note from his teacher saying they were having a pumpkin taste testing and could each kid try to bring in something pumpkin flavored for the class to sample.  This was perfectly timed with the arrival of canned pumpkin in a package from my mother.  I knew immediately that I wanted to make the pumpkin whoopie pies.

The funny thing is, the teacher sent home a note asking what whooopie pies were and all my friends that asked what I was making had no idea what a whoopie pie was either.  They didn't realize that they have unleashed a beast and now they will be trying like four or five different flavors of whoopie pies over the coming months that I have been planning on trying out.

The recipe I used was in a family cookbook, it was my mom's cousins- I'm not sure if she made it up or got it from somewhere else, either way, it's very very good.

Pumpkin Whoopie Pies:

Oven:  350'

2 cups brown sugar
1 cup oil
15 oz pumpkin puree
2 eggs
3 cups flour
1 tsp cinnamon
1 tsp salt
1 tsp baking soda
1 tsp baking powder
1 tsp vanilla

Icing (my recipe):

8 TBSP butter (1 stick)
3 TBSP milk
1 tsp vanilla
2 1/2 - 3 cups confectioner's sugar

For the cake part, mix together dry ingredients in medium bowl and set aside.  Mix together oil and brown sugar until combined, add in eggs until combined, scrape sides of bowl, add in pumpkin puree and vanilla.  Slowly add in dry ingredients until combined, scrape sides and mix again.  I used a medium scoop that I got from Pampered Chef (that I LOVE), you can also use a tablespoon to scoop up some batter and drop it onto the ungreased cookie sheet.  Since the whoopie pies are sandwich-like cakes, I would recommend not making them too large.  I was able to make about 40 small whoopie pies with this batch.  Bake in oven approximately 15-18 minutes.

While the cake part is cooking and cooling, make the icing.

Cream the butter with about 1 cup confectioner's sugar.  Add in about 1 TBSP milk and 1 tsp vanilla, then add more confectioner's sugar, then more milk, continue this method until you reach your desired consistency/taste.  I actually used my hand mixers on low to do this and it came out really good.  The consistency I wanted was thick enough that it did not immediately drip off the mixers, but thin enough that when I put a dollop between the two cakes, when I smooshed them together, it spread out to the edges easily - without dripping out.  It is best to wait to put the frosting in until the cakes are completely cool, otherwise, the heat will make the icing melt and drip out.