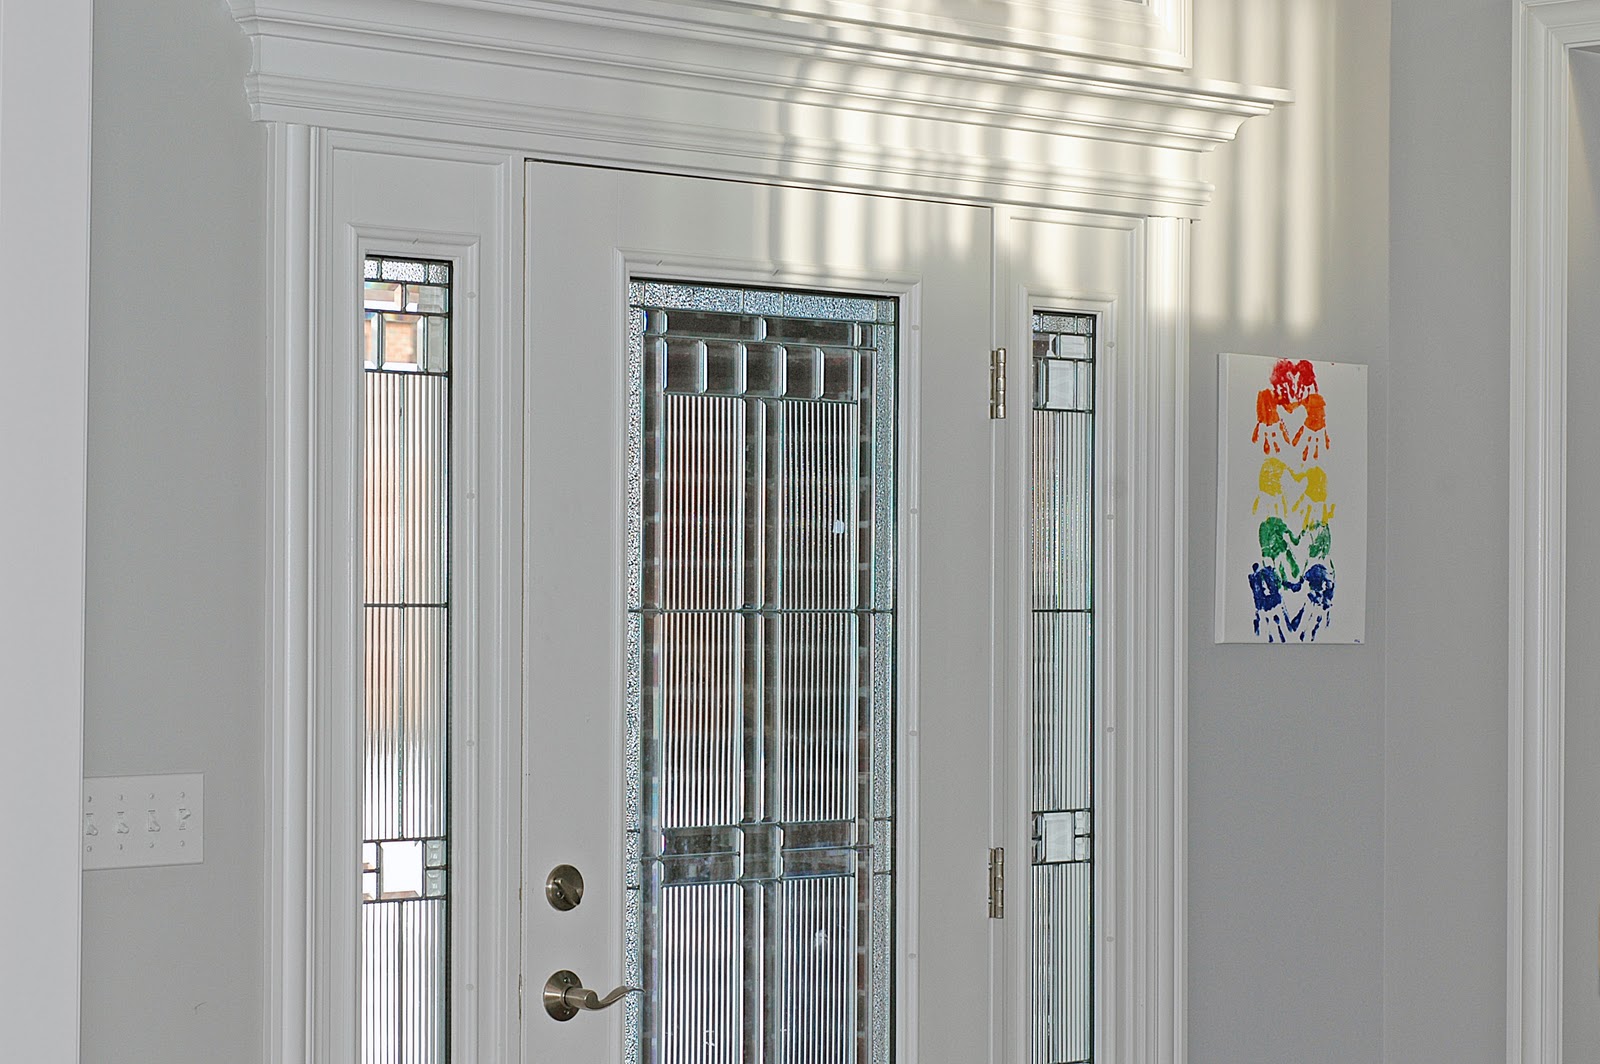
Every year I like to do a craft with a kids that involves their hand prints. I initially bought this canvas to make a handprint Christmas tree wall hanging, but I never got around to taking it out of the bag. My entry way is quite drab, grey paint with white trim- we are slow for hanging up decorations, so I thought a nice bright canvas would make the area more fun and inviting.
Using acrylic paints that I already had, I painted the kids' hands, one at a time and pressed them onto the canvas. You can buy the canvas at Michael's with a 50% off coupon and it's not that expensive.
I started at the top with the baby- holding her fingers slightly spread out and tilted her hand slightly, so that when they were both on, they'd form a heart shape between the thumb and pointer finger, when the hands are upside down.
After everyone's hand prints were on, I used my colored sharpies and wrote their names on the inside of their hearts. I put the year in the bottom right hand corner and hung it up. This was an easy, cheap, and quick way to add some personal touch to our new home.
I love how the color pops in my entryway, I get to look at this everytime I come down the stairs :)
Monday, January 16, 2012
Saturday, January 14, 2012
Busy Cooking: Chocolate Fudge Cake with Salted Caramel Filling
When deciding which cake to make for the chocolate layers, I was flipping through Baking Illustrated and it was no longer a decision once I saw Sour Cream Fudge Layer Cake. I adapted the filling from Salted Caramel Icing I had seen on Sprinkle Bakes blog and I used a Chocolate Icing recipe from Martha Stewart. With a sprinkle of sea salt a top the chocolate icing, this cake has it all, salty and sweet (and rich- so don't cut a big piece). I'm thinking Dave will be trained and ready to make it for my birthday next year!
Sour Cream Fudge Layer Cake:
1 1/4 c all purpose flour
1 cup cocoa powder (says non-Dutch processed)- I used Hersey's
2 tsp instant espresso or coffee powder
1 cup boiling water
1/2 cup sour cream
2 tsp vanilla
1 cup (2 sticks) unsalted butter, almost at room temp
1 3/4 cup sugar
2 eggs
3/4 tsp baking soda
1/2 tsp salt
Salted Caramel Layer:
1/8 c salted butter (1/4 stick)
1/8 c unsalted butter (1/4 stick)
1/4 tsp sea salt
3/4 cup confectioner's sugar
1/3-1/2 c salted caramel sauce
Dark Chocolate Frosting:
1/4 cup cocoa powder
1/4 cup boiling water
1/2 cup (1 stick) unsalted butter
1/2 cup confectioner's sugar
12 oz. semi-sweet chocolate, melted and cooled
Sour Cream Fudge Cake
1) Cut out parchment paper rounds and place them in the bottom of two 9-inch round cake pans. Lightly grease and flour the sides. Set aside. Preheat the oven to 350.
2) Mix cocoa and instant espresso powder in a small bowl, add boiling water, and whisk until smooth, set aside.
3) Mix flour, baking soda, and salt in small bowl, set aside for later.
4) Beat butter in mixer with paddle attachment, about 30 seconds. Add in sugar, beat until fluffy and light. This can take 3-5 minutes, be sure to scrape down sides.
5) Add eggs to butter/sugar mixture, one at a time, be sure to scrape down sides.
6) Once cocoa mixture is cooled, whisk in vanilla and sour cream until smooth.
7) Add 1/3 of dry ingredient mixture to mixer bowl, mix on low, immediately add 1/3 cocoa mixture. Mix another 1/3 of dry ingredients, followed by more cocoa mixture. Repeat one more time so that all of the flour ingredients and cocoa mixture have been added. Scrape down sides of bowl, mix about 15 seconds more to make sure all ingredients have been incorporated.
8) Add batter evenly to the two prepared cake pans. Smooth the tops with a rubber spatula. Bake 23-30 minutes (depending on the type of oven you have). After 12 minutes, rotate the cakes 180'. Cook another 11 minutes, and insert toothpick or skewer into the center. If it comes out clean, or with a few crumbs, take the cakes out, otherwise, check again every 5 minutes.
9) Let cakes cool ten minutes, run a knife around the edges, flip the pan and let the cakes sit on a wire rack. Remove the parchment paper and let the cakes cool completely before frosting.
Salted Caramel Layer
1) While cakes are cooling, make the salted caramel sauce (if you don't have any sitting in your fridge)- you can use store bought caramel sauce in a pinch.
to make the salted caramel sauce, in small sauce pan, mix 1 TBSP corn syrup, 1 cup sugar, 1/4 cup water. Bring to a boil, swirling pan gently, let cook at simmer until it turns an amber color. Remove from heat, add 1 1/2 tsp sea salt, 2 TBSP unsalted butter, 1/2 cup heavy cream. It will foam a bit, so beware. Let sit and cool.
2) Beat butters and salt in mixer, fitted with paddle attachment. Add in confectioner's sugar, scrape down sides. Add in cooled caramel sauce until you reach desired consistency. You want this to be slightly thick, but spreadable, because it's going between two cake layers.
Dark Chocolate Frosting
1) In heat proof bowl set over a pot of boiling water, melt chocolate, stirring often. Once melted, set aside to cool.
2) Stir cocoa and boiling water in a small bowl until cocoa has dissolved, set aside.
3) In a large bowl, beat butter, confectioner's sugar, and salt until fluffy and light, using hand electric mixer.
4) Turn speed to low, add in melted chocolate, beating until combined, scrape down sides.
5) Beat in cocoa mixture, scrape down sides, beat again.
To assemble the cake: Place one cake round on a cake stand or plate. Put all the caramel filling on the cake and evenly spread it across the top. (Optional: drizzle caramel sauce on top of the caramel filling after its spread out). Place the second cake on top. Spread chocolate frosting on the sides of the cakes into a smooth even layer, using a spatula. Scoop frosting onto the top of the cake and spread into a smooth, even layer. If you need to set it, you can refrigerate it, mine seemed to harden pretty quickly and didn't need refrigeration. Sprinkle sea salt on top for garnish.
Tuesday, January 10, 2012
Busy Cooking: Blood Orange Chocolate Chip Muffins
I have been searching for blood oranges since last year, and victory is mine! Never had or heard of one, well you should! Last year, when I was horribly ill during my pregnancy with Maeve, I was into the third month of not being able to drink water. We were at the Osaka airport, heading to New Zealand and I was worried there would be nothing for me to drink on the 14 hour flight. I somehow could drink OJ, but not water- go figure. The only OJ I could find at the airport that day was blood orange juice, so I had to give it a try. At $5 a glass, I ended up drinking 4!!!! It was THAT good.
What are blood oranges? They look like normal oranges:
But they're slightly different on the inside:
They taste a little sweeter, and have a lot more juice on the inside.
I finally found blood oranges last Friday, so I bought 10. I brought them home and began to wonder why I had bought so many and what I would do with them. Of course, I would make some juice, just look at it:
After an extensive search through google, I found some blood orange margaritas for Dave to make for me another time, and then I found these blood orange chocolate chip muffins on White on Rice Couple blog. I have to admit, I was very hesitant to try them, and not sure of how they'd actually taste. Oh. My. Goodness. They are delicious! The only bad thing about them is Dave is out of town, so I'm sitting here eating them all myself and boy are they addictive!
If you can't find blood oranges, I'm sure a regular orange will do just fine.
Blood Orange Chocolate Chip Muffins:
Oven: 400
1 3/4 cup flour
1/2 c sugar
1 1/2 tsp baking powder
1/2 tsp baking soda
1/4 tsp sea salt (I used Kosher)
grated zest of 3 blood oranges (I was leary of this, only used 2, next time, I'm def. using 3)
1/2 c (1 stick) unsalted butter, melted
2/3 c blood orange juice
1 tsp vanilla
2 eggs
6 oz. dark chocolate chunks or semi-sweet chips
Glaze:
1/4 c blood orange juice
1/4 c sugar
1) Preheat oven to 400. Line muffin pan with paper liners- this yielded 12 large muffins (or 24 mini)
2) In large bowl, mix together flour, baking powder, baking soda, salt, sugar, and chocolate chips.
3) In small bowl, combine melted butter, blood orange juice, eggs, and vanilla.
4) Slowly add liquid mixture into dry ingredients, mix until just combined, some lumps are ok.
5) Fill muffin cups about 3/4 full. Bake 20-25 minutes until toothpick comes out clean.
6) Prepare glaze by whisking together sugar and blood orange juice. Poke holes in tops of muffins and brush glaze on tops, letting it seep in. Cool on wire rack.
It almost looks like a chocolate chip cookie, almost.
What are blood oranges? They look like normal oranges:
But they're slightly different on the inside:
They taste a little sweeter, and have a lot more juice on the inside.
I finally found blood oranges last Friday, so I bought 10. I brought them home and began to wonder why I had bought so many and what I would do with them. Of course, I would make some juice, just look at it:
After an extensive search through google, I found some blood orange margaritas for Dave to make for me another time, and then I found these blood orange chocolate chip muffins on White on Rice Couple blog. I have to admit, I was very hesitant to try them, and not sure of how they'd actually taste. Oh. My. Goodness. They are delicious! The only bad thing about them is Dave is out of town, so I'm sitting here eating them all myself and boy are they addictive!
If you can't find blood oranges, I'm sure a regular orange will do just fine.
Blood Orange Chocolate Chip Muffins:
Oven: 400
1 3/4 cup flour
1/2 c sugar
1 1/2 tsp baking powder
1/2 tsp baking soda
1/4 tsp sea salt (I used Kosher)
grated zest of 3 blood oranges (I was leary of this, only used 2, next time, I'm def. using 3)
1/2 c (1 stick) unsalted butter, melted
2/3 c blood orange juice
1 tsp vanilla
2 eggs
6 oz. dark chocolate chunks or semi-sweet chips
Glaze:
1/4 c blood orange juice
1/4 c sugar
1) Preheat oven to 400. Line muffin pan with paper liners- this yielded 12 large muffins (or 24 mini)
2) In large bowl, mix together flour, baking powder, baking soda, salt, sugar, and chocolate chips.
3) In small bowl, combine melted butter, blood orange juice, eggs, and vanilla.
4) Slowly add liquid mixture into dry ingredients, mix until just combined, some lumps are ok.
5) Fill muffin cups about 3/4 full. Bake 20-25 minutes until toothpick comes out clean.
6) Prepare glaze by whisking together sugar and blood orange juice. Poke holes in tops of muffins and brush glaze on tops, letting it seep in. Cool on wire rack.
It almost looks like a chocolate chip cookie, almost.
Saturday, January 7, 2012
Busy Creating: Homemade Star Wars Valentine's Card
I know Valentine's Day is over a month away, but I am so not going to be last minute for it. For the past several holidays, I had a lot of things I wanted to do, but never got around to it. Not this holiday!!! I plan on posting each of my kids' homemade Valentine's ideas, one per week, for the next four weeks. You know what they say, Prior Planning Prevents Poor Performance.
My son is REALLY into Star Wars this year. For Halloween, he was Darth Vader. I saw lots of ideas online where you take your kid's picture, with their hand extended, print it, cut out slots, and stick a lollipop in, like they are handing it to you from the picture. I had this photo of my son from Halloween, so I thought it would be cute along the same lines, but with a glow stick or pixie stick in his hand, as a 3-D light saber.
Here's what you do: Get a photo of your child in costume (if they have it), holding a light saber or such object (if they have it), or pretending to hold a light saber- try to get a close up shot, I only wish I cropped it, so he was larger in the photo.
If you have photo editing software (you can use picnik online free), add text (I downloaded the Star Wars font here), I did a play on the most famous Star Wars quote I know ("Luke, I am your father"). :
Print them out.
Using a sharp cutting tool, make a slice about an inch long across the top of the hands and another one below the hands, this is where you will slide the candy in.
I was going to use pixie sticks or light sticks, until I found these on clearance at Walmart for $0.50 a box!!!
Slide the candy into the slots (I hope Darth Vader is strong enough to carry this):
Make a lot!
I hope this inspired you to start working on your Valentine's too! I just love homemade ones, don't you?
Wednesday, January 4, 2012
Busy Cooking: Homemade Cinnamon Swirl Bread
The kids are back in school for the first time in two weeks- are you looking for something to do with all your free time? Me neither! But, this bread is so delicious, it's hard to resist making a couple loaves during the day. How nice would it be for the kids to walk in the door to the smell of fresh baked cinnamon bread? I used to love walking in the door from school to the smell of a nice hot snack.
Now that winter is upon us, snow days aren't far off. This bread makes delicious french toast, which is perfect to serve for breakfast on those days off. Want to know a secret? You can make the french toast ahead of time, let it cool to room temp, freeze it in ziploc bags, and have it already to serve on those mornings you just don't have time to whip up a hot breakfast (for them or you). You just pop the slices right into the toaster from the freezer and you are good to go. My toaster is Japanese, so I keep it on the lowest power and one (sometimes two pushes down) is good.
Another awesome thing about this bread is that you can take it out of the oven, cool it to room temp, slice it, and then freeze it. It goes from freezer to toaster as normal toast, then you don't have to worry about eating the whole loaf in two days before it starts to get stale. If you're a busy mom like me, something like this is priceless- delicious hot cinnamon toast for breakfast (everyday!!).
Good bye pepperidge farm, hello homemade!
Cinnamon Swirl Bread:
Oven: 350'
1/2 cup sugar
1/2 cup light brown sugar
4 tsp ground cinnamon
1 1/4 cup warm whole milk (I admit, I used 1%)
3 TBSP unsalted butter, melted, cooled
2 egg yolks
3 1/2 - 4 cups all-purpose flour
2 1/4 tsp yeast (1 packet)
1 1/2 tsp salt
1) Mix sugar, brown sugar, and cinnamon together in small bowl. Set 2 TBSP aside in small bowl for topping later.
2) In another bowl, whisk together milk, egg yolks, and melted butter.
3) In bowl of mixer, mix 3 1/2 cup flour, yeast, salt, and 1/4 cup cinnamon sugar mixture together with dough hook. With mixer on low, add in milk mixture and mix about 2 minutes, until dough comes together.
4) Increase speed to medium-low and knead for about 8 minutes. Dough should be smooth and elastic. If dough is sticky, add additional flour 2 TBSP at a time until dough is smooth. It may appear to be sticking to the bottom, but should clear the sides of the bowl.
5) Place dough in a greased bowl and cover with plastic wrap. Let it rise in a warm place until doubled in size, about 1-2 hours.
6) Place dough on lightly floured counter. Press into a 20x8 inch rectangle, with the short side facing you. Spray the dough lightly with water (I got a pastry brush, dipped it in water, and flicked the water onto the dough until is was just moist). Sprinkle the remaining cinnamon sugar on top, leaving a 1/2 inch border all the way around the rectangle. Spray or flick water lightly on to the top of the cinnamon sugar, so it is very lightly moistened.
7) Roll the dough with your hands on the short side, into a tight cylinder (the tighter it is, the less likely you will see gaps in the swirl when you cut the bread). Pinch the seam closed with your fingers.
8) Grease a 9x5 loaf pan. Place the dough seam down into the pan. I usually keep the pan on the counter and use it as a measuring guide when forming the dough into the cylinder.
9) Cover with plastic wrap and let rise until doubled in size 45-75 minutes. Preheat the oven to 350.
10) Lightly brush the top of the dough with some melted butter and sprinkle the 2 TBSP cinnamon sugar you had set aside on top now. Bake 40-60 minutes. If you have a thermometer, the internal temperature of 190' indicates a perfectly cooked loaf.
11) Remove from oven, cool 10 minutes, remove loaf from pan, and let cool on a wire rack.
Source: America's Test Kitchen Family Baking Book
This would go great with a nice cup of hot cocoa!
Now that winter is upon us, snow days aren't far off. This bread makes delicious french toast, which is perfect to serve for breakfast on those days off. Want to know a secret? You can make the french toast ahead of time, let it cool to room temp, freeze it in ziploc bags, and have it already to serve on those mornings you just don't have time to whip up a hot breakfast (for them or you). You just pop the slices right into the toaster from the freezer and you are good to go. My toaster is Japanese, so I keep it on the lowest power and one (sometimes two pushes down) is good.
Another awesome thing about this bread is that you can take it out of the oven, cool it to room temp, slice it, and then freeze it. It goes from freezer to toaster as normal toast, then you don't have to worry about eating the whole loaf in two days before it starts to get stale. If you're a busy mom like me, something like this is priceless- delicious hot cinnamon toast for breakfast (everyday!!).
Good bye pepperidge farm, hello homemade!
Cinnamon Swirl Bread:
Oven: 350'
1/2 cup sugar
1/2 cup light brown sugar
4 tsp ground cinnamon
1 1/4 cup warm whole milk (I admit, I used 1%)
3 TBSP unsalted butter, melted, cooled
2 egg yolks
3 1/2 - 4 cups all-purpose flour
2 1/4 tsp yeast (1 packet)
1 1/2 tsp salt
1) Mix sugar, brown sugar, and cinnamon together in small bowl. Set 2 TBSP aside in small bowl for topping later.
2) In another bowl, whisk together milk, egg yolks, and melted butter.
3) In bowl of mixer, mix 3 1/2 cup flour, yeast, salt, and 1/4 cup cinnamon sugar mixture together with dough hook. With mixer on low, add in milk mixture and mix about 2 minutes, until dough comes together.
4) Increase speed to medium-low and knead for about 8 minutes. Dough should be smooth and elastic. If dough is sticky, add additional flour 2 TBSP at a time until dough is smooth. It may appear to be sticking to the bottom, but should clear the sides of the bowl.
5) Place dough in a greased bowl and cover with plastic wrap. Let it rise in a warm place until doubled in size, about 1-2 hours.
6) Place dough on lightly floured counter. Press into a 20x8 inch rectangle, with the short side facing you. Spray the dough lightly with water (I got a pastry brush, dipped it in water, and flicked the water onto the dough until is was just moist). Sprinkle the remaining cinnamon sugar on top, leaving a 1/2 inch border all the way around the rectangle. Spray or flick water lightly on to the top of the cinnamon sugar, so it is very lightly moistened.
7) Roll the dough with your hands on the short side, into a tight cylinder (the tighter it is, the less likely you will see gaps in the swirl when you cut the bread). Pinch the seam closed with your fingers.
8) Grease a 9x5 loaf pan. Place the dough seam down into the pan. I usually keep the pan on the counter and use it as a measuring guide when forming the dough into the cylinder.
9) Cover with plastic wrap and let rise until doubled in size 45-75 minutes. Preheat the oven to 350.
10) Lightly brush the top of the dough with some melted butter and sprinkle the 2 TBSP cinnamon sugar you had set aside on top now. Bake 40-60 minutes. If you have a thermometer, the internal temperature of 190' indicates a perfectly cooked loaf.
11) Remove from oven, cool 10 minutes, remove loaf from pan, and let cool on a wire rack.
Source: America's Test Kitchen Family Baking Book
This would go great with a nice cup of hot cocoa!
Tuesday, January 3, 2012
Family Survey of 2011
I was searching around on the internet the other day, trying to find something fun to do with the kids on New Year's Eve. I always start with the Crafty Crow, since it's packed with lots of ideas and has links to many great blogs on the side bar. Sure enough, I found something on Teach Mama, via the Crafty Crow, that I thought was just perfect for a new family New Year's Eve tradition: filling out a survey about our year.
I typed up a sheet full of questions and printed out seven copies, yes- I filled one out for Maeve too (her New Year's Resolution is to sleep through the night - every night!). After dinner, we sat at the table and filled out our answers. Then, one by one, we went around the table and said our answers out loud to each question. It was fun to hear the different answers and to see how they were different from what I predicted from everyone.
I am punching holes in these and storing them in a three ring binder labelled New Year's family surveys. Each year, I will add a new tab, with the year on it, and put our new papers in. It will be fun to see how each person's answers will change, how the handwriting will change, how different our resolutions will become, how personalities start to develop.
Here is a sample of one of my favorite's for the year, Owen's. I love that he wants to be SANTA when he grows up:
I also love the zebra he drew. I added the drawing of their favorite animal on the back, because I love to save copies of my kids' drawings.
Hazel's was fun too, she's just learning how to write, so it will be neat to compare to next year, to see if she can do it all on her own (she had help from Owen and me too).
It's not too late to do a survey of your own. What questions can you ask that will be interesting to learn about every year?
I typed up a sheet full of questions and printed out seven copies, yes- I filled one out for Maeve too (her New Year's Resolution is to sleep through the night - every night!). After dinner, we sat at the table and filled out our answers. Then, one by one, we went around the table and said our answers out loud to each question. It was fun to hear the different answers and to see how they were different from what I predicted from everyone.
I am punching holes in these and storing them in a three ring binder labelled New Year's family surveys. Each year, I will add a new tab, with the year on it, and put our new papers in. It will be fun to see how each person's answers will change, how the handwriting will change, how different our resolutions will become, how personalities start to develop.
Here is a sample of one of my favorite's for the year, Owen's. I love that he wants to be SANTA when he grows up:
I also love the zebra he drew. I added the drawing of their favorite animal on the back, because I love to save copies of my kids' drawings.
Hazel's was fun too, she's just learning how to write, so it will be neat to compare to next year, to see if she can do it all on her own (she had help from Owen and me too).
It's not too late to do a survey of your own. What questions can you ask that will be interesting to learn about every year?
Sunday, January 1, 2012
Happy New Year: New Year's Challenges
I've never really made any New Year's Resolutions. This year, instead of making a resolution, I'm making myself a list of challenges to complete by the end of the year. The challenges range in a wide variety of categories, like this blog, cooking, reading, education, exercise, family, sewing, etc. I have a lot of people ask me how I do it, just in general with all the kids and things I like to do. My answer is "why not?", I'm alive, I'm healthy, I have abilities, why not make the most of it while I can. As I post this list, I challenge you to make a list of challenges for yourself for the New Year- take the time while you have it to make your life more interesting and foster your talents, you have no excuse to say I'm bored, there's always something to make, try, learn, or do.
Cooking:
Make croissants
Make danish
Make ravioli
Make homemade pasta sauce
Make english muffins
Make strawberry jelly
Sewing:
Sew one article of clothing per month
Finish 6 quilts
Make the princess dress I bought the pattern for and keep second guessing my talents on
Make curtains for dining room and my bedroom
Exercise:
Run a 5K in less than 20 minutes
Complete a half marathon
Do a warrior dash
Get my kids in a race
Do a kids mini triathalon for the kids
Reading:
Read 6 books
Get rid of books I've finished and give to someone who can read them next
Education:
Organize the kids craft area
Provide fun/exciting activities for my kids for weekends and afterschool
Teach Hazel how to read
Teach myself photoshop, by sitting down for one hour per week and using the manual
Become a better photographer by reading Understanding Exposure and giving myself photo assignments
Organizing:
Get rid of 365 things
Buy less stuff
Repurpose at least 50 of the 365 things
Finish unpacking by the end of January
Make my kids' rooms fun and comfortable
Repaint 6 pieces of furniture
Giving back:
Do at least one random act of kindess per month
Work at a soup kitchen with my kids
Along with my kids, sponsor a child's christmas
Personal:
Start an etsy shop and sell at least 12 things
Make labels for my shop
Lose my fear of selling my things and worrying that they aren't good enough
Spend at least 30 minutes with my kids playing outside (weather permitting) each day
Write two real letters to friends per month
Send birthday cards to all my friends and family ON TIME
Go out to dinner with my husband with no kids, once per month
I have a year to do it, right?
What are you going to challenge yourself with this year?
Subscribe to:
Posts (Atom)