Friday, December 17, 2010
Homemade Snowglobes
Every year, Nathaniel asks for a snow globe for Christmas from Santa. It's the thing he wants the most too. Last year, I had the idea to make our own. I got them all ready and then just ran out of time before leaving for our Christmas break to finish them. This year, I wanted to make some and was quite happy to find the four jars pre prepared in my Christmas bin.
They are actually quite easy to make, if you can find trinkets to fit and glue inside the jar you choose. For my age kids, we used baby food jars. They are small and durable enough that if they get dropped, they are less likely to break.
To make your own, here's what you need:
clean glass jar with fitted lid
lid of water bottle (optional)
small toy
glitter
corn syrup
water proof glue, we used super glue, but you can also use shower sealant (try to find that here ;) )
Glue the lid of the water bottle to the inside of the jar lid. This provides a good base for your small toy so it's more visible in the finished product (it's not necessary). Let the glue dry (maybe do this the day before).
In the jar, add the water to near the top. Add about 1 heaping teaspoon of corn syrup, then mix. We made a mistake with our first one and put only 1 large drop of corn syrup in and the glitter didn't float very well. After mixing in the corn syrup, add in glitter, we added in about 1 teaspoon. Before putting the lid on, put glue all around the inside and twist on tightly, let dry and start shaking!
We can't get snow to fall from the sky here, but we can sure have fun making it in other ways.
Thursday, December 16, 2010
Snowland Play Area
First of all, we live in a place that gets maybe ten minutes of snow flurries a year (at most). I decided to do a snow themed week with my kids. To start off, last weekend, I repurposed the train table yet again (maybe I won't be getting rid of it after all). We took off the black felt from the last time and replaced it with a glitter snow blanket, which I lightly hot glued to the table- I purchased this at Target last year after Christmas for 50 cents!!! It is much less messy than keeping rice or some other type of fake snow in a box.
We have been into places before that had Christmas villages set up for decor only and the kids were so frustrated that they couldn't play with it. I wanted something that was out and ready for them to play with whenever they wanted.
There are many ideas out there for setting up holiday play areas for your kids. I got a good set of playthings, since they are hard to find in Japan, from Pinkandgreenmama. I ordered it before the summer- I wasn't kidding when I said I had to plan far ahead for lots of projects.
We've got the nativity set up. This was another after Christmas half pricer, it's the Little People by Fisher Price Manger set, I think I got it at www.fisherprice.com. To go along with this, we read The Story of Christmas.
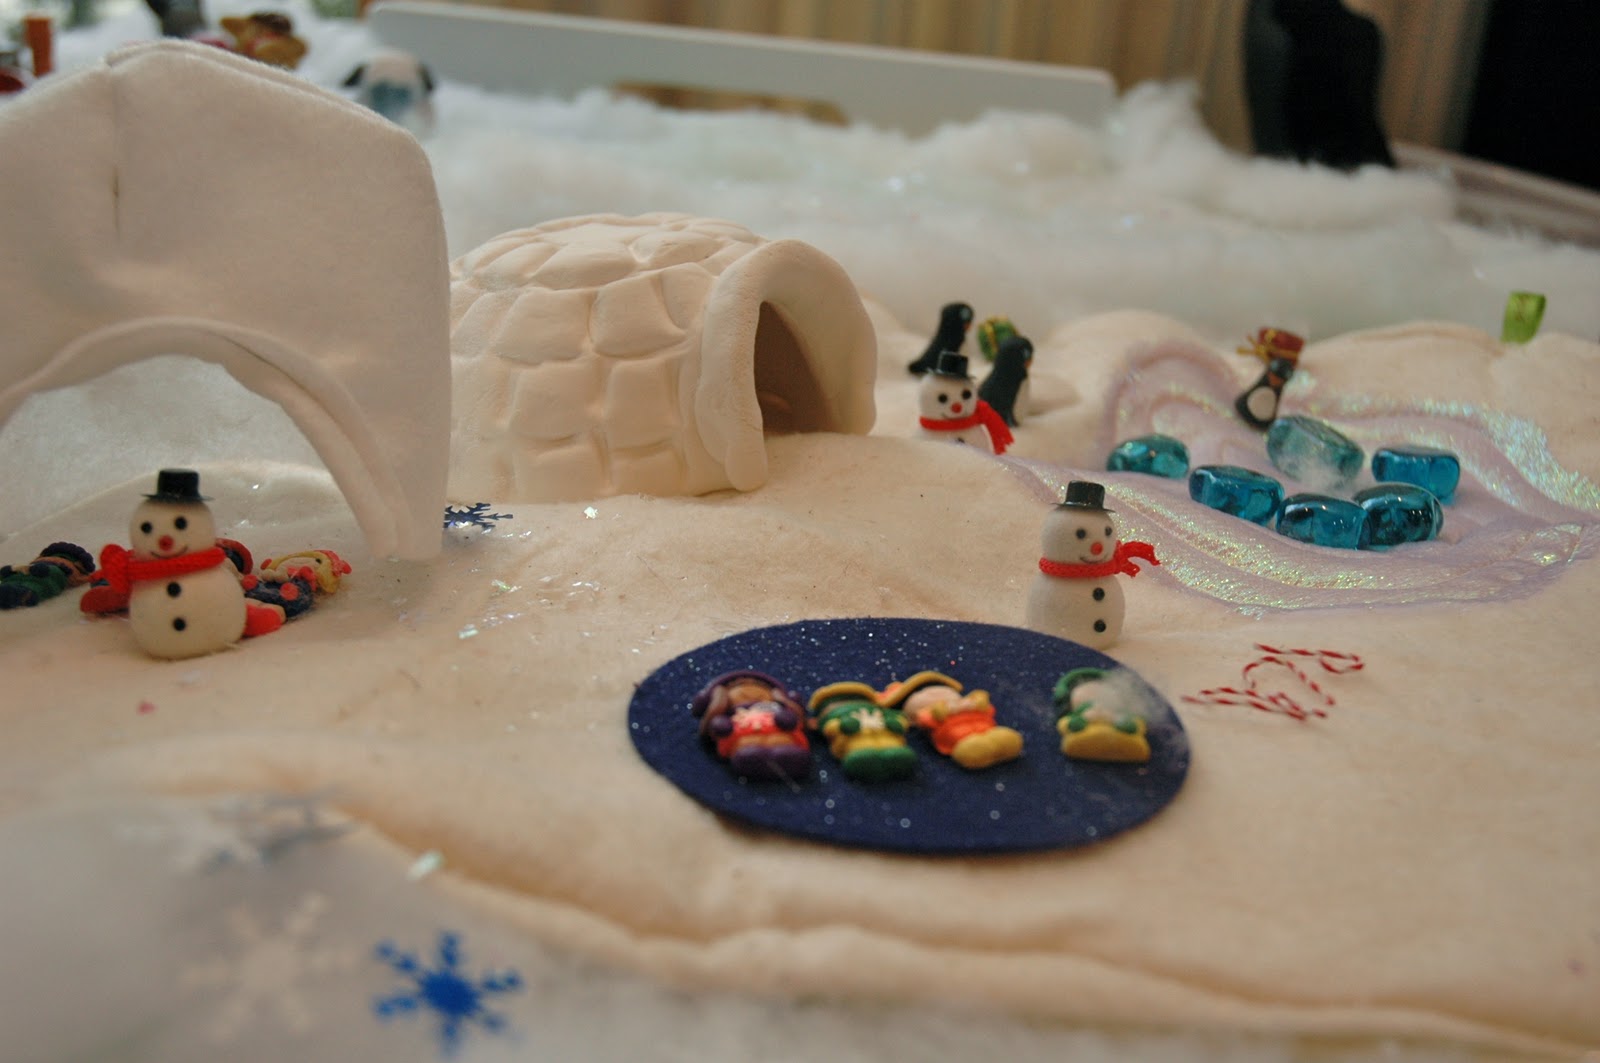
We've got igloos:
There's a tree with presents:
There's some eskimos (laying on the pond), snowmen, and tiny candy canes to play with:
The penguins look like they are having fun:
The kids put our snowglobes in too. Don't you just love the Santa driving the car snowglobe?:
For the five minutes it took me to set up, it has provided countless minutes of entertainment for the kids, and dinner making time for me.
We have been into places before that had Christmas villages set up for decor only and the kids were so frustrated that they couldn't play with it. I wanted something that was out and ready for them to play with whenever they wanted.
There are many ideas out there for setting up holiday play areas for your kids. I got a good set of playthings, since they are hard to find in Japan, from Pinkandgreenmama. I ordered it before the summer- I wasn't kidding when I said I had to plan far ahead for lots of projects.
We've got the nativity set up. This was another after Christmas half pricer, it's the Little People by Fisher Price Manger set, I think I got it at www.fisherprice.com. To go along with this, we read The Story of Christmas.
We've got igloos:
There's a tree with presents:
There's some eskimos (laying on the pond), snowmen, and tiny candy canes to play with:
The penguins look like they are having fun:
The kids put our snowglobes in too. Don't you just love the Santa driving the car snowglobe?:
For the five minutes it took me to set up, it has provided countless minutes of entertainment for the kids, and dinner making time for me.
Peppermint Whoopie Pies
A holiday favorite in my family is whoopie pies. I always remember being afraid to eat too many because they are my dad's favorite. I finally got the recipe a few years ago from my aunt and have been making them every Christmas ever since. Several years ago, for one of my kids' birthdays, I had a bag of Candy Cane Hersey Kisses lying around leftover from Christmas and stirred up this delicious peppermint version of Whoopie Pie.
For the month of December, I decided each week to do make some sort of peppermint recipe for our dessert. Last week it was these Whoopie Pies.
Have you seen these in the stores? I usually stock up with like 6 bags for the year, I have used them as add ins for ice cream, toppers for chocolate cookies, and crushed up to make peppermint icing.
These are dangerous so to avoid eating the whole batch yourself, you should not make them unless you have a party to go to.
Whoopie Pies:
OVEN: 350'
1/2 cup Crisco
1 cup Sugar
2 egg Yolks (I only had one egg, so I used 1 whole egg)
1 cup Milk
2 cups Flour
1/2 cup Cocoa Powder
1 1/2 tsp Baking Soda
1/2 tsp Baking Powder
1/2 tsp Salt
1/2 tsp Vanilla
Icing:
2 1/2 cups confectioner's sugar
1/3 bag Candycane Hersey Kisses (wrappers removed and chopped up- I did mine in my food processor)
1/2 tsp peppermint extract
2-4 TBSP milk
6 TBSP butter
For the whoopie pies, cream the sugar and crisco until fluffy. Mix in egg. Add in cocoa and vanilla, mix. Mix together flour, baking soda, baking powder, and salt in separate bowl. Alternate additions of dry ingredients with milk. Spoon dough onto baking sheet, bake for about 10 minutes in preheated oven. The tops will crack slightly. You can carefully insert a cake tester in the top to see if it comes out clean. If they are cooked too long, they will just be slightly hard. Let cool for a few minutes before moving from baking sheet to cooling rack.
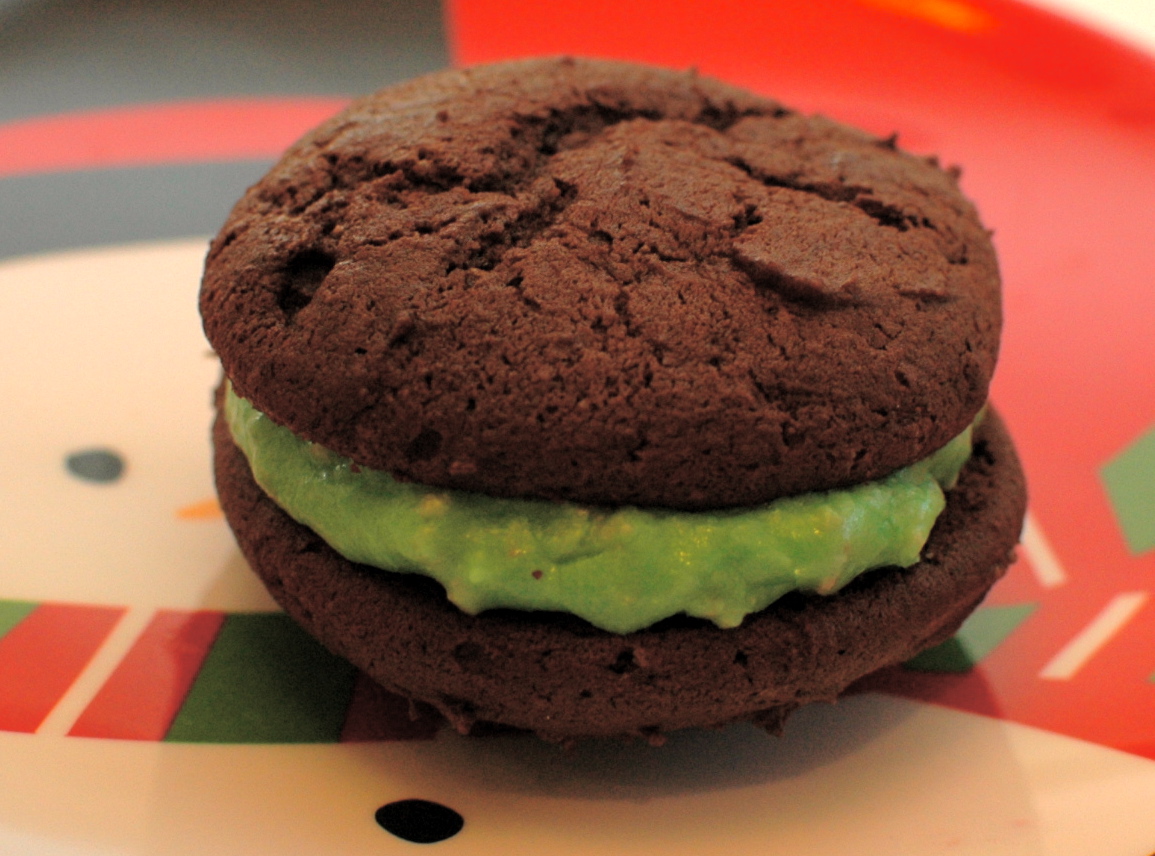
For the icing, cream the butter with about 1/2 cup confectioner's sugar. Add in peppermint extract and 1 TBSP milk. Add in crushed candies. Continue alternating milk and sugar additions until you reach desired consistency/flavor. I wanted the icing thick, but spreadable, slightly thicker than pudding (so it won't leak out the sides). To make it more festive, I added some green food coloring to the icing.
After the cakes cool, scoop a heaping spoonful of icing in the center of one and press another cake on top.
Look at the center, can you see all the pieces of candy in the icing?:
May you find an excuse to make these soon :)
Monday, December 13, 2010
Homemade pillow cases
Here's an idea for you if you're looking to give a unique homemade gift, whether it be for Christmas or something else. Last Christmas, one of my very good friends sent each of my kids a pillow case for Christmas, she even splurged and got someone to professionally embroider their names on them. They love knowing which case is theirs and choose those over the ones that came with their sheets.
A while back, we went to the fabric shop here and they each picked a Japanese type fabric they liked for me to make them a pillow case. In June, two of my kids were invited to a birthday party, so I decided to make the kids pillow cases as a present, who doesn't need or use a pillow case? At the same time, I pulled out the fabric I already bought for my kids and had a pillow case making party. My kids are obsessed with fuzzy fabric, so for the backs of all their cases, I used a big piece of white fuzzy fabric:
Today, my son had another birthday and I am not really sure what 8 year old girls like, so at 3:00 I decided to make her a pillow case. Here are step by step instructions on how I made it and finished it, ironing, cutting, sewing, and all BEFORE 3:45!
What you need:
3/4 yard fabric for main part
1/4 yard for small lip (I used a fat quarter)
1/3 yard for outer part (I used a fat quarter) it is okay to piece together scraps if you need to.
For a seam, I used 1/2" for everything.
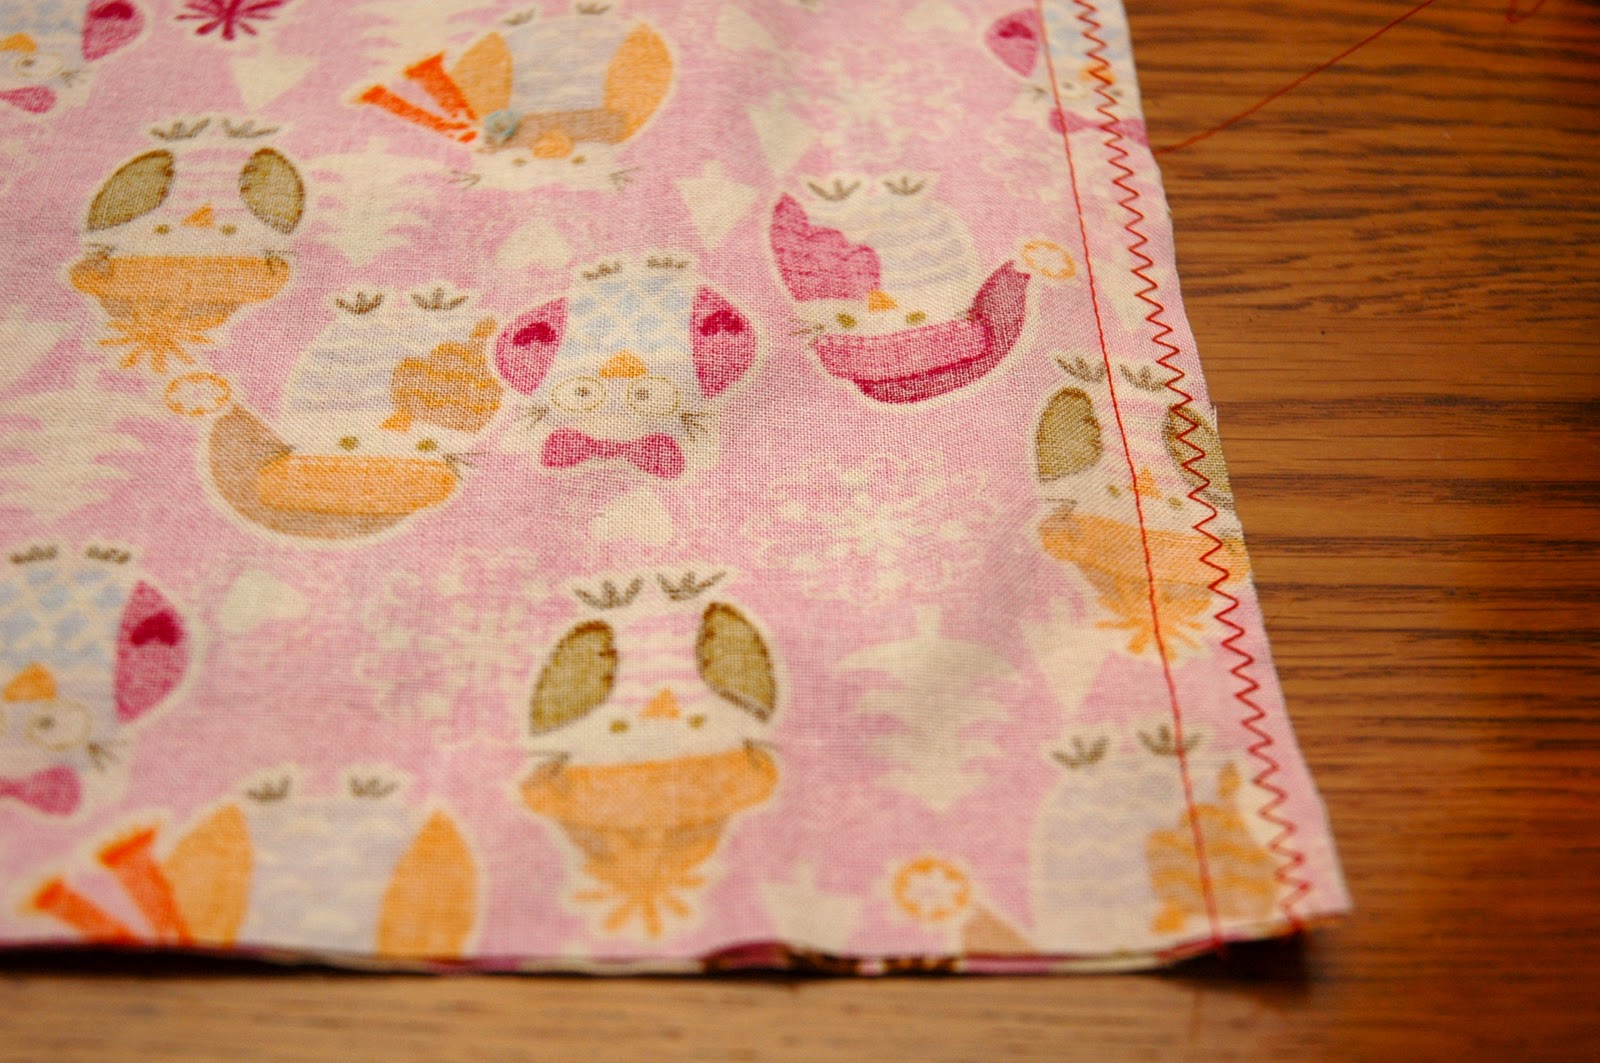
First, for the main part of the pillow, cut a piece of fabric 42" by 26.5" (if your fabric isn't big enough, you can cut 2 pieces of 21.5" by 26.5" and sew them together). Fold the piece of fabric in half on the long part (so when it's folded, it measures 21" by 26.5"). Sew along the bottom and open side's edges. If you have a serger, you can search, or if your machine is wicked old like mine, you can zigzag stitch to be sure no fraying occurs during washing:
Turn the main part right side out and iron flat.
Set this piece aside, now you will work on the small top lip of the pillow case. Cut a piece of fabric 42" by 1 3/4". Again, if your piece isn't long enough, cut two 21.5" by 1 3/4" pieces and sew them together. Sew the two ends of the fabric together, so you get a loop:
Fold this piece in half on itself so the insides are facing each other, it will now be 7/8" by 41" loop. Iron it to make the edge crisp:
Set this piece aside. Now for the main outer part of the case, cut a piece of fabric 11.5" by 42". I didn't have enough to do this, I only was using a fat quarter, so I cut two 9.5" by 21.5 " pieces and worked with that. Sew the edges together with right sides facing, so you get a big loop. Fold the piece in half, so that the wrong sides are facing each other. Iron to make the edge crisp. It will now be 5.75" by 41" loop.
Take the main part of the case and lay flat with the raw edge up. Matching the raw edges, place the small upper lip around it on the outside:
Matching raw edges again, place the outer part of the case around the small upper lip:
Sew along the raw edge to attach all three pieces together. Zigzag stitch the edge to avoid fraying. Flip the lip and top piece up and press with iron into place:
And you have a unique homemade gift in less than an hour. If you can sew straight lines, YOU CAN DO THIS!
The possibilities are endless, cupcakes for a birthday, superheroes for your son, princesses for your daughter, pumpkins for Halloween- Happy sewing!
Sunday, December 12, 2010
Japanese cell phone charms
I have been thinking about posting about the cell phone charm madness that is quite evident to anyone that comes to Japan. When people come here, they have an idea in their head of what they want to get for souvenirs. However, they quickly realize that magnets and keychains are not common, and in fact, a t-shirt with Japanese characters is super hard to find (bad english=easy; your size=not so easy). Almost every Japanese person, young or old has a charm on their cell phone and maybe even more than one on their bag. The cell phone charms range in size from small as a dime, to pretty darn big (size of a donut). Some people have so many on their phone, it's a wonder, they can even find their phone. I saw this girl on a train in Tokyo- and YES, they are all attached to her phone:
When it is time for me to make a trip back to the US, I get a lot of requests to bring back cell phone charms. I also encourage visitors to bring them back as souvenirs. Every touristy site, train station, or city has their own charm. Not only will the charm be a memoir of a site you visited, but also it is just so very very Japanese to have one. I started collecting charms from places we visited around Japan- they are cute and it's funny to remember what the area is famous for and how it is represented. We went to Hokkaido a few years ago and a very popular cartoon character was a green guy with a "package". It turns out his name is a similar sound to the Japanese word for the package and he represents the seaweed in the many lakes up there.
This one I got when I went to hike Mt. Fuji, a cartoon mountain with ice cap and smiley face, on the back it says 3776m for the height:
When we went to Nagasaki, I got several: one was for the dragon boat festivals they hold every year, one was for cheeseburgers (evidently they have some obsession with cheeseburgers there), and the other was for castella (Japanese pound cake they are famous for- I could not find it today, so it's not pictured).
You may notice the dragon charm I got is a Hello Kitty one, not only does every area represent their specialty on a charm, but there is ALWAYS a Hello Kitty donned in character. Yesterday, I was in Osaka at the Sanrio store, the entire third floor was pretty much devoted to Hello Kitty cell phone charms. I could not believe the thousands, yes, thousands of different ones there were.
This might be a bad shot, but it's from my cell phone so that's why, but imagine this times at least 5, that's how many were on the back and side wall:
Here's some cloth ones, all Hello Kitty sushi:
My neighbor was with me, looking for Christmas ornaments to give to her niece and nephew that would be visiting Japan for Christmas. She ended up deciding to get the cell phone charms because they really represented Japan. They had all the Hello Kitty charms for every area of Japan. We were able to find quite a few for our city, Kobe:
Pictured above are the airport, the ropeway my husband takes the kids on-dressed in the uniform of the baseball team, a park we go to a lot, the Harborland area of Kobe we frequent quite a bit, and the shinkansen.
Below are some others I got that I thought were so cute.
Don't you just love this one, it's for our new baby who will probably never get to live in Japan.
I stole my neighbor's idea and we hung them on our tree, they are lightweight and festive with their jingly bells:
When it is time for me to make a trip back to the US, I get a lot of requests to bring back cell phone charms. I also encourage visitors to bring them back as souvenirs. Every touristy site, train station, or city has their own charm. Not only will the charm be a memoir of a site you visited, but also it is just so very very Japanese to have one. I started collecting charms from places we visited around Japan- they are cute and it's funny to remember what the area is famous for and how it is represented. We went to Hokkaido a few years ago and a very popular cartoon character was a green guy with a "package". It turns out his name is a similar sound to the Japanese word for the package and he represents the seaweed in the many lakes up there.
This one I got when I went to hike Mt. Fuji, a cartoon mountain with ice cap and smiley face, on the back it says 3776m for the height:
When we went to Nagasaki, I got several: one was for the dragon boat festivals they hold every year, one was for cheeseburgers (evidently they have some obsession with cheeseburgers there), and the other was for castella (Japanese pound cake they are famous for- I could not find it today, so it's not pictured).
You may notice the dragon charm I got is a Hello Kitty one, not only does every area represent their specialty on a charm, but there is ALWAYS a Hello Kitty donned in character. Yesterday, I was in Osaka at the Sanrio store, the entire third floor was pretty much devoted to Hello Kitty cell phone charms. I could not believe the thousands, yes, thousands of different ones there were.
This might be a bad shot, but it's from my cell phone so that's why, but imagine this times at least 5, that's how many were on the back and side wall:
Here's some cloth ones, all Hello Kitty sushi:
My neighbor was with me, looking for Christmas ornaments to give to her niece and nephew that would be visiting Japan for Christmas. She ended up deciding to get the cell phone charms because they really represented Japan. They had all the Hello Kitty charms for every area of Japan. We were able to find quite a few for our city, Kobe:
Pictured above are the airport, the ropeway my husband takes the kids on-dressed in the uniform of the baseball team, a park we go to a lot, the Harborland area of Kobe we frequent quite a bit, and the shinkansen.
Below are some others I got that I thought were so cute.
Don't you just love this one, it's for our new baby who will probably never get to live in Japan.
I stole my neighbor's idea and we hung them on our tree, they are lightweight and festive with their jingly bells:
Friday, December 10, 2010
Homemade Christmas Stockings
For the past few years, our stockings have made many trips across the Pacific to be with us for Christmas. Sometimes, when I am unpacking the Christmas boxes, I can't remember if they are here or still on the east coast of the United States. This year, I decided to make it easy on myself and make new ones for the kids. Since Christmas is about the kids and it's more fun if they have a stocking they love, I decided to let them choose the colors and designs.
I bought all my felt at the 100 yen shop- the kids could care less if they have a Pottery Barn Kids stocking or dollar store, as long as it's their favorite color and design.
I used a stocking I had bought for myself years ago as a pattern and traced it onto the felt and cut out two (if you have a picky kid that asks for stripes, be sure to cut it out frontwards and then flip it for the other one, so that when you sew it together, both sides are facing out):
Take one piece (decide if you want all stockings facing the same direction)- use that piece for the front and start putting on your designs. For big pieces, I sewed and for small things like ribbon and pom poms, I used a hot glue gun. Hot gluing should be your very last step, so do the sewing now:
Once your decor is sewed on the front, put it facing the back piece and sew around the edges, leaving the top open. I used about 3/8" seam.
My kids insisted they had to have white fuzzy stuff on the top of the stocking. I bought a piece at a fabric store here and cut each strip to be 3 inches high and twice the width of the top of the stocking. I sewed the white fuzzy fabric together, with right sides facing, then placed it around the top edge of the stocking, with the right side of the fuzzy fabric facing the wrong side of the felt stocking. At this time, also place the hook inside, I cut a piece of bag strap, folded it in half and put the two raw edges lined up with the edge of the fuzzy fabric and felt. See below:
Sew around the top edge of the fuzzy fabric and felt. I went back and forth several times over the hook ends to make sure it would be secure.
Pull the stocking right side out. Afterwards, flip the white fuzzy fabric over the top, and the hook will pop up:
If you want to be more fancy, sew some ribbon on the bottom outer edge of the fuzzy fabric. Then you can hot glue gun on the rest of your decor.
For their design, two of the kids wanted Super Mario Brothers. I cut up some old pieces of fabric. One of the kids also wanted to use some car flannel fabric that matched his new blanket:
And the stockings were hung by the chimney with care:
To go along with this, we read "How To Talk To Santa" by Alec Greven (a 10 year old kid)- it has a nice message about how we all get excited about Christmas, but we should try to be like Santa and be giving to others.
I bought all my felt at the 100 yen shop- the kids could care less if they have a Pottery Barn Kids stocking or dollar store, as long as it's their favorite color and design.
I used a stocking I had bought for myself years ago as a pattern and traced it onto the felt and cut out two (if you have a picky kid that asks for stripes, be sure to cut it out frontwards and then flip it for the other one, so that when you sew it together, both sides are facing out):
Take one piece (decide if you want all stockings facing the same direction)- use that piece for the front and start putting on your designs. For big pieces, I sewed and for small things like ribbon and pom poms, I used a hot glue gun. Hot gluing should be your very last step, so do the sewing now:
Once your decor is sewed on the front, put it facing the back piece and sew around the edges, leaving the top open. I used about 3/8" seam.
My kids insisted they had to have white fuzzy stuff on the top of the stocking. I bought a piece at a fabric store here and cut each strip to be 3 inches high and twice the width of the top of the stocking. I sewed the white fuzzy fabric together, with right sides facing, then placed it around the top edge of the stocking, with the right side of the fuzzy fabric facing the wrong side of the felt stocking. At this time, also place the hook inside, I cut a piece of bag strap, folded it in half and put the two raw edges lined up with the edge of the fuzzy fabric and felt. See below:
Sew around the top edge of the fuzzy fabric and felt. I went back and forth several times over the hook ends to make sure it would be secure.
Pull the stocking right side out. Afterwards, flip the white fuzzy fabric over the top, and the hook will pop up:
If you want to be more fancy, sew some ribbon on the bottom outer edge of the fuzzy fabric. Then you can hot glue gun on the rest of your decor.
For their design, two of the kids wanted Super Mario Brothers. I cut up some old pieces of fabric. One of the kids also wanted to use some car flannel fabric that matched his new blanket:
And the stockings were hung by the chimney with care:
To go along with this, we read "How To Talk To Santa" by Alec Greven (a 10 year old kid)- it has a nice message about how we all get excited about Christmas, but we should try to be like Santa and be giving to others.
Wednesday, December 8, 2010
It's the Little Things
You may have noticed I was away from the blog recently. I took a trip to San Francisco with my youngest son. It was a very quick trip, left on Friday, back on Tuesday. You may think I'm crazy to take such a short trip to the US, especially with a kid, but on many levels, the trip was worth it.
To start, the trip evolved from my desire to retain my United Airlines Gold Card. I never thought in my life, I'd be trying to plan a trip just to obtain elite airline status. I also never thought my husband and I would have so many in depth conversations about our yearly travel and how to attain the best rewards from an airline. Yes, we talk often about how we are going to fly our 50,000 miles in a year and keep those gold cards. We talk about how we just couldn't fathom standing in the regular check-in, not the express for gold card holders, how we couldn't imagine waiting forever in the security line instead of bypassing it in the gold card lane, or worse, only earning 1 mile per mile flown, instead of 2. Oh, and let's not forget about the bags, 50 lbs is for the birds, with a gold card, you get 3, yes 3 free checked and up to 70 lbs each, that's worth it's weight in gold alone to us. Is this really me, have I become this person so obsessed with premier flying status that I actually booked a trip involving a 9.5 hour flight and 11.5 hour return, with a small amount of jet lag involved? Do you remember my post about traveling back to Japan with my four kids after homeleave? I think you know why I have turned into this elite hungry person.
We also have a friend in San Francisco, whom we have known for a very long time, Dave's old college roommate. He has visited us in Japan 4 times, so I figured it was time to repay the favor and also give myself a chance to check out his new condo.
What really sealed the deal for me to take this trek was being able to bring back a lot of Christmas for my kids. As I have mentioned before, this is our first time staying in Japan for Christmas and I wanted to make it extra special for my kids. We can get them toys anywhere, we can make lots of cookies, cakes, and decorations, but there's just something to be said for the little things you find in stores that make it feel like a holiday. Normally, I would just have my mom ship all the stuff over, but even shipping's gotten over the top expensive.
What are these little things I speak of? Check out this photo:
One of the greatest things for me about living abroad is how these little things pictured here have become such treats for my kids. These items are either very expensive, hard to find, or non-existent here, so receiving them is the biggest treat. Holidays have been so much easier to shop for all of us because we ask for simple things such as a favorite candy bar or a box of oatmeal.
When I was in Target this past weekend, it was like a holiday explosion for me. There were so many crowds, so many scents, so many new types of food items, so many types of holiday decor to choose from. How do I squeeze a little bit of it all into my suitcases? As I was going up and down the aisles, I kept coming up with more ideas of how we could spend each night before Christmas and before I knew it, my cart was so full and people were staring at me, asking me if they could come to my house for Christmas. I couldn't help but smile, I knew I was successful and that even though we are the family with a cardboard tree, we are the family that is going to have one of the most memorable Christmases ever.
Do you know someone that is living far away from home, maybe not even overseas, it could be in another state with no relatives living close by. If you are sending them a gift this year, don't think of the big things, think little. It's the little things that are familiar that make us squeal with joy. I can't believe how happy it made me to buy a box of Keebler merry mint patties. For my kids, even the holiday napkins were a delight, they just like to look at them and say how pretty they are. As for the big things, we use them and appreciate them, but eventually, they get old and collect dust. It's the little things that excite us, they are the things we miss the most, and the things that bring us the greatest comfort.
This was my first trip away from home, sort of solo, and how did I spend it?- shopping at Target for little Christmas things that put HUGE smiles on my kids' faces.
To start, the trip evolved from my desire to retain my United Airlines Gold Card. I never thought in my life, I'd be trying to plan a trip just to obtain elite airline status. I also never thought my husband and I would have so many in depth conversations about our yearly travel and how to attain the best rewards from an airline. Yes, we talk often about how we are going to fly our 50,000 miles in a year and keep those gold cards. We talk about how we just couldn't fathom standing in the regular check-in, not the express for gold card holders, how we couldn't imagine waiting forever in the security line instead of bypassing it in the gold card lane, or worse, only earning 1 mile per mile flown, instead of 2. Oh, and let's not forget about the bags, 50 lbs is for the birds, with a gold card, you get 3, yes 3 free checked and up to 70 lbs each, that's worth it's weight in gold alone to us. Is this really me, have I become this person so obsessed with premier flying status that I actually booked a trip involving a 9.5 hour flight and 11.5 hour return, with a small amount of jet lag involved? Do you remember my post about traveling back to Japan with my four kids after homeleave? I think you know why I have turned into this elite hungry person.
We also have a friend in San Francisco, whom we have known for a very long time, Dave's old college roommate. He has visited us in Japan 4 times, so I figured it was time to repay the favor and also give myself a chance to check out his new condo.
What really sealed the deal for me to take this trek was being able to bring back a lot of Christmas for my kids. As I have mentioned before, this is our first time staying in Japan for Christmas and I wanted to make it extra special for my kids. We can get them toys anywhere, we can make lots of cookies, cakes, and decorations, but there's just something to be said for the little things you find in stores that make it feel like a holiday. Normally, I would just have my mom ship all the stuff over, but even shipping's gotten over the top expensive.
What are these little things I speak of? Check out this photo:
One of the greatest things for me about living abroad is how these little things pictured here have become such treats for my kids. These items are either very expensive, hard to find, or non-existent here, so receiving them is the biggest treat. Holidays have been so much easier to shop for all of us because we ask for simple things such as a favorite candy bar or a box of oatmeal.
When I was in Target this past weekend, it was like a holiday explosion for me. There were so many crowds, so many scents, so many new types of food items, so many types of holiday decor to choose from. How do I squeeze a little bit of it all into my suitcases? As I was going up and down the aisles, I kept coming up with more ideas of how we could spend each night before Christmas and before I knew it, my cart was so full and people were staring at me, asking me if they could come to my house for Christmas. I couldn't help but smile, I knew I was successful and that even though we are the family with a cardboard tree, we are the family that is going to have one of the most memorable Christmases ever.
Do you know someone that is living far away from home, maybe not even overseas, it could be in another state with no relatives living close by. If you are sending them a gift this year, don't think of the big things, think little. It's the little things that are familiar that make us squeal with joy. I can't believe how happy it made me to buy a box of Keebler merry mint patties. For my kids, even the holiday napkins were a delight, they just like to look at them and say how pretty they are. As for the big things, we use them and appreciate them, but eventually, they get old and collect dust. It's the little things that excite us, they are the things we miss the most, and the things that bring us the greatest comfort.
This was my first trip away from home, sort of solo, and how did I spend it?- shopping at Target for little Christmas things that put HUGE smiles on my kids' faces.
Subscribe to:
Posts (Atom)