I keep accidentally opening a folder on my computer that has pictures of these brownies that I took about one year ago. I didn't like think the pictures looked good, so I wasn't going to post them, but every time, I accidentally scroll over them (like everyday)-- I want to make them and I love the pictures a tiny bit more.
Yesterday, I was so excited to find my new favorite baking chocolate, Scharffen Berger, at Target. In honor of the score, I'm making brownies and posting this recipe. I refuse to make brownies anymore unless it's with good chocolate. To me, using bad chocolate is like using margarine instead of butter.
This recipe is definitely my go to brownie recipe and you won't be disappointed either. If you are looking for a non-traditional Thanksgiving dessert, you should make these (and eat them all!)
Sweet and Salty Brownies:
Caramel:
1 cup sugar
1 TBSP corn syrup
1/4 cup water
1/2 cup heavy cream
1 1/2 tsp sea salt
2 TBSP butter
Brownies:
1 1/4 cup all purpose flour
1 tsp salt
2 TBSP unsweetened cocoa powder
11 oz dark chocolate, chopped (60-72% chocolate)
1 cup unsalted butter (2 sticks)
1 1/2 cup sugar
1/2 cup brown sugar, firmly packed
5 eggs, room temp (important!)
2 tsp vanilla
1) Make the caramel. Measure out heavy cream, and set aside, place butter and salt in small bowl, set aside. In medium saucepan- preferably metal- combine sugar, corn syrup, and water- stir carefully- don't splash onto sides, it can wreck the caramel later. Cook over medium high heat until it reaches 350' or a dark amber color (like beer)- it will take a while to turn amber, but once it does, it can get brown fast and burn. You don't need to stir while it is heating up, maybe swirl the pan once or twice.
Once it reaches the amber color, turn off heat and slowly add cream and salt and butter- be careful because it will release a LOT of steam, the caramel may even seem to harden, just keep whisking it until smooth. Set aside to cool while you mix the brownies.
2) Preheat the oven to 350'.
3) Grease a 9x13 baking pan. You can also choose to line it front to back and side to side with parchment paper- I never have done this and my brownies have never stuck in the pan.
4) In a bowl, whisk flour, cocoa powder, and salt- set aside.
5) Put chocolate and butter in a double boiler- set this over a pan of boiling water- stir until the chocolate and butter have melted and are smooth. **(If you do not have a double boiler- put chocolate and butter in microwave safe bowl and microwave in 20 second increments, take out and stir each time- longer increments can result in the chocolate burning and drying out. )
6) Keep double boiler over pot of water, turn off the burner. Add the sugar and brown sugar to the chocolate mixture and whisk until combined.
7) Transfer chocolate mixture to a large bowl- use a scraper to get it all out. Add three eggs to the chocolate mixture and whisk until just combined (do not over mix here- this is the difference between gooey fudge brownies or dense cake ones). Add the last two eggs and mix until just combined.
8) Add vanilla and whisk until combined.
9) Sprinkle flour mixture on top of chocolate mixture- fold in with a spatula or wooden spoon. There may be small amounts of flour mixture that aren't mixed in, that is ok-Remember over mixing will result in denser brownies.
10) Pour half of the brownie batter into the prepared pan. Spread about 1/2-3/4 cup of the caramel sauce around the top of the batter- stay about 1/2 " away from the edge of the batter. Drop the rest of the batter on top of the caramel layer and use a spatula to carefully spread it out.
11) Bake the brownies for about 40-45 minutes total. After 20 minutes of baking, rotate the pan halfway to ensure even baking. After 35 minutes of baking, you can insert a toothpick into the center of the brownies to check for doneness- a few sticky crumbs will come out on the pick, but should not be dredged in batter. Remember, there is caramel in there, so it will be a littly sticky-but when in doubt cook a little longer- I have made these before and taken out when they weren't done and it is hard to finish cooking a half baked batch once you realize you under baked them.
12) Remove from oven and sprinkle the top with sea salt or another coarse salt.
Recipe adapted from Baked Explorations
Caramel recipe from Bakingdom blog.
Showing posts with label food. Show all posts
Thursday, November 27, 2014
Sunday, July 14, 2013
Black Raspberry Swirl Ice Cream
I'm baaaack and hopefully for good. I realized today that July is National Ice Cream Month. I thought I'd make my comeback with this amazing ice cream that I made last weekend. I got a vitamix recently so I've been hitting up the farmer's market hard every weekend to stock my freezer full of farm grown local fruit for my smoothies. Last week, I came across black raspberries.
The sighting of the black raspberries was kind of nostalgic for me. I had never actually seen them for sale before, but back in Massachusetts, black raspberry is one of my favorite flavors to get at the local ice cream shop. Here, where I live now, there are not very many local dairy bars that have a variety of hard ice cream flavors, it's mostly soft serve, so it makes me sad that my kids miss out on that experience. I immediately bought a quart of black raspberries and went home that very day to make black raspberry ice cream. I don't know who I was with, but I think it was my dad, that ordered it with jimmies- black raspberry with chocolate-you can't go wrong.
I recently purchased David Lebovitz's The Perfect Scoop. It has been on my wishlist for a very long time. I decided to buy it because my son expressed interest in learning how to make ice cream. As I was searching for a black raspberry ice cream recipe, I pulled out the book and there it was, "raspberry swirl ice cream". If you are looking for a fun way to introduce new fruits to a picky kids, here you go! All of my kids ate it and liked it. It is good to know that the ice cream is actually made with real, local berries. If you can't find black raspberries, I'm positive it will be just as delicious with red ones, which are also in season now.
Black Raspberry Swirl Ice Cream:
Ice Cream:
1 cup Whole Milk (if you use low fat, it will not turn out as creamy)
2/3 cup sugar
pinch of salt
1 1/2 cup Heavy Cream
5 Egg Yolks
1/2 tsp vanilla
Black Raspberry Swirl:
1 1/2 cup black raspberries (fresh or frozen)
3 TBSP Sugar
1 TBSP vodka
1) Make the raspberry swirl. Mash the raspberries together with the sugar and vodka. (The vodka helps the ice cream stay smooth- I did not have vodka, but since I make my own vanilla with vodka, I used 1 TBSP vanilla)- I also was lazy and just mashed it together in my food processor, just way easier. Place a fine mesh sieve over a bowl, and strain the raspberry mixture to remove the seeds. Cover and refrigerate until ready to use.
2) For the ice cream, place egg yolks in a medium sized bowl and whisk.
3) Place milk, sugar, and salt in medium sauce pan, warm it to about 175'.
4) While milk mixture is warming, pour cream into a large bowl, with a mesh sieve over it.
5) Once milk mixture is warm, pour half of it over the egg yolks, stirring constantly. This is called tempering the eggs. Pour this mixture back into the pan with the rest of the milk mixture. Continue heating, stirring and scraping the bottom of the pan. The mixture should reach about 185', you will notice it will thicken like a custard, and coat the spatula. Remove from heat.
6) Pour custard mixture through mesh sieve into cream. Stir in the vanilla and stir until cool, over an ice bath. Once mixture is cool, cover and place in the refrigerator to chill. Once the mixture is chilled, about 1 hour, you can churn in your ice cream maker, according to directions.
7) Chill the container you will be storing the ice cream in in your freezer. When the ice cream is done churning, layer a scoop of ice cream, spread a thin layer of raspberry swirl, then ice cream, etc until you have filled the container. Freeze until ready to serve.
The sighting of the black raspberries was kind of nostalgic for me. I had never actually seen them for sale before, but back in Massachusetts, black raspberry is one of my favorite flavors to get at the local ice cream shop. Here, where I live now, there are not very many local dairy bars that have a variety of hard ice cream flavors, it's mostly soft serve, so it makes me sad that my kids miss out on that experience. I immediately bought a quart of black raspberries and went home that very day to make black raspberry ice cream. I don't know who I was with, but I think it was my dad, that ordered it with jimmies- black raspberry with chocolate-you can't go wrong.
I recently purchased David Lebovitz's The Perfect Scoop. It has been on my wishlist for a very long time. I decided to buy it because my son expressed interest in learning how to make ice cream. As I was searching for a black raspberry ice cream recipe, I pulled out the book and there it was, "raspberry swirl ice cream". If you are looking for a fun way to introduce new fruits to a picky kids, here you go! All of my kids ate it and liked it. It is good to know that the ice cream is actually made with real, local berries. If you can't find black raspberries, I'm positive it will be just as delicious with red ones, which are also in season now.
Black Raspberry Swirl Ice Cream:
Ice Cream:
1 cup Whole Milk (if you use low fat, it will not turn out as creamy)
2/3 cup sugar
pinch of salt
1 1/2 cup Heavy Cream
5 Egg Yolks
1/2 tsp vanilla
Black Raspberry Swirl:
1 1/2 cup black raspberries (fresh or frozen)
3 TBSP Sugar
1 TBSP vodka
1) Make the raspberry swirl. Mash the raspberries together with the sugar and vodka. (The vodka helps the ice cream stay smooth- I did not have vodka, but since I make my own vanilla with vodka, I used 1 TBSP vanilla)- I also was lazy and just mashed it together in my food processor, just way easier. Place a fine mesh sieve over a bowl, and strain the raspberry mixture to remove the seeds. Cover and refrigerate until ready to use.
2) For the ice cream, place egg yolks in a medium sized bowl and whisk.
3) Place milk, sugar, and salt in medium sauce pan, warm it to about 175'.
4) While milk mixture is warming, pour cream into a large bowl, with a mesh sieve over it.
5) Once milk mixture is warm, pour half of it over the egg yolks, stirring constantly. This is called tempering the eggs. Pour this mixture back into the pan with the rest of the milk mixture. Continue heating, stirring and scraping the bottom of the pan. The mixture should reach about 185', you will notice it will thicken like a custard, and coat the spatula. Remove from heat.
6) Pour custard mixture through mesh sieve into cream. Stir in the vanilla and stir until cool, over an ice bath. Once mixture is cool, cover and place in the refrigerator to chill. Once the mixture is chilled, about 1 hour, you can churn in your ice cream maker, according to directions.
7) Chill the container you will be storing the ice cream in in your freezer. When the ice cream is done churning, layer a scoop of ice cream, spread a thin layer of raspberry swirl, then ice cream, etc until you have filled the container. Freeze until ready to serve.
Source: Adapted from The Perfect Scoop by David Lebovitz
Sunday, May 12, 2013
Chocolate Frosted Vanilla Cupcakes with Cream Filling
Back in March, it occurred to me that I hadn't made cupcakes in months. It was this blog that got me obsessed with cupcakes, and how magical they are. I used to make cupcakes more than anything else, then I stopped.
My cousin sent me a message saying she missed reading about the cupcakes I was making and it really occurred to me how much I missed making the cupcakes. I decided to recreate the first cupcake I ever made for this blog, which, in fact was the first filled cupcake I had ever made, and the last one I ever used a box mix with.
All this coincided with my photography club's presentation that I was giving about food photography, so I knew it was the perfect time to show how far I've come in three years with a photo of the same batch of cupcakes, not only with my photography skills, but my baking skills as well.
THEN:
NOW:
I wish I had time to post this before Mother's Day so my cousin could have made them for herself, but it's early enough in the day that if she wants, she can still make a batch.
Happy Mother's Day Em, thanks for inspiring me to make cupcakes again!
Oven: 350'
Yellow Cupcakes:
1 1/2 cups flour
1 cup sugar
1 1/2 tsp baking powder
1/2 tsp salt
8 TBSP unsalted butter, room temp
1/2 cup sour cream
1 egg plus 2 yolks
1 1/2 tsp vanilla
Marshmallow filling:
1/6 cup confectioner's sugar
3.5 oz marshmallow fluff (we made our own homemade-OMG wait for this recipe soon)
pinch salt
1/2 TBSP water
3-4 TBSP butter, room temp
Chocolate Frosting:
1/4 cup plus 2 TBSP dutch process cocoa powder
1/4 cup plus 2 TBSP boiling water
15 TBSP unsalted butter (she used a lot more, I don't like butter flavor frosting, so I modified)
1/2 cup confectioner's sugar
pinch salt
16 oz semi-sweet chocolate, melted and cooled (use bars if you can, not chips)
Preheat the oven to 350'
1) For the cupcakes: In the bowl of your mixer, using the paddle, combine flour, sugar, baking powder, and salt.
2) Slice butter into 8 pieces and slowly add them to the flour mixture. Add in sour cream, egg, yolks, and vanilla and beat on medium until smooth. Scrape down bowl and mix again until all ingredients are incorporated.
3) Line muffin pan with paper liners. Scoop batter into cup wells until 2/3 full. This will make 12 cupcakes, so there should be just enough batter to fill one large muffin pan.
4) Bake in oven 20-24 minutes, rotating halfway through. They are done when a cake tester inserted in the center comes out clean. Let cool completely on wire rack before filling or frosting.
5) For the filling: With whisk attached to hand or stand mixer, beat butter and marshmallow fluff together. Add in confectioner's sugar, salt, and water, beat until fluffy and combined.
6) Cut a small round cone out of the top of each cupcake, scoop a TBSP of filling into each cupcake. Shave the cake off the bottom part of each cone and replace the top of the cupcake, once it has been filled.
7) For the frosting: Break semi-sweet chocolate into pieces, put in microwave proof bowl and microwave for 20 second increments, stirring in between each time, until completely melted and smooth, set aside to cool.
8) In a medium bowl, whisk the cocoa powder and boiling water until cocoa dissolves. Set aside.
9) In bowl of mixer (stand or hand), using whisk, beat the butter, confectioner's sugar, and salt on medium until light and fluffy. Reduce mixer speed and add in the melted, cooled chocolate. Beat until combined. Scrape down sides and mix again.
10) Beat in the cocoa mixture until combined, scrape down sides and remix again. Put frosting in bag with a piping tip and frost the cupcakes.
Source: Cupcakes- Cook's Illustrated Cookbook, Frosting- Martha Stewart Cupcakes, Filling- Skip to my Lou blog
My cousin sent me a message saying she missed reading about the cupcakes I was making and it really occurred to me how much I missed making the cupcakes. I decided to recreate the first cupcake I ever made for this blog, which, in fact was the first filled cupcake I had ever made, and the last one I ever used a box mix with.
All this coincided with my photography club's presentation that I was giving about food photography, so I knew it was the perfect time to show how far I've come in three years with a photo of the same batch of cupcakes, not only with my photography skills, but my baking skills as well.
THEN:
NOW:
I wish I had time to post this before Mother's Day so my cousin could have made them for herself, but it's early enough in the day that if she wants, she can still make a batch.
Happy Mother's Day Em, thanks for inspiring me to make cupcakes again!
Oven: 350'
Yellow Cupcakes:
1 1/2 cups flour
1 cup sugar
1 1/2 tsp baking powder
1/2 tsp salt
8 TBSP unsalted butter, room temp
1/2 cup sour cream
1 egg plus 2 yolks
1 1/2 tsp vanilla
Marshmallow filling:
1/6 cup confectioner's sugar
3.5 oz marshmallow fluff (we made our own homemade-OMG wait for this recipe soon)
pinch salt
1/2 TBSP water
3-4 TBSP butter, room temp
Chocolate Frosting:
1/4 cup plus 2 TBSP dutch process cocoa powder
1/4 cup plus 2 TBSP boiling water
15 TBSP unsalted butter (she used a lot more, I don't like butter flavor frosting, so I modified)
1/2 cup confectioner's sugar
pinch salt
16 oz semi-sweet chocolate, melted and cooled (use bars if you can, not chips)
Preheat the oven to 350'
1) For the cupcakes: In the bowl of your mixer, using the paddle, combine flour, sugar, baking powder, and salt.
2) Slice butter into 8 pieces and slowly add them to the flour mixture. Add in sour cream, egg, yolks, and vanilla and beat on medium until smooth. Scrape down bowl and mix again until all ingredients are incorporated.
3) Line muffin pan with paper liners. Scoop batter into cup wells until 2/3 full. This will make 12 cupcakes, so there should be just enough batter to fill one large muffin pan.
4) Bake in oven 20-24 minutes, rotating halfway through. They are done when a cake tester inserted in the center comes out clean. Let cool completely on wire rack before filling or frosting.
5) For the filling: With whisk attached to hand or stand mixer, beat butter and marshmallow fluff together. Add in confectioner's sugar, salt, and water, beat until fluffy and combined.
6) Cut a small round cone out of the top of each cupcake, scoop a TBSP of filling into each cupcake. Shave the cake off the bottom part of each cone and replace the top of the cupcake, once it has been filled.
7) For the frosting: Break semi-sweet chocolate into pieces, put in microwave proof bowl and microwave for 20 second increments, stirring in between each time, until completely melted and smooth, set aside to cool.
8) In a medium bowl, whisk the cocoa powder and boiling water until cocoa dissolves. Set aside.
9) In bowl of mixer (stand or hand), using whisk, beat the butter, confectioner's sugar, and salt on medium until light and fluffy. Reduce mixer speed and add in the melted, cooled chocolate. Beat until combined. Scrape down sides and mix again.
10) Beat in the cocoa mixture until combined, scrape down sides and remix again. Put frosting in bag with a piping tip and frost the cupcakes.
Source: Cupcakes- Cook's Illustrated Cookbook, Frosting- Martha Stewart Cupcakes, Filling- Skip to my Lou blog
Thursday, April 18, 2013
My Son's No Sugar Challenge
So, the last month and a half or so, I've been struggling to find time. Struggling to write and post without sounding hypocritical to myself and what I do. But, hey, this is my blog, if I want to talk about fitness one day, and cupcakes the next, it's ok, because that's who I am- I love to exercise, I love to be fit, I love helping people get fit and feel good about themselves, I love inspiring people, I love sharing things I've made, especially food that is delicious, and I love challenging myself.
I finally feel like my food photography has progressed to a level where I feel I should be, so I can't wait to share some of the new recipes I've tried recently (warning, two are cupcakes). Now, the hypocritical part (sort of): Our crossfit gym did its first paleo challenge last month. My son and two daughters come with me to coach, so they were hearing lots of info about the paleo challenge (essentially, no sugar, no grains, no dairy, no legumes)- immediately both my son and one of my daughters were jumping at the chance to do the challenge and had my boss weigh and measure them. Honestly, I knew I wasn't participating in the challenge and didn't think either one of them would survive, but my son-- WOW he amazed me!
I knew that Nathaniel was a pretty picky eater to begin with, so I was not sure I could have him go completely paleo and still eat enough calories. We decided for the first round, he would just eliminate sugar. You would not believe how intense and serious he took this! My 9 year old son went 4 weeks with no sugar. I was thinking it would be interesting to see if I noticed any behavioral changes in him- which, for the record, I did not. The one thing I noticed was that this kid has will power and determination. He read labels on everything and would not eat it if it listed sugar. I allowed him to cheat on his sister's birthday for cake and ice cream, and he kept double checking with me that it was ok.
Every morning, he had toast and bacon or multigrain blueberry pancakes that I made. I made multigrain bread for him, so he could use it for lunch. He started searching online for sugar free recipes and started making sugar free desserts for himself, like cake and cookies. I couldn't believe what I was seeing and I do feel guilty that in the beginning I didn't have faith in him. When he went on a ski trip to california, he baked his own batch of sugar free cookies to bring for the trip and freaked out because my husband didn't tell the ski school instructors he was not allowed sugar (luckily it was just a little bit in the jelly of his sandwich). When they got back from their trip, I made hotdogs, and he had ketchup, before he took a bite, he ran to the fridge, pulled out the ketchup, saw sugar in the ingredients, and wiped it off his hot dog. That is some determination!
I love that I'm teaching him how to be healthy and how to read food packaging. He asked me why certain foods weren't healthy, which prompted me to take our next science lesson to the next level and we are studying nutrition and human anatomy- I'm loving it!
I've learned valuable lessons from this experience too. One is never doubt your kids' abilities and the main one was that it is really hard to not feed your kids sugar. Every snack, prepackaged food, drink has added sugar, it is really quite sickening how much sugar an average kid must consume every day. Even Cheerios has sugar.
When the four weeks were up, he had to complete a crossfit workout, called the "Dirty Thirty", followed by a 1,000m row- I took him in and my boss ran him through the workout. He worked the hardest I've ever seen him work in my life. He got red faced and sweaty, which made him excited. We reweighed and measured him- he had lost a pound and 1/2 " in waist and arms got a little smaller too- that was not the goal of course, he is 9 and growing, but I found it interesting nonetheless. Since that day, he has been nothing excited about doing the WOD with the adults. My boss told him that he had taken his workouts to the next level, and I know that made him feel special and proud.
Here's some pictures of him doing his workout:
What did we gain from this? My son is a tougher person than I thought, I need to read labels closer than I already did, and my son knows how to cook now.
What can you gain? Your kid can survive without sugar, kids have more willpower than we think, you can give them sugar, but notice labels, be aware of what's in your food. The thing I try to live by is moderation. I give them sweets, but in moderation- because I don't want them to be curious later on in life and go on a crazy binge. Be smart and teach your kids to be smart- educate yourself and know why things are bad for you, they are more apt to listen to a solid reason than "it's bad for you".
I finally feel like my food photography has progressed to a level where I feel I should be, so I can't wait to share some of the new recipes I've tried recently (warning, two are cupcakes). Now, the hypocritical part (sort of): Our crossfit gym did its first paleo challenge last month. My son and two daughters come with me to coach, so they were hearing lots of info about the paleo challenge (essentially, no sugar, no grains, no dairy, no legumes)- immediately both my son and one of my daughters were jumping at the chance to do the challenge and had my boss weigh and measure them. Honestly, I knew I wasn't participating in the challenge and didn't think either one of them would survive, but my son-- WOW he amazed me!
I knew that Nathaniel was a pretty picky eater to begin with, so I was not sure I could have him go completely paleo and still eat enough calories. We decided for the first round, he would just eliminate sugar. You would not believe how intense and serious he took this! My 9 year old son went 4 weeks with no sugar. I was thinking it would be interesting to see if I noticed any behavioral changes in him- which, for the record, I did not. The one thing I noticed was that this kid has will power and determination. He read labels on everything and would not eat it if it listed sugar. I allowed him to cheat on his sister's birthday for cake and ice cream, and he kept double checking with me that it was ok.
Every morning, he had toast and bacon or multigrain blueberry pancakes that I made. I made multigrain bread for him, so he could use it for lunch. He started searching online for sugar free recipes and started making sugar free desserts for himself, like cake and cookies. I couldn't believe what I was seeing and I do feel guilty that in the beginning I didn't have faith in him. When he went on a ski trip to california, he baked his own batch of sugar free cookies to bring for the trip and freaked out because my husband didn't tell the ski school instructors he was not allowed sugar (luckily it was just a little bit in the jelly of his sandwich). When they got back from their trip, I made hotdogs, and he had ketchup, before he took a bite, he ran to the fridge, pulled out the ketchup, saw sugar in the ingredients, and wiped it off his hot dog. That is some determination!
I love that I'm teaching him how to be healthy and how to read food packaging. He asked me why certain foods weren't healthy, which prompted me to take our next science lesson to the next level and we are studying nutrition and human anatomy- I'm loving it!
I've learned valuable lessons from this experience too. One is never doubt your kids' abilities and the main one was that it is really hard to not feed your kids sugar. Every snack, prepackaged food, drink has added sugar, it is really quite sickening how much sugar an average kid must consume every day. Even Cheerios has sugar.
When the four weeks were up, he had to complete a crossfit workout, called the "Dirty Thirty", followed by a 1,000m row- I took him in and my boss ran him through the workout. He worked the hardest I've ever seen him work in my life. He got red faced and sweaty, which made him excited. We reweighed and measured him- he had lost a pound and 1/2 " in waist and arms got a little smaller too- that was not the goal of course, he is 9 and growing, but I found it interesting nonetheless. Since that day, he has been nothing excited about doing the WOD with the adults. My boss told him that he had taken his workouts to the next level, and I know that made him feel special and proud.
Here's some pictures of him doing his workout:
What did we gain from this? My son is a tougher person than I thought, I need to read labels closer than I already did, and my son knows how to cook now.
What can you gain? Your kid can survive without sugar, kids have more willpower than we think, you can give them sugar, but notice labels, be aware of what's in your food. The thing I try to live by is moderation. I give them sweets, but in moderation- because I don't want them to be curious later on in life and go on a crazy binge. Be smart and teach your kids to be smart- educate yourself and know why things are bad for you, they are more apt to listen to a solid reason than "it's bad for you".
Tuesday, February 5, 2013
Chocolate swirl "Babka" Buns
Before the summer, my sister-in-law asked me to help her make Babka. I had never heard of it before, so I was up for the challenge. Babka is a yeast dough that is twisted in a high pan with chocolate or cinnamon filling. She had had it at a family party, loved it so much, brought it home and saved it in her freezer for me to try. I actually never got to try it, so I can't say for sure that this is going to satisfy her quest for the matched recipe. But, I can say that I am glad she asked me to make it because these were AWESOME! They are super easy to make and I purposely made them during a week when my kids were too busy eating their favorite cereal to notice what they were missing. Warm them up for 20 seconds in the microwave and they are warm and delicious the next day with your morning coffee.
Just think, melted chocolate smell wafting through your house- whose Valentine wouldn't want to wake up to that smell?
Chocolate Swirl Buns:
Oven: 350'
2 cups flour
1 1/2 tsp yeast
1/2 tsp salt
3 TBSP unsalted butter - room temperature
1/4 sugar
1 egg
1/4 cup milk (whole is best)
Filling:
3 TBSP unsalted butter
1/4 cup sugar
pinch salt
8 oz. semisweet chocolate
1) Combine the flour, salt, and yeast in bowl of mixer with the whisk. Remove the whisk, replace with dough hook.
2) Heat the milk to 90-110', very warm to the touch- I used the microwave for mine. Whisk the egg into the warm milk. Slowly pour the milk/egg mixture into the flour mixture, while mixing with the dough hook on low.
3) Cut the butter into three pieces, add to the mixing dough. Let knead for about ten minutes. The dough will be sticky- that is ok, you do not need to add more flour or the buns won't bake with the same texture.
4) Place dough in a greased bowl, cover with plastic wrap and let rise until doubled.
5) Make the filling- Place the chocolate, salt, and sugar in the bowl of your food processor with the blade in. Pulse until the chocolate is chopped into fine pieces. Add the butter and pulse until the mixture resembles a gritty, crumbly paste.
6) Once dough has doubled in size, place it on a lightly floured surface and let it rest 5 minutes. Grease your muffin pan while you wait- make sure to spray with non-stick spray in the wells.
Roll the dough out into a 12x20 rectangle, it will be very thin. I was worried and didn't roll mine out to the full size. Spread the filling all over the dough, but stay 1/2" away from all the edges-otherwise it will overflow in the oven and smell like burnt chocolate. With your hands on the short (12") edge, roll the dough into a tight log. Pinch the open end down to create a seam. Cut 1" pieces with a serrated knife and place each bun into a well of your prepared muffin pan.
7) Bake in the oven for 18-20 minutes, rotating halfway through.
Adapted from: Smitten Kitchen via Tracey's Culinary Adventures.
Friday, January 25, 2013
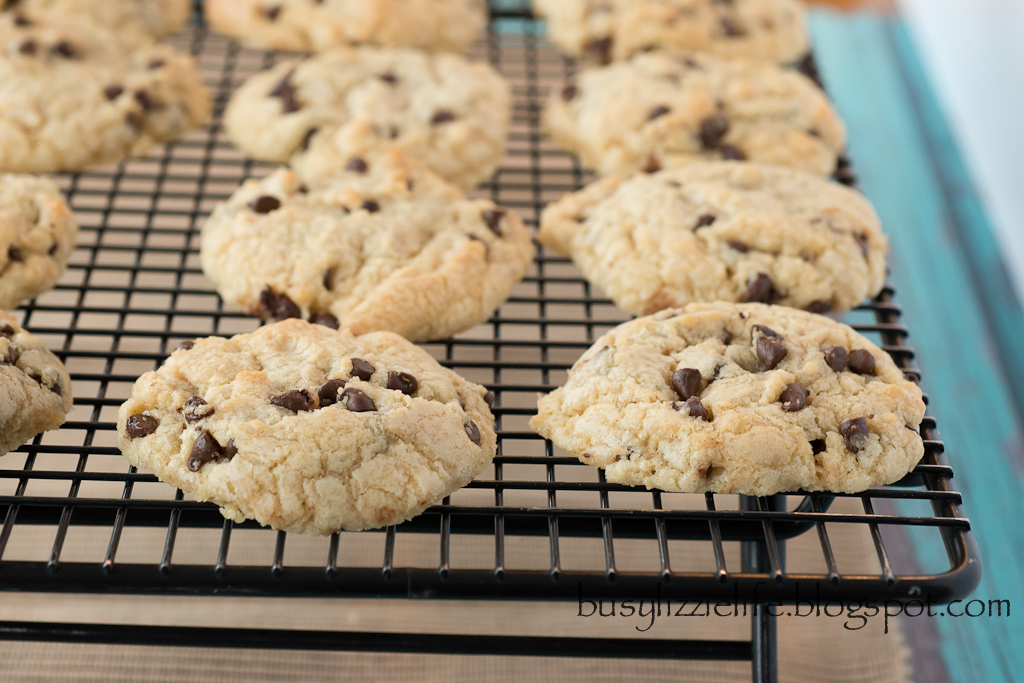
Ultimate Chocolate Chip Cookies
These cookies were so delicious, that the first batch I made was gone the very first day, something that never happens in my house- for real. So, I made another batch the very next day. I hope this is an indication to you of how much we all enjoyed them. The method of making the cookies was different than any other I've made before. You brown the butter first, so you are going in with completely melted butter, which is something that is normally taboo in a cookie recipe. Then you do a mix and rest period- not sure exactly what it does, but the cookies turn out soft, gooey, and great!
I did all this by hand, and normally I won't try a recipe I don't think I can use my mixer with.
Ultimate Chocolate Chip Cookies:
Oven: 375'
1 3/4 c flour
1/2 tsp baking soda
14 TBSP unsalted butter
3/4 cup brown sugar
1/2 cup granulated sugar
1 tsp salt
2 tsp vanilla
1 large egg plus 1 egg yolk
1 1/4 cup semisweet chocolate chips
1) Whisk flour and baking soda together in a medium bowl and set aside.
2) Melt 10 TBSP of the butter in a skillet over medium heat. Cook until butter is browned and has an aroma, about 3 minutes.
3) Transfer browned butter into a large bowl and immediately add the remaining 4 TBSP butter, stir until butter has completely melted. Add brown sugar, sugar, vanilla, and salt to the melted butter and whisk until incorporated.
4) Add egg and egg yolk to butter mixture and whisk for 30 seconds. Set bowl aside to rest for 3 minutes. Then whisk again for 30 seconds. Let it rest for 3 minutes and whisk for 30 seconds 2 more times.
5) Using a spatula, fold the flour mixture into the wet ingredients. Mix until combined. Slowly fold in the chocolate chips. Drop evenly onto prepared baking sheets (I like to use parchment paper). Bake 10-14 minutes, rotating the pan halfway through.
Source: Cook's Illustrated Cookbook
Tuesday, January 15, 2013
Honey Apple Almond Layer Cake
As part of my New Year's Resolutions, I want to continue to get better at food photography. A friend of mine and I decided to do a food photography challenge to hold each other accountable. I had seen another blog that did a challenge where they made every recipe out of a food magazine- while it appealed to me, there are just a lot of recipes, I know I couldn't stomach, particularly those involving seafood. I do want to expand my taste palate, so we are using food magazines as our source, and this month we chose a Honey Apple Almond Layer Cake from the Food Network Magazine. I'm not usually keen on making cakes from magazines- I like to stick to my favorite cook books (Cook's Illustrated, Baked, Pastry Queen)- so not only was this a completely new flavor of cake, it was a new cake recipe source.
My overall review is that the cake came out pretty good. I think it was not as sweet as your traditional vanilla or chocolate cake and for those of you looking for something different, give this a try. My favorite part of the cake was the frosting. It is almond flavored swiss meringue butter cream- for those of you unfamiliar with swiss meringue butter cream, it is a very fluffy light frosting, that you can pile on high without feeling disgusting from the sweetness. However, in this case, the cake was very dense, almost like a pound cake, so if I made the cake again, I would use a thicker frosting, such as a traditional buttercream. The apple butter layer in the middle was not overwhelming and complimented the cake well. I feel like the brushed honey could almost be skipped, I'm not sure it made that much of a flavor difference. I opted to top the cake with cinnamon red hots, because I just thought it would compliment the apple butter, as opposed to slivered almonds.
The thing that excited me most about this cake was frosting it. My husband got me a rotating cake stand for Christmas and I am wondering how I lived without it. It is definitely awesome and any serious cake baker should add it to their wishlist now!
Honey Apple Almond Layer Cake
Oven: 350
Cake:
2 sticks unsalted butter
2 cups all purpose flour
1 TBSP baking powder
1/2 tsp salt
1 1/4 cup sugar
4 eggs
1 TBSP vanilla
1 1/4 cup whole milk
Frosting:
4 egg whites
1 1/4 cup sugar
1 tsp almond extract
1 tsp vanilla
2 sticks unsalted butter (room temp** see note below)
Filling:
3/4 cup apple butter
3 TBSP honey
2 TBSP water
1) Preheat the oven to 350. Grease 2 9" cake pans and line the bottoms with parchment paper.
2) In a medium bowl, whisk together the flour, baking powder, and salt. Set aside.
3) In mixer, beat the butter with the sugar on medium-high until fluffy (~3 minutes). Scrape down the sides of the bowl. Add the eggs one at a time. Scrape down the sides, then beat in the vanilla.
4) In alternating batches, starting and ending with the flour mixture, add in flour mixture and milk. Scrape down sides after last flour addition and give one final mix until smooth- do not overmix or cake will be very dense.
5) Evenly divide the batter in the two prepared cake pans. Bake in oven for 30-35 minutes, rotating halfway through- a cake tester inserted in the center should come out clean. Let cakes cool for a few minutes, then invert to remove cakes and let cool on baking rack.
6) Once cakes are completely cool, make the frosting. In heatproof pan (or double boiler) set over a saucepan of simmering water, whisk egg whites and sugar. Heat until sugar is dissolved and mixture reaches a temperature of 160'. Remove from heat and pour into bowl of your stand mixer with the whisk attachment. Beat on medium high until completely cool and stiff white peaks form- will sort of look like marshmallow fluff. (If you have never made swiss meringue buttercream before, here is a great tutorial/video). Once it is at this stage, switch to the paddle attachment. One TBSP at a time, drop in the butter and beat on medium. Eventually the frosting will thicken like pudding and you will notice a different sound of it slapping against the paddle. After you have added all the butter, scrape down the sides and beat in the almond extract and vanilla.
**If you run into a problem where the frosting is too runny or looks curdled because you did not use room temp butter - like I did- go here to find out how to save your frosting- it saved mine!
7) To assemble the cake, use a bread knife and level off the bottom layer- place it on a plate or cake stand. Heat the honey and water in a saucepan until simmering. Brush half of the honey mixture onto the bottom cake layer. Drop the 3/4 cup of apple butter onto this layer, and spread out to about 1/2" from the edges. Place the top layer of the cake on. Brush the remaining honey onto the top layer. Frost the cake, starting the the sides. Set some frosting aside for decorative edges, if you want.
Source: Adapted from Food Network Magazine, Jan/Feb 2013
Enjoy the cake! If you make it, let me know if you liked it or not.
My overall review is that the cake came out pretty good. I think it was not as sweet as your traditional vanilla or chocolate cake and for those of you looking for something different, give this a try. My favorite part of the cake was the frosting. It is almond flavored swiss meringue butter cream- for those of you unfamiliar with swiss meringue butter cream, it is a very fluffy light frosting, that you can pile on high without feeling disgusting from the sweetness. However, in this case, the cake was very dense, almost like a pound cake, so if I made the cake again, I would use a thicker frosting, such as a traditional buttercream. The apple butter layer in the middle was not overwhelming and complimented the cake well. I feel like the brushed honey could almost be skipped, I'm not sure it made that much of a flavor difference. I opted to top the cake with cinnamon red hots, because I just thought it would compliment the apple butter, as opposed to slivered almonds.
The thing that excited me most about this cake was frosting it. My husband got me a rotating cake stand for Christmas and I am wondering how I lived without it. It is definitely awesome and any serious cake baker should add it to their wishlist now!
Honey Apple Almond Layer Cake
Oven: 350
Cake:
2 sticks unsalted butter
2 cups all purpose flour
1 TBSP baking powder
1/2 tsp salt
1 1/4 cup sugar
4 eggs
1 TBSP vanilla
1 1/4 cup whole milk
Frosting:
4 egg whites
1 1/4 cup sugar
1 tsp almond extract
1 tsp vanilla
2 sticks unsalted butter (room temp** see note below)
Filling:
3/4 cup apple butter
3 TBSP honey
2 TBSP water
1) Preheat the oven to 350. Grease 2 9" cake pans and line the bottoms with parchment paper.
2) In a medium bowl, whisk together the flour, baking powder, and salt. Set aside.
3) In mixer, beat the butter with the sugar on medium-high until fluffy (~3 minutes). Scrape down the sides of the bowl. Add the eggs one at a time. Scrape down the sides, then beat in the vanilla.
4) In alternating batches, starting and ending with the flour mixture, add in flour mixture and milk. Scrape down sides after last flour addition and give one final mix until smooth- do not overmix or cake will be very dense.
5) Evenly divide the batter in the two prepared cake pans. Bake in oven for 30-35 minutes, rotating halfway through- a cake tester inserted in the center should come out clean. Let cakes cool for a few minutes, then invert to remove cakes and let cool on baking rack.
6) Once cakes are completely cool, make the frosting. In heatproof pan (or double boiler) set over a saucepan of simmering water, whisk egg whites and sugar. Heat until sugar is dissolved and mixture reaches a temperature of 160'. Remove from heat and pour into bowl of your stand mixer with the whisk attachment. Beat on medium high until completely cool and stiff white peaks form- will sort of look like marshmallow fluff. (If you have never made swiss meringue buttercream before, here is a great tutorial/video). Once it is at this stage, switch to the paddle attachment. One TBSP at a time, drop in the butter and beat on medium. Eventually the frosting will thicken like pudding and you will notice a different sound of it slapping against the paddle. After you have added all the butter, scrape down the sides and beat in the almond extract and vanilla.
**If you run into a problem where the frosting is too runny or looks curdled because you did not use room temp butter - like I did- go here to find out how to save your frosting- it saved mine!
7) To assemble the cake, use a bread knife and level off the bottom layer- place it on a plate or cake stand. Heat the honey and water in a saucepan until simmering. Brush half of the honey mixture onto the bottom cake layer. Drop the 3/4 cup of apple butter onto this layer, and spread out to about 1/2" from the edges. Place the top layer of the cake on. Brush the remaining honey onto the top layer. Frost the cake, starting the the sides. Set some frosting aside for decorative edges, if you want.
Source: Adapted from Food Network Magazine, Jan/Feb 2013
Enjoy the cake! If you make it, let me know if you liked it or not.
Friday, November 16, 2012
Homemade Oreo Ice Cream
I've been holding out. I've made variations of this ice cream since the spring over and over again, but I have not posted the recipe. It's not that I didn't want to, it's just that 1) the ice cream is so good, it does not last long enough to photograph, and 2) when I do have a bit of it hanging around, I don't have enough time to photograph it the way I'd like.
Tuesday was my daughter's birthday and she asked me to make her some ice cream. I decided to take the new candycane oreos I bought and use them as a mix -in to my favorite vanilla ice cream recipe. The result: AWESOME (although I bet Trader Joe's Candy Candy Jo Jos would be incredible!).
I've been having a hard time finding time to do anything lately and this blog is something I enjoy to help me be me. It seems as though I've let it fall by the wayside and I have TONS of things to share, so hopefully this will springboard me back in the swing of things.
If you get a chance to make this ice cream, it will work well on its own, or with a variety of mix ins, the key is to add the mix-ins at the very end of the ice cream churning process.
Treat yourself today- I know I am- (and tomorrow)!
Oreo Ice Cream-
1 vanilla bean (or 1 TBSP vanilla)
1 3/4 cups heavy cream
1 1/4 cups whole milk
1/2 cup plus 2 TBSP sugar
1/3 cup light corn syrup
1/4 tsp salt
6 egg yolks
1) Split vanilla bean lenghtwise, scrape out seeds. Place vanilla bean pod, seeds, cream, milk, 1/4 cup plus 2 TBSP sugar, corn syrup, and salt in medium sauce pan. Whisk, then heat to about 175' over medium heat.
2) Whisk egg yolks and remaining 1/4 cup sugar in medium bowl. Set aside.
3) When cream mixture has reached 175', remove pan from heat- remove vanilla bean pod. Slowly whisk 1 cup heated cream mixture into the bowl of the egg yolk mixture. This is tempering the egg yolks. Return this tempered egg yolk mixture back to the saucepan with the rest of the cream mixture.
4) Return the cream mixture to medium heat until it registers a temperature of about 180', the mixture will be slightly thickened like custard. Place a fine mesh sieve over a medium bowl- pour the custard mixture through the sieve and collect in the bowl. Let cool to room temp, then cover and refrigerate until completely cool, about 4 hours.
5) Remove custard from refrigerator. Start your ice cream maker, pour custard in, and churn according to directions. When the ice cream is beginning to firm up, before you stop the mixer, chop up the oreos into bite sized pieces and pour into ice cream maker for the last 30 seconds. Transfer ice cream to air tight container and freeze before serving.
Source: adapted from Cook's Illustrated Cookbook
Tuesday was my daughter's birthday and she asked me to make her some ice cream. I decided to take the new candycane oreos I bought and use them as a mix -in to my favorite vanilla ice cream recipe. The result: AWESOME (although I bet Trader Joe's Candy Candy Jo Jos would be incredible!).
I've been having a hard time finding time to do anything lately and this blog is something I enjoy to help me be me. It seems as though I've let it fall by the wayside and I have TONS of things to share, so hopefully this will springboard me back in the swing of things.
If you get a chance to make this ice cream, it will work well on its own, or with a variety of mix ins, the key is to add the mix-ins at the very end of the ice cream churning process.
Treat yourself today- I know I am- (and tomorrow)!
Oreo Ice Cream-
1 vanilla bean (or 1 TBSP vanilla)
1 3/4 cups heavy cream
1 1/4 cups whole milk
1/2 cup plus 2 TBSP sugar
1/3 cup light corn syrup
1/4 tsp salt
6 egg yolks
1) Split vanilla bean lenghtwise, scrape out seeds. Place vanilla bean pod, seeds, cream, milk, 1/4 cup plus 2 TBSP sugar, corn syrup, and salt in medium sauce pan. Whisk, then heat to about 175' over medium heat.
2) Whisk egg yolks and remaining 1/4 cup sugar in medium bowl. Set aside.
3) When cream mixture has reached 175', remove pan from heat- remove vanilla bean pod. Slowly whisk 1 cup heated cream mixture into the bowl of the egg yolk mixture. This is tempering the egg yolks. Return this tempered egg yolk mixture back to the saucepan with the rest of the cream mixture.
4) Return the cream mixture to medium heat until it registers a temperature of about 180', the mixture will be slightly thickened like custard. Place a fine mesh sieve over a medium bowl- pour the custard mixture through the sieve and collect in the bowl. Let cool to room temp, then cover and refrigerate until completely cool, about 4 hours.
5) Remove custard from refrigerator. Start your ice cream maker, pour custard in, and churn according to directions. When the ice cream is beginning to firm up, before you stop the mixer, chop up the oreos into bite sized pieces and pour into ice cream maker for the last 30 seconds. Transfer ice cream to air tight container and freeze before serving.
Source: adapted from Cook's Illustrated Cookbook
Friday, October 5, 2012
Paleo Pumpkin Waffles
So, It's been 3 and 1/2 weeks and I'm still sticking to my paleo challenge. I've had a few small mishaps (on purpose, like milk in my coffee, some things a mom just can't knock), but I am feeling energetic, strong, less hungry, and just great! I can't wait until next Monday to see how my workout compares to four weeks ago. I'm excited to see how much my body has changed too- with the before and after photos.
When I started this challenge, I was worried about what I was going to eat, then I reminded myself of all the things I enjoy cooking. I also remembered I'm getting good and crafty with spices, so creating meat and veggie dishes that are enjoyable to me was not difficult. The one thing I knew I would struggle with was baked goods. Luckily, a member of my crossfit gym pointed me to the blog paleomg. She has lots of muffin and cake recipes that are gluten, dairy, and sugar free. The ones I have tried have been pretty decent, but my absolute favorite find, which will be a keeper once I'm not 100% paleo, and it is these waffles!
Seriously, try them, you'll love them. If you are thinking about being more healthy and trying to be gluten free or just want a new breakfast treat, whip these up, they're easy and tasty!
Pumpkin Waffles:
3/4 cup almond flour
1/2 cup pumpkin puree
1/2 cup shredded unsweetened coconut
1/4 cup coconut milk
2 TBSP pure maple syrup
2 eggs
1/4 tsp baking powder
1/4 tsp baking soda
1/4 tsp salt
1/2 tsp cinnamon
1/2 tsp nutmeg
1/4 tsp ginger
1 TBSP vanilla
1) Plug in waffle iron and preheat.
2) Whisk together almond flour, baking soda, baking powder, salt, cinnamon, nutmeg, and ginger in medium bowl, set aside.
3) In medium bowl, whisk together coconut milk, maple syrup, eggs, pumpkin puree, and vanilla.
4) Fold wet ingredients into dry ingredients. Cook according to your waffle iron directions. I made about 3 and 1/2 belgian sized waffles.
5) Serve with fresh fruit and maybe a drizzle of pure maple syrup. YUM!
source: Paleomg
When I started this challenge, I was worried about what I was going to eat, then I reminded myself of all the things I enjoy cooking. I also remembered I'm getting good and crafty with spices, so creating meat and veggie dishes that are enjoyable to me was not difficult. The one thing I knew I would struggle with was baked goods. Luckily, a member of my crossfit gym pointed me to the blog paleomg. She has lots of muffin and cake recipes that are gluten, dairy, and sugar free. The ones I have tried have been pretty decent, but my absolute favorite find, which will be a keeper once I'm not 100% paleo, and it is these waffles!
Seriously, try them, you'll love them. If you are thinking about being more healthy and trying to be gluten free or just want a new breakfast treat, whip these up, they're easy and tasty!
Pumpkin Waffles:
3/4 cup almond flour
1/2 cup pumpkin puree
1/2 cup shredded unsweetened coconut
1/4 cup coconut milk
2 TBSP pure maple syrup
2 eggs
1/4 tsp baking powder
1/4 tsp baking soda
1/4 tsp salt
1/2 tsp cinnamon
1/2 tsp nutmeg
1/4 tsp ginger
1 TBSP vanilla
1) Plug in waffle iron and preheat.
2) Whisk together almond flour, baking soda, baking powder, salt, cinnamon, nutmeg, and ginger in medium bowl, set aside.
3) In medium bowl, whisk together coconut milk, maple syrup, eggs, pumpkin puree, and vanilla.
4) Fold wet ingredients into dry ingredients. Cook according to your waffle iron directions. I made about 3 and 1/2 belgian sized waffles.
5) Serve with fresh fruit and maybe a drizzle of pure maple syrup. YUM!
source: Paleomg
Friday, September 28, 2012
Homemade Chocolate Drink Syrup
It's no secret, I love cafe mochas! They can get quite expensive, so I make them at home as much as possible. Starbucks used to sell mocha powder, so I could get mine pretty similar tasting to theirs. At the beginning of the summer, I realized that they don't sell the powder anymore and of course, I ran out. I panicked and then I remembered that I had seen a DIY recipe for chocolate syrup on Annie's Eats. I actually like it better in my mochas AND I no longer buy chocolate quik for my kids' flavored milk.
This recipe involved four ingredients and ten minutes of time, it's not much simpler than that! Once you make it, store it in a squeeze bottle in the fridge and you'll have it whenever you need.
Chocolate Syrup:
1 cup unsweetened cocoa powder
1 1/4 cup granulated sugar
1 cup water
pinch salt
2 tsp vanilla
1) Mix cocoa powder, sugar, and salt in medium sauce pan.
2) Whisk in water until no lumps remain. Heat over medium heat to a boil, reduce to a simmer for five minutes, stirring frequently.
3) Remove from heat, let cool five minutes, add in the vanilla, stir. Let cool and store in your favorite squeeze bottle.
Source: 52 Kitchen Adventures via Annie's Eats
Tuesday, September 18, 2012
Cider Glazed Chicken with Apple Shallot Vinaigrette
Soooo, I'm still holding strong on this no gluten, no legumes, no starch, no dairy, no sugar thing. I spent my first week down in the dumps about not being able to bake, but then I started realizing how many dinner recipes I have that I want to try. One thing that I have going in my favor is that I LOVE TO COOK. There are a lot of recipes I have in my folder to try that involve none of the above ingredients. My spirits are raised- I may not be making sweets and fun colored treats to eat, but I am making delicious, healthy meals for my family to enjoy.
This is a recipe that has caught my eye when flipping through my recipe binder several times. Last night, I was planning on making chicken soup, but Dave came home with a gallon of fresh pressed apple cider and it was like fate. This dinner was more than I imagined it would be. The homemade vinaigrette set this over the top! Eating an apple dipped in the vinaigrette, made a sweet taste, almost like I had sprinkled sugar on top of it (yes, I'm getting desperate!). But, seriously, I was surprised by how delicious it was and I was excited when there was enough left over chicken for me to make another salad for lunch the next day. This is a great recipe to try to kick off the fall apple season!
Cider Glazed Chicken:
2 TBSP grapeseed or olive oil
4 boneless chicken breasts
salt and pepper to taste
1/2 cup apple cider
1 TBSP cider vinegar
Apple Shallot Vinaigrette:
1 medium apple (Gala or McIntosh)
1 shallot
3/4 tsp mustard powder
3 TBSP grapeseed or olive oil
2 TBSP cider vinegar
Garnish:
Slivered Almonds
1) Preheat the oven to 400'.
2) Heat an oven safe skillet with 2 TBSP oil in it over medium heat. Sprinkle salt and pepper on chicken. Cook chicken on one side until browned (about 4 min), flip, cook then flip and brown other side. Place pan in oven and bake until chicken is cooked through (12-15 min). When chicken is cooked, remove pan from oven, place chicken on a plate to cool, return pan to a burner for the cider glaze.
3) Mince the apple and the shallot, place in a small bowl. Mix in the cider vinegar and mustard and set aside to marinate, about 10 minutes. After the ten minutes, add in the 3 TBSP oil, season with salt and pepper to taste, mix and set aside for later.
4) In the pan that you placed back on the burner, add the cider- heat over medium heat. Stir the cider, scraping bit off the bottom of the pan. Boil and reduce the liquid by half, about 2-3 minutes. Add the 1 TBSP cider vinegar. Mix, remove pan from heat (optional to swirl in 1 TBSP butter). Set sauce aside until serving.
5) Shred chicken breasts into bite sized pieces- throw them in the pan with the cider sauce, mix it up to coat. Place chicken on top fresh lettuce. Cut the remaining apple into thin slices- place this in the bowl with the chicken and lettuce. Drizzle on the apple shallot dressing. Optional, sprinkle on a handful of slivered almonds.
Source: Bon Appetit November 2011
Hope you like it!
This is a recipe that has caught my eye when flipping through my recipe binder several times. Last night, I was planning on making chicken soup, but Dave came home with a gallon of fresh pressed apple cider and it was like fate. This dinner was more than I imagined it would be. The homemade vinaigrette set this over the top! Eating an apple dipped in the vinaigrette, made a sweet taste, almost like I had sprinkled sugar on top of it (yes, I'm getting desperate!). But, seriously, I was surprised by how delicious it was and I was excited when there was enough left over chicken for me to make another salad for lunch the next day. This is a great recipe to try to kick off the fall apple season!
Cider Glazed Chicken:
2 TBSP grapeseed or olive oil
4 boneless chicken breasts
salt and pepper to taste
1/2 cup apple cider
1 TBSP cider vinegar
Apple Shallot Vinaigrette:
1 medium apple (Gala or McIntosh)
1 shallot
3/4 tsp mustard powder
3 TBSP grapeseed or olive oil
2 TBSP cider vinegar
Garnish:
Slivered Almonds
1) Preheat the oven to 400'.
2) Heat an oven safe skillet with 2 TBSP oil in it over medium heat. Sprinkle salt and pepper on chicken. Cook chicken on one side until browned (about 4 min), flip, cook then flip and brown other side. Place pan in oven and bake until chicken is cooked through (12-15 min). When chicken is cooked, remove pan from oven, place chicken on a plate to cool, return pan to a burner for the cider glaze.
3) Mince the apple and the shallot, place in a small bowl. Mix in the cider vinegar and mustard and set aside to marinate, about 10 minutes. After the ten minutes, add in the 3 TBSP oil, season with salt and pepper to taste, mix and set aside for later.
4) In the pan that you placed back on the burner, add the cider- heat over medium heat. Stir the cider, scraping bit off the bottom of the pan. Boil and reduce the liquid by half, about 2-3 minutes. Add the 1 TBSP cider vinegar. Mix, remove pan from heat (optional to swirl in 1 TBSP butter). Set sauce aside until serving.
5) Shred chicken breasts into bite sized pieces- throw them in the pan with the cider sauce, mix it up to coat. Place chicken on top fresh lettuce. Cut the remaining apple into thin slices- place this in the bowl with the chicken and lettuce. Drizzle on the apple shallot dressing. Optional, sprinkle on a handful of slivered almonds.
Source: Bon Appetit November 2011
Hope you like it!
Friday, September 14, 2012
No Yeast Cinnamon Rolls
Do you have a fear of using yeast? Do you avoid using yeast because of the time it takes to make something with it? Do you love cinnamon rolls? If you have answered yes to all of these questions, put your apron on!
I have seen these cinnamon rolls in my cookbook before and then I saw them online at two different blogs I enjoy reading. It was like someone was telling me to try them. I was a little doubtful since I know I already found the perfect cinnamon roll. But, last Saturday, I was in a rush, and I wanted something sweet and homemade (I'll get to why in a minute). I remembered these cinnamon rolls, and decided to give them a whirl. I've done you all a favor by doing this, because these are easy - anyone can make them, even my younger brother- hint hint!
For the next 28 days, I'm participating in a challenge at my CrossFit gym not to eat sugar, grains, or dairy. So far, I have succeeded (4 days in). These cinnamon rolls, along with pizza for dinner, seemed like the perfect farewell to delicious baked goods for the next month. I only got one, that's how quick my family gobbled them up.
Yes, there is prize money involved in this no eating sugar thing, that's my motivation. I want a new lens for my camera- and to be stronger!
No Yeast Cinnamon Rolls:
Oven: 425'
Dough:
2 cups flour
2 tsp sugar
2 tsp baking powder
1/2 tsp salt
1 1/4 c heavy cream
Filling:
3 TBSP butter, melted
1/3 c brown sugar
1 TBSP cinnamon
Icing:
1 TBSP butter
1 cup confectioner's sugar
2-3 TBSP milk
1/2 tsp vanilla
Adapted from Cook's Country via Brown Eyed Baker
1) Preheat the oven to 425'.
2) Whisk together the flour, sugar, baking powder, and salt. Using a spoon, mix in the heavy cream until incorporated, form dough into a ball, lightly knead on floured surface for about 30 seconds until smooth ball forms. (I did all of this in the kitchen aid mixer). Roll out dough into a rectangle ~9x12. Spread melted butter on top of dough to 1/2" of the edges. Mix together the cinnamon and brown sugar- sprinkle on top of the melted butter.
3) Put your hands on the long side of the dough, tightly roll the dough into a cylinder. Using your fingers, press the top seam closed.
4) Cut out the cinnamon rolls, about 1- 1 1/2" thick -(8-10 rolls, depending how thick you want them). Place the rolls about 1" apart on a prepared greased sheet. I did what she recommended and baked mine in a pie pan, but there were not enough to fill the pan, and mine were close together and they were not round, but kite shaped- I'm using a cookie sheet next time. Space them 2" apart.
5) Bake 18-24 minutes, depending on your oven. Rotate halfway through and check for doneness when tops are golden brown.
6) Cream the butter in a bowl for the icing. Cream in the confectioner's sugar. Add in the vanilla. Slowly add alternating milk and confectioner's sugar, until desired consistency is reached. Drop small scoops of icing on top of hot cinnamon rolls. Use the back of a spoon to spread out the icing.
Only 24 days and I can grab another!
Saturday, August 25, 2012
Sparkling Raspberry Limeade
It's been one hot summer here. For the past ten years, we've experienced hot summers, so the heat doesn't bother me. The shock is that it has been hot since pretty much April, and continues to do so now. One thing I've been trying to do lately is cut back on soda. I usually only drink one pepsi a day, but lately, it's been like 3 a week. I've filled my bubbly drink need by mixing juice with soda water- you get used to it.
My brother used to work at an ice cream shop and one thing I always used to ask him for was a Raspberry Lime Rickey. If I was lucky, he'd bring me one home- I don't think I have had one since he stopped working there, years and years ago. When I saw this recipe in Food Network magazine this summer, I immediately ripped it out. Fresh lime juice and raspberry sauce mixed in with soda water and you have the perfect bubbly fruity drink for a hot hot day. I mix up a batch of the raspberry lime juice and keep it in the fridge, along with a liter of soda water, so when the craving hits, I simply mix up a fresh bubbly glass. If you're having company, you can always mix up all the raspberry lime juice with a liter of soda water in a pitcher for all to enjoy.
Raspberry Limeade:
6 oz fresh raspberries (3/4 cup)
1 cup sugar
1 cup water
1 cup freshly squeezed lime juice (16 small or 6 large limes)
1 liter soda or seltzer water
1) Put raspberries, water, and sugar in a medium saucepan. Heat over medium heat to a simmer, until sugar dissolves. Crush raspberries against the side of the pan to squeeze out the juices. Set aside once sugar is dissolved and let cool to room temperature.
2) Squeeze 1 cup fresh lime juice. Put in medium sized bowl. Once raspberry juice is cooled, strained the seeds and pulp with a fine mesh sieve. Place the sieve over the bowl of lime juice and allow the raspberry juice to pour into the bowl. Mix the raspberry and lime juice together.
3) Get a glass of ice, fill halfway with raspberry lime juice and top off with soda or seltzer water, garnish with a slice of lime and/or raspberries.
Source: Food Network Magazine, September 2012
My brother used to work at an ice cream shop and one thing I always used to ask him for was a Raspberry Lime Rickey. If I was lucky, he'd bring me one home- I don't think I have had one since he stopped working there, years and years ago. When I saw this recipe in Food Network magazine this summer, I immediately ripped it out. Fresh lime juice and raspberry sauce mixed in with soda water and you have the perfect bubbly fruity drink for a hot hot day. I mix up a batch of the raspberry lime juice and keep it in the fridge, along with a liter of soda water, so when the craving hits, I simply mix up a fresh bubbly glass. If you're having company, you can always mix up all the raspberry lime juice with a liter of soda water in a pitcher for all to enjoy.
Raspberry Limeade:
6 oz fresh raspberries (3/4 cup)
1 cup sugar
1 cup water
1 cup freshly squeezed lime juice (16 small or 6 large limes)
1 liter soda or seltzer water
1) Put raspberries, water, and sugar in a medium saucepan. Heat over medium heat to a simmer, until sugar dissolves. Crush raspberries against the side of the pan to squeeze out the juices. Set aside once sugar is dissolved and let cool to room temperature.
2) Squeeze 1 cup fresh lime juice. Put in medium sized bowl. Once raspberry juice is cooled, strained the seeds and pulp with a fine mesh sieve. Place the sieve over the bowl of lime juice and allow the raspberry juice to pour into the bowl. Mix the raspberry and lime juice together.
3) Get a glass of ice, fill halfway with raspberry lime juice and top off with soda or seltzer water, garnish with a slice of lime and/or raspberries.
Source: Food Network Magazine, September 2012
Sunday, August 12, 2012
Blueberry Pie
I've always had fun going blueberry picking and found it to be one of my summer rituals. The only problem with this blueberry picking was that I didn't like to eat the blueberries, just liked to pluck them off the bush. When I was a senior in high school, I did the pie eating contest for my class- it was blueberry pie, and I actually realized that I liked blueberry pie. I've only made a couple in my life, but I've always enjoyed them.
My sister, on the other hand, LOVES blueberry pie and in fact, for her birthday a few years ago, my mom made her a blueberry pie and now every year, she asks for another. Her birthday was a week ago and I know she won't get to eat this pie that I made, but I wanted to make her the blueberry pie that she wanted for her birthday. This pie is so good, I can say that I LOVE it too. The crust is what makes this pie. Take anything you hate or love and roll it up in this crust and it's like a little piece of heaven in your mouth- seriously! Even though my sister can't have a slice of my pie, she can use the recipe to make her own and be assured it's dangerously good!
Top it with some homemade ice cream, and just try to eat one slice, just try!
Blueberry pie:
Oven: 425'
Crust:
3 cups all purpose flour
1 1/2 cups crisco (use crisco not butter)
1 egg
1 TBSP white vinegar
5 TBSP cold water
1 tsp salt
Filling:
2 pints blueberries
2/3 cup sugar
1/3 cup all purpose flour
1 TBSP lemon juice
1) For the crust, using a pastry blender if you have it (or if you're kind of lazy like me, your kitchen aid with the dough hook attached), cut the crisco into the flour until it is crumbly like sand.
2) Crack the egg into a bowl, whisk it, then add it to the flour mix until it is incorporated and mixture is clumpy. Slowly add the 5 TBSP of cold water, the white vinegar, and the salt and mix until incorporated and dough forms a sticky ball.
3) Divide dough into 3 equal sized balls. Place each ball on a piece of plastic wrap, flatten into a small disk, wrap in the plastic, and freeze for 15 minutes. If you forget and leave it in longer, just let it thaw on the counter for a few minutes.
4) Lightly flour the counter and rolling pin. Gently roll the dough into a round that is slightly wider than your pie pan- flip and reflour frequently so dough does not stick to counter. Using the rolling pin, transfer the dough into the pie pan.
5) Prepare the filling: Rinse the berries in a colander. In a medium bowl, mix the flour, sugar, and lemon juice. Add the blueberries in and stir until coated. Pour the filling into the pie pan.
6) Roll out the top crust- if you want to do a lattice like I did, lay out a piece of parchment paper, cut out the strips of dough with a pastry cutter, or a crinkle cutter, or just a pizza cutter for a straight edge. Then weave the strips in and out of each other on the parchment paper. If you are patient, refrigerate it for about 10 minutes to solidify the lattice- or if you are like me and not patient, just quickly flip the parchment paper with the lattice on top of the filled pie to transfer the lattice on. Press the edges together and roll the excess under to give a nice high crust.
7) Bake the pie for 20-30 minutes until crust is golden- at this point, you can put foil around the edges to prevent burning, then cook an additional 15-20 minutes until filling is bubbly. (40-50 minutes total cook time)
8) Let cool before cutting and serving.
Source:
Filling: Fine cooking magazine June/July 2012
Pie Crust: Pioneer Woman
My sister, on the other hand, LOVES blueberry pie and in fact, for her birthday a few years ago, my mom made her a blueberry pie and now every year, she asks for another. Her birthday was a week ago and I know she won't get to eat this pie that I made, but I wanted to make her the blueberry pie that she wanted for her birthday. This pie is so good, I can say that I LOVE it too. The crust is what makes this pie. Take anything you hate or love and roll it up in this crust and it's like a little piece of heaven in your mouth- seriously! Even though my sister can't have a slice of my pie, she can use the recipe to make her own and be assured it's dangerously good!
Top it with some homemade ice cream, and just try to eat one slice, just try!
Blueberry pie:
Oven: 425'
Crust:
3 cups all purpose flour
1 1/2 cups crisco (use crisco not butter)
1 egg
1 TBSP white vinegar
5 TBSP cold water
1 tsp salt
Filling:
2 pints blueberries
2/3 cup sugar
1/3 cup all purpose flour
1 TBSP lemon juice
1) For the crust, using a pastry blender if you have it (or if you're kind of lazy like me, your kitchen aid with the dough hook attached), cut the crisco into the flour until it is crumbly like sand.
2) Crack the egg into a bowl, whisk it, then add it to the flour mix until it is incorporated and mixture is clumpy. Slowly add the 5 TBSP of cold water, the white vinegar, and the salt and mix until incorporated and dough forms a sticky ball.
3) Divide dough into 3 equal sized balls. Place each ball on a piece of plastic wrap, flatten into a small disk, wrap in the plastic, and freeze for 15 minutes. If you forget and leave it in longer, just let it thaw on the counter for a few minutes.
4) Lightly flour the counter and rolling pin. Gently roll the dough into a round that is slightly wider than your pie pan- flip and reflour frequently so dough does not stick to counter. Using the rolling pin, transfer the dough into the pie pan.
5) Prepare the filling: Rinse the berries in a colander. In a medium bowl, mix the flour, sugar, and lemon juice. Add the blueberries in and stir until coated. Pour the filling into the pie pan.
6) Roll out the top crust- if you want to do a lattice like I did, lay out a piece of parchment paper, cut out the strips of dough with a pastry cutter, or a crinkle cutter, or just a pizza cutter for a straight edge. Then weave the strips in and out of each other on the parchment paper. If you are patient, refrigerate it for about 10 minutes to solidify the lattice- or if you are like me and not patient, just quickly flip the parchment paper with the lattice on top of the filled pie to transfer the lattice on. Press the edges together and roll the excess under to give a nice high crust.
7) Bake the pie for 20-30 minutes until crust is golden- at this point, you can put foil around the edges to prevent burning, then cook an additional 15-20 minutes until filling is bubbly. (40-50 minutes total cook time)
8) Let cool before cutting and serving.
Source:
Filling: Fine cooking magazine June/July 2012
Pie Crust: Pioneer Woman
Tuesday, August 7, 2012
S'mores Whoopie Pies
I've been wanting to make this recipe for over a year now. I tend to have recipes in my head and then impulsively decide it is time to make them. Last summer, I decided to make them, but one of the ingredients in the cake part of the pie was Graham Flour. I did not have that, so I could not make them. I finally bought some and then let it sit pretty in the pantry for about six months. It's been so dry here that I wasn't too keen on setting up our fire pit on our sorry looking lawn. When we were having my son's friends over for dinner, I knew these would be the perfect alternative to actual fire roasted s'mores.
The first one I bit into was okay, the next day, I had one for breakfast and it was really good, and finally on the second day- they were AWESOME! Even my husband at first said, they are the second best type of Whoopie Pie I've made, then he changed his mind the second day to the best. I'm not sure what it is, maybe the flavor of the graham flour marinates itself into the cake more as each day passes, but they just kept getting better and better!
If you are looking for a fun summer inspired treat, try these today, they won't disappoint!
S'mores Whoopie Pies:
Oven: 375'
1 1/2 cups graham flour (**)
3/4 cup all purpose flour
1/2 tsp baking powder
1 tsp baking soda
1/2 tsp salt
4 TBSP unsalted butter
4 TBSP shortening (CRISCO)
1 cup brown sugar
2 eggs
1/2 cup buttermilk
2 TBSP milk
1 tsp baking soda
1 tsp white vinegar
1 tsp vanilla
**(If you can't find graham flour, you can use whole wheat flour, I was also thinking part whole wheat/part fine graham cracker crumbs)
Marshmallow Icing:
3/4 cup marshmallow fluff
6 TBSP unsalted butter
1 1/2 cups confectioner's sugar
2 tsp vanilla extract
Chocolate Ganache:
2 oz semi-sweet chocolate
1/4 cup heavy cream
1 TBSP light corn syrup
1) Preheat the oven to 375'. Line a baking sheet with parchment paper and set aside.
2) In a bowl, whisk together graham flour, all purpose flour, baking powder, 1 tsp baking soda, and salt. Set aside
3) Cream butter, shortening, and brown sugar in bowl of mixer with paddle attachment. It should be light and fluffy. Scrape down sides, add in eggs, mix, then add in butter milk, mix, then scrape sides again.
4) In a liquid measuring cup, mix 1 tsp baking soda, milk, and white vinegar. Add this mixture to the mixing bowl, along with the flour mixture. Mix on low until combined. Add in vanilla, mix on medium for about two minutes, scrape down sides, and mix once more.
5) Using a spoon, drop batter onto prepared cookie sheet. Leave about 2 inches in between each. Bake 10-12 minutes, rotating sheet halfway through. Tops will be golden brown. Let cool and remove to a wire baking rack. Let cool completely before filling. I was able to make 36 cookies, which makes 18 whoopie pies.
For the Marshmallow Icing:
1) Beat Marshmallow fluff and butter in mixing bowl with paddle attachment. Add in powdered sugar and vanilla, mix about 3-4minutes on medium until light and fluffy. Using a spoon, scoop a dollop of icing into the center of a cookie. Use the back of the spoon to spread it out to the edges of the cookie- repeat until you have half the cookies frosted. **You could also use straight up Marshmallow fluff in a pinch.
For the Chocolate Ganache:
1) Break up 2 oz chocolate (I used Ghiradelli semi-sweet). Place the chocolate in a heatproof bowl. Heat cream in small saucepan until boiling. Remove and pour over the chocolate. Let this sit for about 5 minutes while the chocolate softens. Using a whisk, stir the chocolate and cream until combined and smooth. Add corn syrup, whisk to combine and let sit about 5 minutes. Scoop a small amount of chocolate onto the marshmallow icing on the cookie- use the back of the spoon to spread it out. Place a top on the cookie and you have a whoopie pie ready to eat!
Source:
Graham Whoopie Cake adapted from Whoopie Pies by Sarah Billingsley and Amy Treadwell
Marshmallow Icing adapted from How Sweet Eats
Chocolate Ganache adapted from Pastry Queen by Rebecca Rather
Which one do you want?
The first one I bit into was okay, the next day, I had one for breakfast and it was really good, and finally on the second day- they were AWESOME! Even my husband at first said, they are the second best type of Whoopie Pie I've made, then he changed his mind the second day to the best. I'm not sure what it is, maybe the flavor of the graham flour marinates itself into the cake more as each day passes, but they just kept getting better and better!
If you are looking for a fun summer inspired treat, try these today, they won't disappoint!
S'mores Whoopie Pies:
Oven: 375'
1 1/2 cups graham flour (**)
3/4 cup all purpose flour
1/2 tsp baking powder
1 tsp baking soda
1/2 tsp salt
4 TBSP unsalted butter
4 TBSP shortening (CRISCO)
1 cup brown sugar
2 eggs
1/2 cup buttermilk
2 TBSP milk
1 tsp baking soda
1 tsp white vinegar
1 tsp vanilla
**(If you can't find graham flour, you can use whole wheat flour, I was also thinking part whole wheat/part fine graham cracker crumbs)
Marshmallow Icing:
3/4 cup marshmallow fluff
6 TBSP unsalted butter
1 1/2 cups confectioner's sugar
2 tsp vanilla extract
Chocolate Ganache:
2 oz semi-sweet chocolate
1/4 cup heavy cream
1 TBSP light corn syrup
1) Preheat the oven to 375'. Line a baking sheet with parchment paper and set aside.
2) In a bowl, whisk together graham flour, all purpose flour, baking powder, 1 tsp baking soda, and salt. Set aside
3) Cream butter, shortening, and brown sugar in bowl of mixer with paddle attachment. It should be light and fluffy. Scrape down sides, add in eggs, mix, then add in butter milk, mix, then scrape sides again.
4) In a liquid measuring cup, mix 1 tsp baking soda, milk, and white vinegar. Add this mixture to the mixing bowl, along with the flour mixture. Mix on low until combined. Add in vanilla, mix on medium for about two minutes, scrape down sides, and mix once more.
5) Using a spoon, drop batter onto prepared cookie sheet. Leave about 2 inches in between each. Bake 10-12 minutes, rotating sheet halfway through. Tops will be golden brown. Let cool and remove to a wire baking rack. Let cool completely before filling. I was able to make 36 cookies, which makes 18 whoopie pies.
For the Marshmallow Icing:
1) Beat Marshmallow fluff and butter in mixing bowl with paddle attachment. Add in powdered sugar and vanilla, mix about 3-4minutes on medium until light and fluffy. Using a spoon, scoop a dollop of icing into the center of a cookie. Use the back of the spoon to spread it out to the edges of the cookie- repeat until you have half the cookies frosted. **You could also use straight up Marshmallow fluff in a pinch.
For the Chocolate Ganache:
1) Break up 2 oz chocolate (I used Ghiradelli semi-sweet). Place the chocolate in a heatproof bowl. Heat cream in small saucepan until boiling. Remove and pour over the chocolate. Let this sit for about 5 minutes while the chocolate softens. Using a whisk, stir the chocolate and cream until combined and smooth. Add corn syrup, whisk to combine and let sit about 5 minutes. Scoop a small amount of chocolate onto the marshmallow icing on the cookie- use the back of the spoon to spread it out. Place a top on the cookie and you have a whoopie pie ready to eat!
Source:
Graham Whoopie Cake adapted from Whoopie Pies by Sarah Billingsley and Amy Treadwell
Marshmallow Icing adapted from How Sweet Eats
Chocolate Ganache adapted from Pastry Queen by Rebecca Rather
Which one do you want?
Wednesday, July 11, 2012
Simple Cream Scones with Brown Sugar Cinnamon Butter
Here's some news to some people: My husband is the scone baker in our house. When I left Japan in 2007 for several months to have my daughter, he took up scone baking as a hobby, and yes, he's good at it. He has gotten his scone making down to a science, from freezing the butter, to grating it, and carefully cutting it into the dough. However, since we've moved into our new house, he has not made them.
A few months ago, I found a recipe online for chocolate biscuits with brown sugar cinnamon butter. It was a day when I was craving a homemade bakery type breakfast treat. One of my sons just loved them and has been begging me to keep making them. I didn't want to keep having chocolately breakfasts, so I pulled out my trusty Cook's Illustrated Cookbook to find a recipe for plain scones that I could top with this butter. The recipe is simple, tasty, and quick to prepare. The scones come out light and cakey on the inside and have a slight crisp shell, reminiscent of a thin shortbread cookie.
I recently made some homemade raspberry jam and strawberry too- they go perfectly on top of these scones for an easy on the go breakfast! One day, I actually timed myself making them, from getting the ingredients out, to putting them in the oven- it was less than ten minutes!
Simple Cream Scones:
Oven: 425'
2 cups all purpose flour
3 TBSP sugar
1 TBSP baking powder
1/2 tsp salt
5 TBSP unsalted butter
1 cup heavy cream
1) In bowl of food processor**, pulse the flour, sugar, baking powder, and salt. Cut the butter into 5 pieces, add them into the flour mixture, pulse until it has been incorporated and the mixture resembles coarse sand.
2) Add cream and pulse until the mixture just forms a ball. Remove dough from food processor, using hands, form into a ball. Place dough ball on lightly floured counter top, roll or pat into a 9" circle. Cut into 8 wedges.
3) Place the scone wedges on a baking sheet, lined with parchment paper, and bake 12-15 minutes (until tops are golden brown).
**If you don't have a food processor, you can do it in the kitchen aid with the paddle, or by hand and use a pastry blender or fork to cut the butter in.
Brown Sugar Cinnamon Butter:
1/4 cup (1/2 stick) butter, softened
1 1/2 TBSP brown sugar
1/4 tsp cinnamon
1) When butter is soft enough to mash with a spoon, mix in brown sugar and cinnamon until well combined. Serve immediately with hot scones or biscuits. If serving later or to store, spread the butter in a line across a piece of plastic wrap, roll up and form into a log. Freeze, then cut into small circular pats of butter.
Wednesday, June 27, 2012
Chocolate Glazed Funfetti Birthday Donuts
Before I say anything, I have two words about these donuts: WICKED. GOOD.
Ok, so, these donuts. I found them a few weeks ago, actually, I made them on Mother's Day for breakfast. I figured it'd be a fun breakfast for the kids to butter them up for some good behavior since Dave was out of town. I also figured they'd be easy for me to dissolve in my mouth since my wisdom teeth had only been out for two days at that point. They were so good, but it was hard to enjoy without being fully able to chew them.
My son's sixth birthday was yesterday and I was feeling so guilty because of the 26 birthdays I have celebrated with my children so far, I have never ever missed one. I had class last night so I wasn't going to be home for cake. Even though he had a friend party Sunday and we were having whoopie pies before I left for class, I still wanted to do something extra special for my little guy. I knew that seeing a giant plate of these on the table would make any birthday boy feel special and after a few bites (donuts), I wasn't feeling so guilty anymore.
Besides the obvious tastiness of the donuts, they are baked not fried- Happy Birthday to everyone on that !
Chocolate Glazed Funfetti Donuts:
Oven: 425'
Donuts:
1/2 cup butter (1 stick)
1 cup sugar
3 egg whites
1/2 TBSP vanilla (~2tsp)
1 cup all purpose flour
1/2 cup cake flour
1 tsp baking powder
1/3 cup milk
1/3 cup your favorite sprinkles
Glaze:
1 1/2 cups confectioner's sugar
3 TBSP cocoa powder
3 TBSP milk (or more depending how thin you want your glaze to be)
1 1/2 tsp vanilla
1) Preheat oven to 425'. Spray your donut pan with non-stick cooking spray. (I'm usually not a cooking spray fan, but for the donut pan, trust me, it's easier).
2) Cream butter and sugar in bowl of mixer with paddle attachment on medium, until light and fluffy.
3) Separate egg whites into a small bowl. Add egg whites and vanilla into bowl with butter and sugar. Mix, then scrape down sides.
4) In medium bowl, combine flour, cake flour, and baking powder. Alternately with the milk, add the dry ingredients to the mixing bowl in two additions. Scrape down sides. Add in sprinkles, lightly mix until combined.
5) For easiest method of filling the donut pan, I put the batter into a piping bag with the largest tip opening I have. You can also put it in a ziploc bag and cut off the corner. Pipe a small circle of batter into each donut well (1/2 full height-wise).
6) Bake 7-9 minutes (I used a mini donut pan, so I did 7 minutes). Let cool about 5 minutes. Remove donuts from pan, regrease, add more batter, and bake some more.
7) While donuts are baking, prepare the glaze, by whisking all ingredients together until smooth. Dip the top of a warm donut into the glaze. Sit on a plate or cooling rack and shake on some sprinkles.
Yield: 40 mini donuts
Source: Sugarcrafter
For a little extra something something, serve the milk in ice cream sundae glasses. Your kids will not care if you're not home on their bday night for sure!
We heart these donuts!


Ok, so, these donuts. I found them a few weeks ago, actually, I made them on Mother's Day for breakfast. I figured it'd be a fun breakfast for the kids to butter them up for some good behavior since Dave was out of town. I also figured they'd be easy for me to dissolve in my mouth since my wisdom teeth had only been out for two days at that point. They were so good, but it was hard to enjoy without being fully able to chew them.
My son's sixth birthday was yesterday and I was feeling so guilty because of the 26 birthdays I have celebrated with my children so far, I have never ever missed one. I had class last night so I wasn't going to be home for cake. Even though he had a friend party Sunday and we were having whoopie pies before I left for class, I still wanted to do something extra special for my little guy. I knew that seeing a giant plate of these on the table would make any birthday boy feel special and after a few bites (donuts), I wasn't feeling so guilty anymore.
Besides the obvious tastiness of the donuts, they are baked not fried- Happy Birthday to everyone on that !
Chocolate Glazed Funfetti Donuts:
Oven: 425'
Donuts:
1/2 cup butter (1 stick)
1 cup sugar
3 egg whites
1/2 TBSP vanilla (~2tsp)
1 cup all purpose flour
1/2 cup cake flour
1 tsp baking powder
1/3 cup milk
1/3 cup your favorite sprinkles
Glaze:
1 1/2 cups confectioner's sugar
3 TBSP cocoa powder
3 TBSP milk (or more depending how thin you want your glaze to be)
1 1/2 tsp vanilla
1) Preheat oven to 425'. Spray your donut pan with non-stick cooking spray. (I'm usually not a cooking spray fan, but for the donut pan, trust me, it's easier).
2) Cream butter and sugar in bowl of mixer with paddle attachment on medium, until light and fluffy.
3) Separate egg whites into a small bowl. Add egg whites and vanilla into bowl with butter and sugar. Mix, then scrape down sides.
4) In medium bowl, combine flour, cake flour, and baking powder. Alternately with the milk, add the dry ingredients to the mixing bowl in two additions. Scrape down sides. Add in sprinkles, lightly mix until combined.
5) For easiest method of filling the donut pan, I put the batter into a piping bag with the largest tip opening I have. You can also put it in a ziploc bag and cut off the corner. Pipe a small circle of batter into each donut well (1/2 full height-wise).
6) Bake 7-9 minutes (I used a mini donut pan, so I did 7 minutes). Let cool about 5 minutes. Remove donuts from pan, regrease, add more batter, and bake some more.
7) While donuts are baking, prepare the glaze, by whisking all ingredients together until smooth. Dip the top of a warm donut into the glaze. Sit on a plate or cooling rack and shake on some sprinkles.
Yield: 40 mini donuts
Source: Sugarcrafter
For a little extra something something, serve the milk in ice cream sundae glasses. Your kids will not care if you're not home on their bday night for sure!
We heart these donuts!


He could barely wait til I was done taking pictures to eat one:
Subscribe to:
Posts (Atom)