A few weeks ago, I gave myself some time to go back on pinterest and peruse my favorite blogs. I got sad by all the awesome stuff I saw people somehow finding the time to make that I could not. The good thing was it got the wheels in my brain turning and kept my thoughts inspiring me. I was particularly inspired by a series one blogger did for making kids' clothes and the challenge was to sew for one hour a day. I want to do that!
Now, that Christmas is about a month away, I want to devote more of my free time to my sewing machine. I have heard my oldest son say three times recently how he loves the homemade gifts I've made him and that he especially loved that because I made them, I'd be less likely to throw them away and he could keep them longer. I gave each of my kids a choice as to what homemade gift they'd like me to make them- this son: a secret room (we'll see about that). There's some things they won't get a choice in like the clothes I am making them.
I was telling my sister how I wanted to do more homemade and I know from year's past, that I need to start early if I want to finish my projects on time and not be rushing and stressed out. She was telling me the thing she'd like to make is pants for my niece. This got me inspired to incorporate not only an hour of sewing a day, but a week's worth of pants tutorials. Today I'm featuring a simple way to make girls' jersey knit leggings.
These leggings posted today are something I've been wanting to make FOREVER, but just never set aside the time. They were super easy and I LOVE LOVE how they came out. This pair of leggings was two pieces of fabric and took me 1 hour 5 minutes to make (I timed it)- that was with a few distractions from the kids along the way- best part?: NO PATTERN! Whenever I make pants, I usually do not use a pattern, but I usually have four pieces of fabric, so this was a little new for me and even easier than I could imagine. I was inspired to use this method by a post on
make it and love it blog.
To start off, get a piece of jersey knit fabric, about 1/2 yard if the print goes any which way (this was for a size 5/6) AND a pair of your daughter's leggings that currently fit. Fold the fabric in on itself- just wide enough to lay the leggings on so you can trace them.
1) You want to place the leggings on the folded edge of the fabric- be sure to smooth them out and position them so the seams are flat. Using a kids' washable marker, trace around the leggings, leave about 1/4-1/2" border for your seam. On the bottom, you can leave more room if you want the leggings a bit longer and at the top, leave about 1 1/4" extra space, this is to make the waist band. (See the faint black line in photo 1 above- Also, the black pants are on the folded edge, for some reason, there was a piece of white paper under part of the fabric, so much for contrast.).
2) Cut out your first piece. Fold the fabric in again. Place the first cut out piece on the fold and cut out around it. Now you have your two pieces and you are ready to sew!
3) Open the two cut pieces and lay them on top of each other, right sides together.
4) Sew along the curved edges on the right side and then on the left side. You have now created the front and back seams. Jersey fabric will not fray- so do not worry about serging. I do not have a serger, but for extra strength, since kids are rough on their clothes. I went along the first stitch again with a zigzag stitch.
OK, just realized that I numbered the second picture 1, 2, 3, 4 as well- that's what I get for writing this at 5:30 am. So, I'll write the steps 1, 2, 3, 4 for this picture, just remember which picture you are following.
1) Open the pants up and lay them so the two seams you just sewed are on top of each other and you make a pants shape. Lay flat and line up the inside pant legs.
2) Sew along the inside pants legs, then to reinforce the stitch since this is the crotch, go back over with a zig zag.
3) Iron up a hem on bottom, about 1/4", then stitch and zigzag here again. You'll notice in some of my pictures, Hazel's looks a little ruffly. I did my zigzag stitch right at the edge instead of 1/4" up and it gave it that ruffled look.
4) Iron the waistband edge down 1/4" and then fold down again 1". Press. This will create a closed clean edge for your waist band. Sew along the lower edge of the waist band, but leave a 2" opening, so you can thread in the elastic waist band.
5) Measure your child's waist, cut a piece of elastic that size and thread it in through the waist band. I have a giant plastic needle that I use to pull the elastic through, makes life much easier. You can get those kid's crocheting needles at craft stores- I highly recommend it! Slightly overlap the ends of the elastic, pin them, and sew back and forth over them to keep them together. Pull the elastic back into the waistband and sew closed the opening that you pulled it through. You are done!
The front:
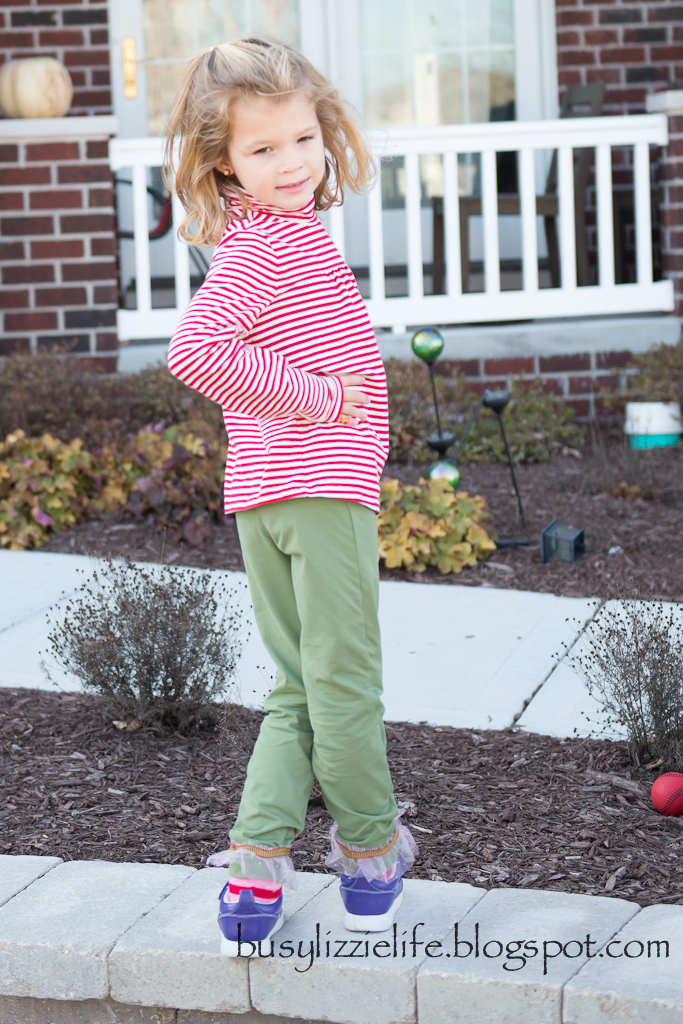
The back:
These are not only fun to wear alone, but under skirts- yes I know she has matching issues, what can I say- she marches to the beat of her own drum!:
Plenty of stretch for hours of play: