Tuesday, January 31, 2012

DIY Tutu Organizer Kids' Shelf

OK, you can totally tell I had a lot of boys before I had a daughter.  She has a LOT of tutus.  And, no I don't force them on her, she loves to wear them, I just might have gone overboard on the number I bought.  They are very puffy and take up a lot of room, drawer space is limited, so this is where I've been storing them.
Last fall, I began searching for ideas how other people stored tutus and found nothing.  In the process, I came up with my own idea (I have had the materials since last October, just finally got around to doing it last weekend).

I started with a photo ledge that I bought at IKEA for $10:
I took some old dolls and had my husband screw them on to the front of the shelf (my plan was to have them seated on the shelf and their legs would hold the stuff up, but he didn't like the idea of them sitting with their legs open and the glue took too long to dry.  Another idea my dad had was adhesive velcro so you can change out the toy if you want):
The original idea was for the arms to hold up the stuff, but the arms are movable and the weight of the tutus make them fall down to the dolls' sides.  So, I used drapery clips and hung them on the wings of the dolls, then, clipped the tutus to them.
Rapunzel is dual purpose, her hair is housing some of our favorite barrettes:
Not only can we hang stuff from the front, but we can put stuff on the shelf:
Princess peach seriously looks frightened that she's going to fall off.

Saturday, January 28, 2012

Kid Friendly Letter Writing Center

This has been on my "to do list" for over three years now.  We have always lived apart from our families, and I thought having a special place set up for the kids to write letters to their family and friends that live far away was essential.

I have always been a letter writer.  I have so much stationery that I could probably write a letter a day to everyone I know for a year and still not be out of it.  We rarely buy cards. I encourage the kids to make their own, so for the little ones that can't spell yet, I am constantly telling them what to write and how to spell it.

Last year, when shopping for homeschool stuff, one of the main things I wanted to buy for my second grader was a book of letter writing etiquette.  I searched online and went into a few teaching stores, and such an item was not available.  I had the idea to make my own basic templates, but never sat down to do it.

I am currently taking an e-course at Playful Learning Spaces to help me create playful spaces for my kids throughout the house and as a major motivator to unpack.  My first week was very successful because it motivated me to finally create this letter writing center for the kids.  About two weeks ago, I saw a similar idea on pinkandgreenmama blog, which made me want to make mine even more.

The idea is to create places the are fun and inviting to the kids where they want to sit and create.  This is great because they have all the things they need to do it on their own, while I'm cooking dinner or changing the baby ;)

In the letter writing center, I included normal and very small sized notecards.  The very small ones are for our Valentine's mailboxes that I posted about earlier in the week.  The kids are SOOO excited to use them and get mail.  The normal ones are for sending to family and friends.  We love getting mail, but so do other people- sometimes if you want to get mail, you've got to send it.  We love supporting the US Postal Service because we have a lot of family members (a lot) that work for them !

Here's a quick tour:
In the top left, I hung a calendar, family and friend's birthdays are marked down so the kids can decide if they want to send someone a card.
I used a five drawer organizer that I had from homeschooling, you can get them at Target, Michael's, JoAnn's for around $12.  I used adhesive velcro to attach the labels to the drawers.

Here's a close up of some of the drawers:
Stickers- we use them to decorate homemade cards and the outsides of envelopes.  For the time of year, I only put out Valentine's and Birthday stickers:
Mini notecards:
The top drawer houses our Addresses.  I created a 4x2 table in power point and put a picture and the name of the people in the picture in each grid.  After I printed the pictures, I turned the paper over and printed the addresses on the backs.  (If you do this, when creating the tables, whoever is on the right in the picture table, their address would be typed in on the left in the address table, remember it will print on the opposite side when printing on the back).
I cut the pictures out and laminated them.  I placed them all in the top drawer, now readers and non-readers can identify who they want to write to.  There are family and friends new and old included.

On the top of the organizer, I put laminated letter writing templates.  Sorry about the shot, I tried to rotate it and it was making me sick to look at it.  I didn't have time to take another photo.   There are templates for birthday, thank you, miss you, congratulations, and a general letter.
An envelope guide:
A caddy full of writing and coloring supplies:
A box full of pretty blank cards.  We reused a cardboard box that our garbage bags came in to make this from scrapbook paper and ribbon.
The front white cards are homemade from my kids' artwork.  I scan in the pictures, save them as jpeg, then I paste them into power point to make the cards.  In the bottom right hand corner of each, it says "from the desk of...." The kids have been eyeballing these all week! (These would also make great homemade gifts!)
Under the table where the writing center is, I put a basket of books about mail:

Dear Mrs. LaRue
Millie Waits for the Mail
The Jolly Postman
Click Clack Moo, Cows that Type
The Post Office Book

I hope this inspires you to create something great in your house too.

Thursday, January 26, 2012

DIY Valentine's Mailboxes

About a month ago, I began to have Valentine's Day on the brain.  I went crazy pinning stuff on my pinterest board that I wanted to make.  One thing in particular was these Valentine's mailboxes.

Um, who doesn't love opening up the mailbox and finding a crisp envelope - preferably a colored envelope, with a real stamp on it,  and handwritten addressed to you?  OK, I sound desperate, but sorry, it's sad getting so much junk mail and catalogs and nothing fun.

If the mail isn't coming to us, we'll send it to ourselves for now.  So, the day after I pinned them, I went to Target dollar bin and bought 7 mailboxes.  I didn't have much choice in the colors, all they had was turquoise and white ones.

The next day, we went to Goodwill and for the first time, instead of dropping stuff off, we went in.  We got seven candle sticks for $0.99 each!
I let Hazel choose the paint colors, and just like I would have, she chose rainbow colors.
She painted all the candle sticks by herself, it took about two weeks to finish - we've been busy.  We did all surfaces, wood, metal, and glass with the acrylic paints we had- we did not sand or prime any of them.
I hot glued all the mailboxes onto the stands.
I cut out letters for their initials out of the scrapbooking paper that I've had laying around for 8 years, thinking it'll actually make it into an album - chuckle!  In my perfect world, I would have done all solids- doesn't this one look so nice?
But they are for the kids, so I let them choose which paper they wanted me to use.

Except dad, I chose his ;)
There have been many communal gatherings around these lately, wondering when we can use them. I think I have created a monster here.
When will I open mine and find something inside?
Send my kids some mail already!

This project has motivated me to finish something I've wanted to do for the kids for the past three years.  Stay tuned tomorrow to see the new Letter Center I made for the kids.

Tuesday, January 24, 2012

Busy Cooking: Fluffernutter Cupcakes

You're Welcome!

Growing up in Massachusetts, fluffernutter sandwiches were a staple.  The fluff is in the aisle with the peanut butter.

I spent a summer studying at Duke, there was no fluff!  Yes, my mom sent an emergency package of fluff to me.  Living in the midwest now, there is fluff, but not in the peanut butter aisle- in the baking aisle.

Sometimes, it's not fluff, it's marshmallow kreme.  I only eat fluff.

Yesterday, Hazel ate our last cupcake after lunch.  I said "I wish I had a cupcake", she said "Why don't we make some more?".

I checked the clock, we had 30 minutes until Maeve's doctor appointment.  There was time.  I looked at my cake stand that I got for Christmas.  It is illegal to keep a cake stand empty.
I went to look up some other cupcakes I wanted to make and got sidetracked by these.

Make them, you'll love them- even if you have to use Marshmallow Kreme.

I found the recipe on How Sweet It Is blog, and the recipe listed below is a half batch, which yielded 20 mini cupcakes (or 8 large).  I also cut the amount of butter in the icing.

Fluffernutter Cupcakes:

Oven:  350'

Cupcakes:
2 TBSP unsalted butter (1/8 cup)
1/4 cup creamy peanut butter
1/2 cup sugar
1 egg
1 tsp vanilla
3/4 cup flour
1/2 + 1/8 tsp baking powder
3 TBSP milk
1/4 cup peanut butter chips (I omitted because I didn't have any)
1/3 cup marshmallow fluff

Peanut butter Filling:
1 TBSP butter
1/8 cup creamy peanut butter
1/2 tsp vanilla
1/4 + 1/8 cup powdered sugar
1 TBSP milk (more if needed)

Marshmallow Frosting:
4 TBSP (1/2 stick) unsalted butter
2 tsp vanilla
3/4 cup marshmallow fluff
1 1/2 cup confectioner's sugar
2-3 TBSP milk (to reach desired consistency)

1) Preheat oven to 350 and put liners in cupcake pans.

2) In bowl of mixer, cream peanut butter and butter until smooth and fluffy.  Beat in sugar, egg, and vanilla until fluffy.  Scrape down sides.

3) In small bowl, mix together flour and baking powder.  Add half of the dry ingredients to the mixer bowl, mix until combined.  Scrape down sides.

4) Add milk to mixer bowl, mix until combined.  Add remaining dry ingredients.  Mix until combined, scrape down sides.

5) Fold in fluff and peanut butter chips (if using).

6) Fill liners of cupcake pans about 2/3 full.  Bake 12-14 minutes for mini cupcakes, 17-21 for large.  Rotate pans halfway through.

7) Let cupcakes cool completely.

8) Make filling.  Put peanut butter and butter in a bowl, beat with electric mixer.  Add in vanilla and confectioner's sugar.  Beat again- it will be dry and crumbly.  Add milk to reach a thick, sticky consistency like  oatmeal.

9) Once cupcakes are cooled, cut a circle out of the top, scrape off the bottom of the circle to remove cake from center of cupcake. Fill the well with peanut butter filling, place the top back on the cupcake.

10) Prepare the frosting.  Beat butter in bowl of mixer until fluffy.  Add in marshmallow fluff and beat again for 2-3 minutes (important to do).

11) Add vanilla, beat.  Add confectioner's sugar on low until combined.  If it seems too thick (mine did), add in milk 1 TBSP at a time, you want it to be thin enough to pipe out but thick enough to hold its shape.  I added about 2 TBSP milk.  Beat again 2-3 minutes!  (make sure to do this, at first I didn't, and my frosting didn't seem right, so I put it back in and beat it for 3 minutes on medium high and it was much tastier and fluffier).

12) Put 2-3 TBSP peanut butter in ziploc, microwave for 25-30 seconds, cut a small hole in the corner and drizzle on tops. (optional).
But seriously, it takes them to the next level, if there is one.

13) Try to stop yourself from eating them all.

Gratitude Journals

The other day I was talking with some friends about whether or not our kids really appreciate things they have.  One friend suggested starting a gratitude journal.  I thought that would be an excellent activity for my kids.  As soon as I left the house, I went straight to Barnes and Noble to look for some cool journals.

All the day planners and calendars are 75% off right now!  Hello!, can they be more perfect, there's a space for every single day of the year, most of them even have lines.

Here's the idea:  each night, to keep the kids occupied while I'm getting dinner on the table, they will write two things from the day that they are thankful for.  I even got one for Dave and I.  Not only is this giving them an opportunity to really think about things large and small that they might be thankful for, it helps them practice writing, it is a conversation starter when they read them aloud at dinner, and it gives me a little peace while I'm getting the food out.

Actually, yesterday I was also challenged by another friend to really listen to people and figure out what they need without just assuming you know.  Seeing what they are thankful for versus what I think they should be will be an interesting way for me to learn more about my family.

Last summer, I started the name journals with my kids.  These would also make excellent journals for practicing name and phone number writing on a daily basis.  For the price I paid, you can't beat it.  If you miss them this year, write yourself a note to hit up the sale next year.

Hazel is the most excited about hers.  It came with a bookmark, stickers, note paper, and photo pockets.  She was absolutely thrilled (and I love the Japanese theme):
I write the words, then she copies:
Nathaniel is very interested in elements, could this be more perfect?  A different element a day:
Addison can write in sentences:
and Owen is almost there:
And today I'm thankful for a caring and helpful husband and five healthy kids.  What about you?

Saturday, January 21, 2012

Busy Cooking: Homemade Four Cheese Ravioli

Repeat after me, "I will never buy store bought ravioli again!".

OK, fine, I know that's impossible to say, but after trying this homemade version (pasta and all), I can't imagine a better tasting ravioli (even at a restaurant).

I have been wanting to try making homemade pasta for a long time, but it just seemed like something that was completely impossible to do, or at least too advanced for me.  Guess what?  It couldn't be easier and it  doesn't require that many ingredients.

I have been eyeballing and wishing for the pasta maker attachment for my kitchenaid for some time now.  I finally got some money for Christmas, found it on sale at Macy's, and bit the bullet.  So far, I made spaghetti and now ravioli.  Both times, I pretty much used the same pasta dough recipe, except this time, I used a special flour for pasta.  I was at the grocery store looking for Semolina flour, which is necessary for the pasta, and this italian woman pointed to a bag of flour that said "00".  Evidently it is very popular for pasta making in Italy- I'm not sure you can find it in your local store, I was in a special store like Whole Foods.  Never fear, you can use part all purpose, part semolina if you can't find the "00".

The recipe I used was a combination of what I found in Gourmet cookbook, and on Annie's Eats.  I always do a google search for a new recipe because I like to see someone else who has made it and their honest opinion on the results.  I have never made anything from the Gourmet cookbook, so I was a little leary, but their recipe and the one on Annie's Eats were very similar.  The Gourmet cookbook mentions the "00" is low in protein and gluten so it produces a softer pasta.  They said the closest flour to that in the US is all purpose, but you can add part or all cake flour to produce a lighter fluffier pasta.

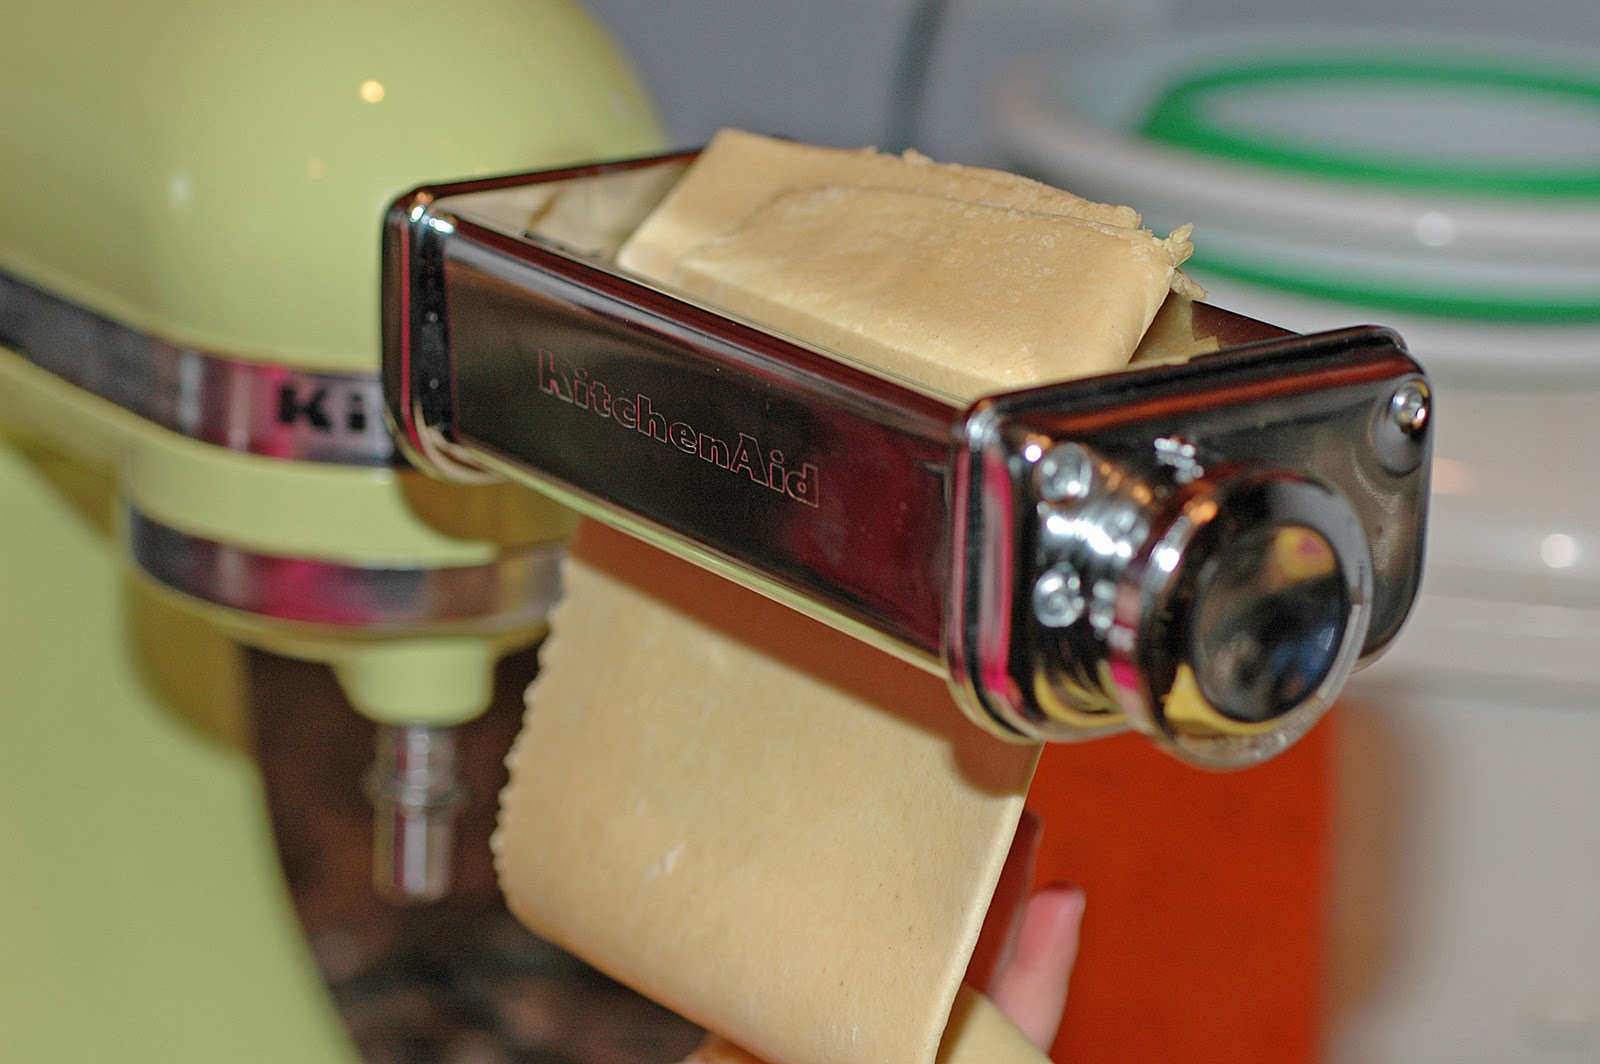
Now, I used the pasta roller to thin out the dough, you can do it by hand, you just have to be strong and use your elbow grease, so don't be turned off to trying this if you don't have a pasta roller.

Seriously, this was THE BEST pasta I've ever had.  EVER!

One thing checked off my New Year's Challenge list!

Pasta Dough:
3 cups 00 flour (If you can't find it, use 1 1/2 c semolina flour, 1 1/2 c all purpose or cake flour)
4 large eggs
1/2 tsp salt
2 TBSP water
1 TBSP oil

Four Cheese Filling:
1/2 c shredded mozzerella
1/2 c ricotta cheese
1/2 c shredded fontina cheese
1/2 c shredded fontinella cheese
1 clove garlic, minced through press
1/4 tsp oregano
1/4 tsp basil
1/4 tsp salt

1) In bowl of mixer, with dough hook, combine flour and salt.  Make a well in the center, add eggs, mix until lumpy.
2) Add in water and oil.  The dough will be a crumbly mess, turn out onto counter and hand knead.  It will come together, I promise.  I thought about giving up, but after about 4-5 minutes, it came together in a smooth ball.  It will be dense, but smooth, you don't want it to be sticky or too pliable like bread dough, firm like cookie dough.
3) Divide the dough into 4 balls, cover with a damp towel and let sit about 20 minutes.
4) Make the filling.  It was very thick, like cream cheese, I almost added an egg, but resisted- it turned out great, so don't worry.

5) Set your pasta roller to the widest setting.  If you have the kitchen aid, it will be number one.
6) Take one of the dough balls and gently flatten it to about 1/2 inch thick.
7) Turn the kitchen aid on, slowly feed the dough through the rollers.
8) Take the dough back to the counter, Fold it into thirds, like a business document, then in half, press down with roller, and feed it through the rollers again.  Repeat this about 5 times, the dough will get nice and soft.

9) Change the pasta roller setting to 2, run it though once.  Then, change it to 3, run it through again.  Repeat changing to thinner settings until your dough is the thickness you want, I went down to setting 5, at this point, it was slightly translucent and I felt like it would be good to hold filling and not rip. **(If you wanted to make spaghetti, next time through, you would switch to the pasta cutter attachment of your choice).

10) I hung the long dough strip over the backs of one of my chairs while processing the next ball of dough.
11) Someone was too tempted by the long pasta strip and this is what I found.  After that, I did one ball at a time, stuffed them, and cut out the ravioli before moving on to the next one.
12)  Lay the dough out on your counter or mat. I had half the dough on the mat and the other half hanging down the side of the counter. Scoop filling onto the dough.  I used a ravioli press I bought at Sur La Table and moved it along the side of the pasta as I laid the filling, to make sure I was spacing them out enough.  I used small amounts of dough, about the size of a teaspoon.
13) Flip the dough that was hanging off the counter up and over the filled dough.
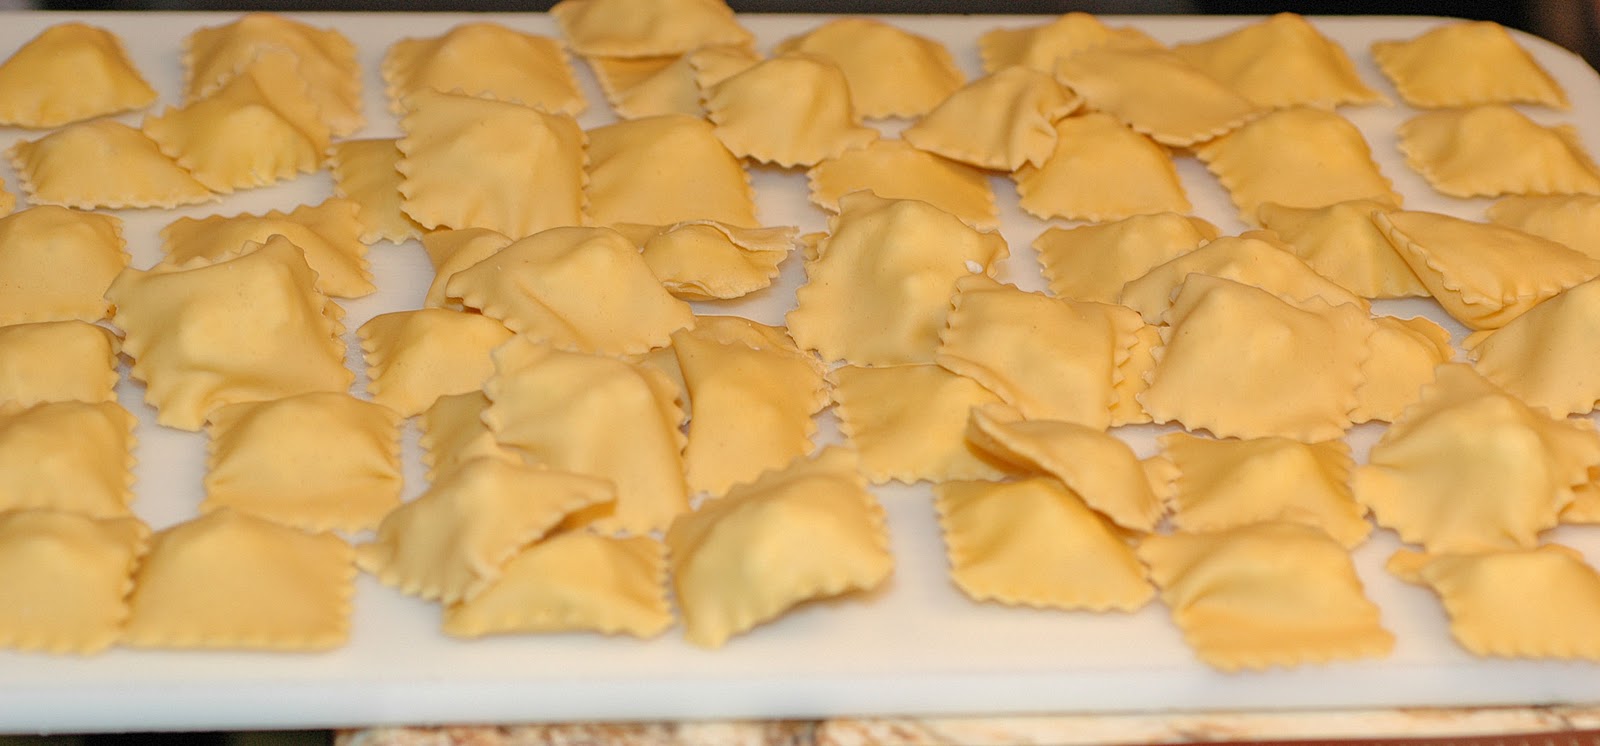
14) Using the ravioli cutter, cut out the ravioli, making sure that the filling is in the center and that the edges are sealed.
15) Place cut ravioli on a lightly floured board or pan while they are waiting to be cooked.  
16) Boil some water with a little pinch of salt and a teaspoon of oil.  Add in ravioli (I did half batch at a time).  They puffed up, see ravioli to the left in picture below.  I was worried they'd pop, which they didn't.    Cook for 2-3 minutes, top with sauce and cheese, and enjoy!
The water is orange because this was the second batch and I stirred it with the spoon I was using to mix the sauce.
Make them today, you'll be glad you did!