Monday, November 29, 2010

Thanksgiving Leftover Heart Tarts

Every year, my dad makes turkey tettrazine with his leftover turkey.  When I've had my own Thanksgivings away from home, I've always mixed all the leftovers (turkey, carrots, potatoes, stuffing, and gravy) and made them into a pie.  A few years ago, I acquired some cute little heart and star shaped tart makers from Williams Sonoma.  Tonight, I made a wheat pie crust, and mixed together all my leftovers, to make these cute little tarts for dinner.

I rolled out the dough and cut out a bottom and a top heart, the bottom of the press functions as a cutter:

Then, I put the bottom crust on the bottom of the press:

I filled it with my leftover mixture:

I put on the top crust:

I pressed: (if you use the back of the top, you can make a cut out with a small opening in the shape of a heart too.  I didn't want the opening on these though)

I put them on my pizza stone and baked at 350' for about 30 minutes, and then I served them with cranberry sauce on the side.  You can actually just pick them up with your hand and eat them- no fork required ;)

Wheat crust:
1 1/2 cups whole wheat flour
1 1/2 cups white flour
1 TBSP sugar
3/4 tsp salt
14 TBSP (1 3/4 cup butter)
~ 1/2 cup cold water

Mix together flours, sugar, and salt.  Cut in butter until pea sized clumps form.  Add water until dough forms a smooth ball. Roll out on lightly floured surface.

I made 15 heart tarts.

Celebrating Thanksgiving in Japan

This year was our first year without a friend or family member from the States joining us for Thanksgiving dinner.  Every year, our neighborhood club hosts a Thanksgiving dinner party for all the local foreigners.  This year, we attended for our first time and it was very nice and made being far away from home seem not so far.  The friends you meet here become your family for the time you are here, you share most holidays with them and it is nice to be able to celebrate in a way similar to back at home.  The Japanese chef prepared a nice spread of Thanksgiving type fare- there was turkey, gravy, mashed potatoes, green beans, salad, bread, and then some untraditional fare such as ham and pasta.  This was a fancy turkey, check out the paper caps on the legs, I only see those in movies that take place in fancy restaurants.


Here's the gang before dinner, excited to be there and in their fancy clothes.

Even though we attended the party, we still decided to have our own Thanksgiving as a family at our home.  We invited over another family from our neighborhood that was celebrating their first Thanksgiving overseas and a Japanese family we are friendly with (can you believe they never had turkey before?- they can't believe I've never eaten octopus :).

For dinner, we had turkey, carrots, green bean casserole, mashed potatoes, stuffing, gravy, cranberry sauce, and rolls.  I think I am most thankful that this will be our last year having to buy a frozen turkey from a major wholesale grocer and keeping it in our freezer for over 2 months before the holiday in fear we wouldn't find another one.  I can't wait to be able to buy a fresh one next year, maybe I'll actually get some juice in the pan.  Here's an example of what the turkey looks like:

Having a traditional Thanksgiving dinner here requires some planning, if you want to have things like they were back home that is.  For example, we have to have cheesecake for dessert, lemon jell-o is a key ingredient- that comes back in the summer in our suitcase.  I needed graham crackers for the crust, which are very very hard to find here, so that required some strategical planning to visit all the local foreign grocers over and over again.  Of course good rolls are just hard to come by here, so we had to make homemade, which I'd prefer anywhere I live anyways.

For the rolls, both Dave and I made a batch of different types, both equally delicious.  I made Parker House (they were invented in Boston- had to make them) and he made butter twists.  Here's a picture I snapped of his:

One great thing about spending Thanksgiving here is when you realize you run out of an ingredient or forgot to buy something, the stores are OPEN!!!  Of course, I had forgotten to get the baguette for our homemade stuffing, so luckily, we could just run to the store and get some.  Another nice thing is there is no temptation to go battle the crowds for black Friday the next morning since it doesn't exist here.

For dessert, we had apple pie, chocolate pudding pie, cheesecake, peppermint ice cream pie, and a newbie for us, spiced turkey cookies.

These were a HUGE hit with the kids and much easier to make than pie ;)  I made royal icing for my first time, but that was very tedious and time consuming to apply.  I still prefer a normal vanilla cake icing on the cookies, but the kids were gaga for these little guys (maybe because they were personalized) and gobbled them right up.

Happy late Thanksgiving everyone!

Wednesday, November 24, 2010

Apple Crisp Pie

This is the first year we are eating Thanksgiving dinner all by ourselves.  A big part of the meal is all the pies that you get to eat.  However, just us means me, Dave, and 4 little kids (who only want chocolate pie).  I am used to eating dessert at my aunt's house where there are like 50 people and 20 different desserts.  How can we compare to that?  Well, I decided instead of making our three traditional "have to have" desserts on the day we cook our Thanksgiving dinner, I'd keep trying new pie recipes all week long to give us a sampling of things we might be missing out on/ can't possibly eat all by ourselves.

I found this pie recipe on Pioneer Woman's blog, when I wasn't even looking for a pie recipe.  I was intrigued by the cinnamon cream mixture she added to the apples.  In my whole pie making life, I have never made a single crust apple pie and frankly wasn't sure I'd ever want to.  Well, boy was I wrong, this pie was sooo good, I had two pieces last night, one for breakfast and I'll certainly be having another for dessert tonight. :)  Actually, it's so good, you don't even need to serve it with ice cream, I almost want to call it Apple Crisp Pie A La Mode.  To me, it tastes remarkably like apple crisp, something my mom used to make for dessert a lot in the fall, so I felt that was a good name for the pie.

CRUST: (I used 2/3 of her recipe because I knew I wouldn't need all the extra in my freezer)
1 cup crisco (I ended up using about 2/3 cup crisco, 1/3 cup crisco butter- ran out of crisco, don't know where to get it here in a pinch)
2 cups flour
1 egg
2 tsp white vinegar
3-4 TBSP cold water
2 tsp salt

Using a pastry cutter (or whisk of your kitchen aid or food processor)- cut the flour and crisco together until it forms small pea sized clumps.  If using kitchen aid, switch to dough hook.  Add in the egg (I didn't beat my before I added it, she recommended it).  Add vinegar and salt.  Slowly add water 1 TBSP at a time until dough just about forms a ball and looks sticky.  Pick up the dough, knead with your hands for a minute or two.  Split into two balls and place each in a freezer safe ziploc bag- if you flatten the ball slightly, it will make it easier to roll out later, if you freeze too long.  Leave in freezer about 20-30 minutes, remove ball from bag and roll out on floured surface with a floured rolling pin.  Note:  this makes two crusts, I left the second bag in the freezer for a TBD pie when I feel the need to make another.

While the crust is in the freezer, work on the apple and filling part.

FILLING:
4 large apples (if you are using a large pie pan)
1 cup heavy cream
1/2 tsp cinnamon (I added more cinnamon than she recommended and heaped it)
1/2 cup brown sugar
1/2 cup sugar
2 tsp vanilla
1 TBSP flour

Peel, core, and cut apples.  I cut mine into long thin slices, about 1/8-1/4".  Put in large bowl and set aside.  Mix together sugars, cinnamon, and flour.  Stir in heavy cream and vanilla.  Mix, then pour on top of the apples.  Stir so all of the apples get coated.  By the way, she recommended don't try this because you might never get a pie, well a few of the kids and I each tried an apple slice, it was soooo good!  Set aside.

TOPPING:
7 TBSP butter
3/4 cup flour
1/2 cup brown sugar
1/4 cup pecans

In food processor, chop up nuts.  At this point, I added the butter and chopped up with nuts.  I then transferred the mixture to a small bowl with the brown sugar and flour, and mixed it by hand until it was crumbly.

To assemble the pie: Preheat oven to 375'.  Remove the crust from the freezer, on floured surface with floured rolling pin, roll out dough.  I think a trick to keeping the crust from getting stuck on the surface is to keep flipping it and reflouring the surface.  It is very fragile, but I got mine to behave (and yes the ends cracked a bit like she said)- but since the dough is soft, I used my fingers to press and seal any holes.

Here's my crust in the pan:

Next, pour the apple mixture into the pan:

Finally, using your hands sprinkle the topping on.  I almost feel like it was a bit too much, but that's just me:

I baked mine for 60 minutes and took it out.  It was very juicy and the piece did not hold together like  a perfect pie triangle like Pioneer Woman's.  Then, I realized, I had left the foil on top of the pie the entire time because she said the topping might burn.  I put the pie back in the oven for another 25 minutes with no foil on top and it really thickened up.  Next time I make this pie, I will not put foil over the top unless I see the topping really looking burnt.

Of course, today, after being in the fridge overnight, I was able to cut that picture perfect pie triangle.  Whatever the shape of my piece, it doesn't matter because it tastes really good!  And, that is one flaky, crispy, yummy crust!   Happy pre-Thanksgiving pie eating to me!

Tuesday, November 23, 2010

Turkey Handprint Pillow

Last year, I decided that each year I would make myself some type of keepsake at Thanksgiving using the kids' handprint turkeys.  Last year, we made placemats on paper and laminated them.  This year, I wanted to take it a step further and make a throw pillow cover.  I painted each kid's palm and thumb brown, and let them choose the colors for their feathers.   I added an eye, beak, and gobbler after.  I made the turkey's feet be the initial of the person whose handprint it was.  I added some brown fabric as a border and Charlie Brown autumn fabric for the back, I sewed in velcro so that we can take the cover off the pillow if it needs to be washed.  I hope it doesn't because half the paint is fabric paint and the other half is acrylic, which means it would dull down a bit in the wash.  The kids have been admiring it all night, comparing their hand sizes and feather color choices.   I can't wait to build up my collection over the years.

Here's the back:

Monday, November 22, 2010

Fabric Covered Tea Box

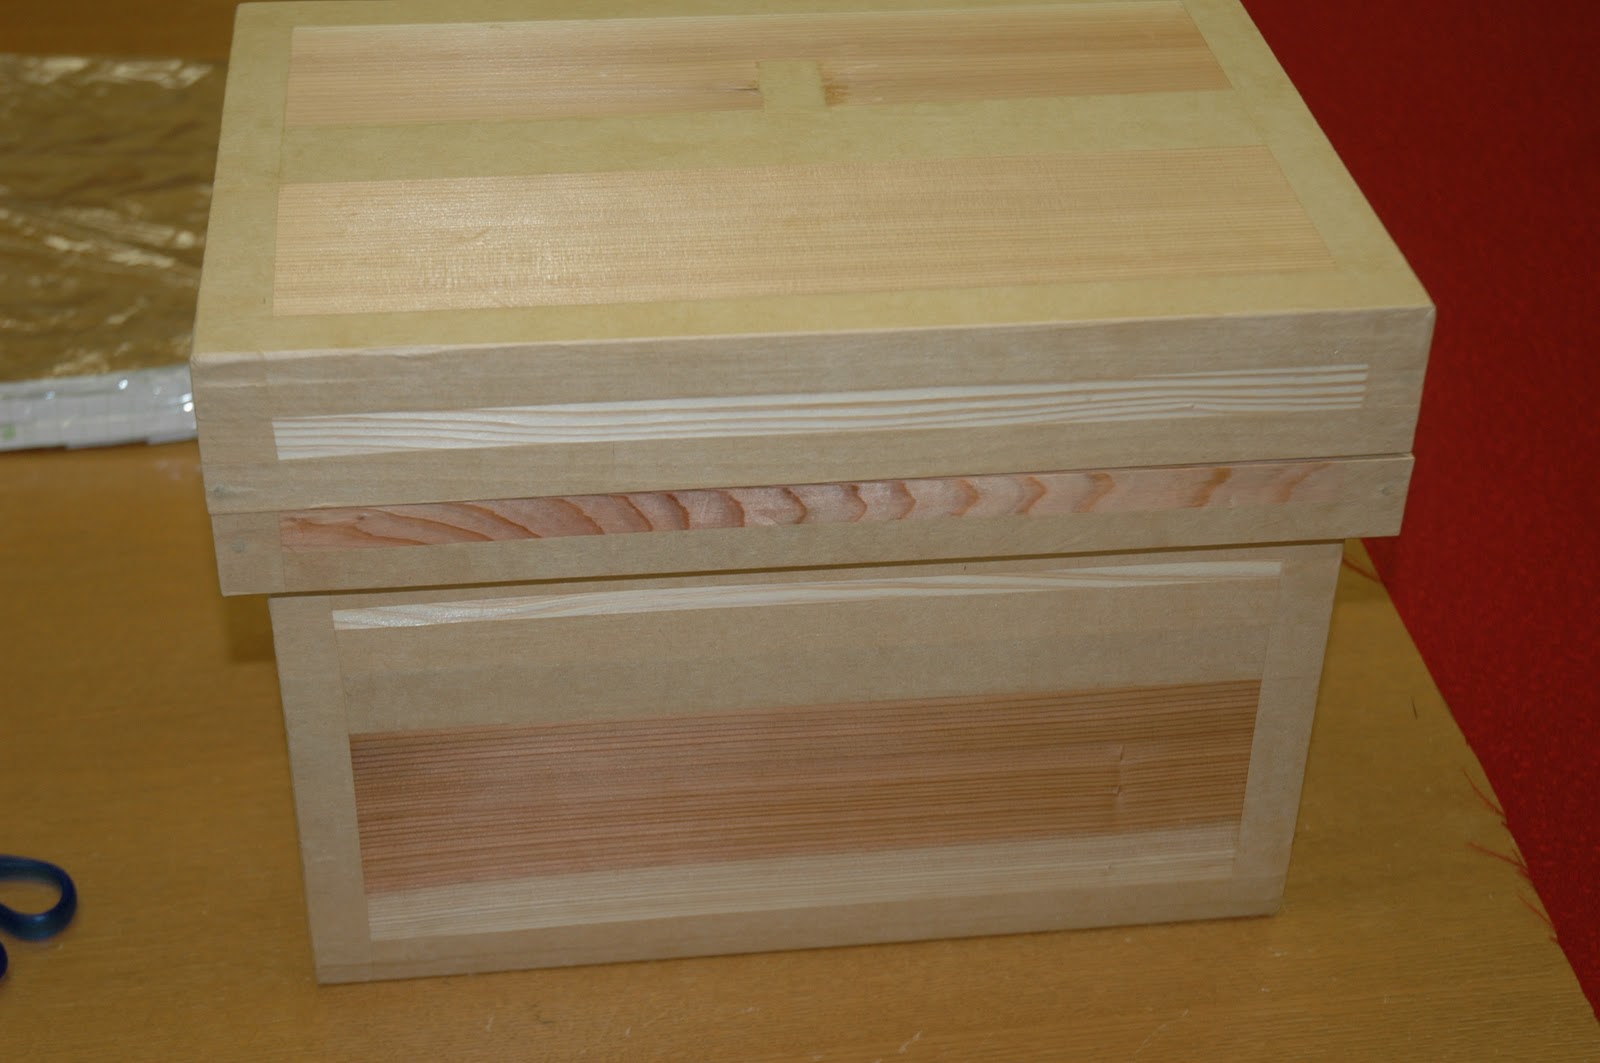
About two weeks ago, I took a class on how to cover a wooden Japanese tea box with fabric.  In Japanese, this box is actually called "chabako".  The box is made of wood and usually lined with some type of metal.  The box is used to store and preserve tea and tea making equipment, such as the tea bowl and scoop.

Here you can see the inside:

At our neighborhood club, one of the waitresses is very crafty.  You should see the stuff she sews and quilts that she make ALL BY HAND- yes, she does not own a sewing machine- her stuff puts mine to shame!  One of my neighbors approached her about offering some classes to us so we could learn how to do some typical Japanese crafts.  At first, I thought this would be quite easy, but in the end, without her help, I would not have been able to get such nice end results.

To make the box, we needed a bare tea box, some batting, fabric (as we found out, nicer Japanese kimono-type fabric behaves and looks the best- it's just pricey!), double sided fabric tape, a staple gun, and staples.

Here my fabric is laid out facing down, with a piece of the pattern ready to be cut out:

I have the lid on the batting, we needed to cut a piece to fit evenly on the top.  I used thin batting, next time for the top, I'd like to use a bit thicker to make it more puffy looking.

We put batting on the top of the lid and its sides and then on the sides of the main box and its bottom, all using a carpenter's staple gun- what a way to feel powerful and get some nice blisters at the same time!

I am getting ready to attach my first piece of fabric.  We hemmed it about 1/4" using double sided hem tape.

Then, we used double sided hem tape again, along the upper edge of the wide lip and pressed the back of the fabric on the non-hemmed side to it.

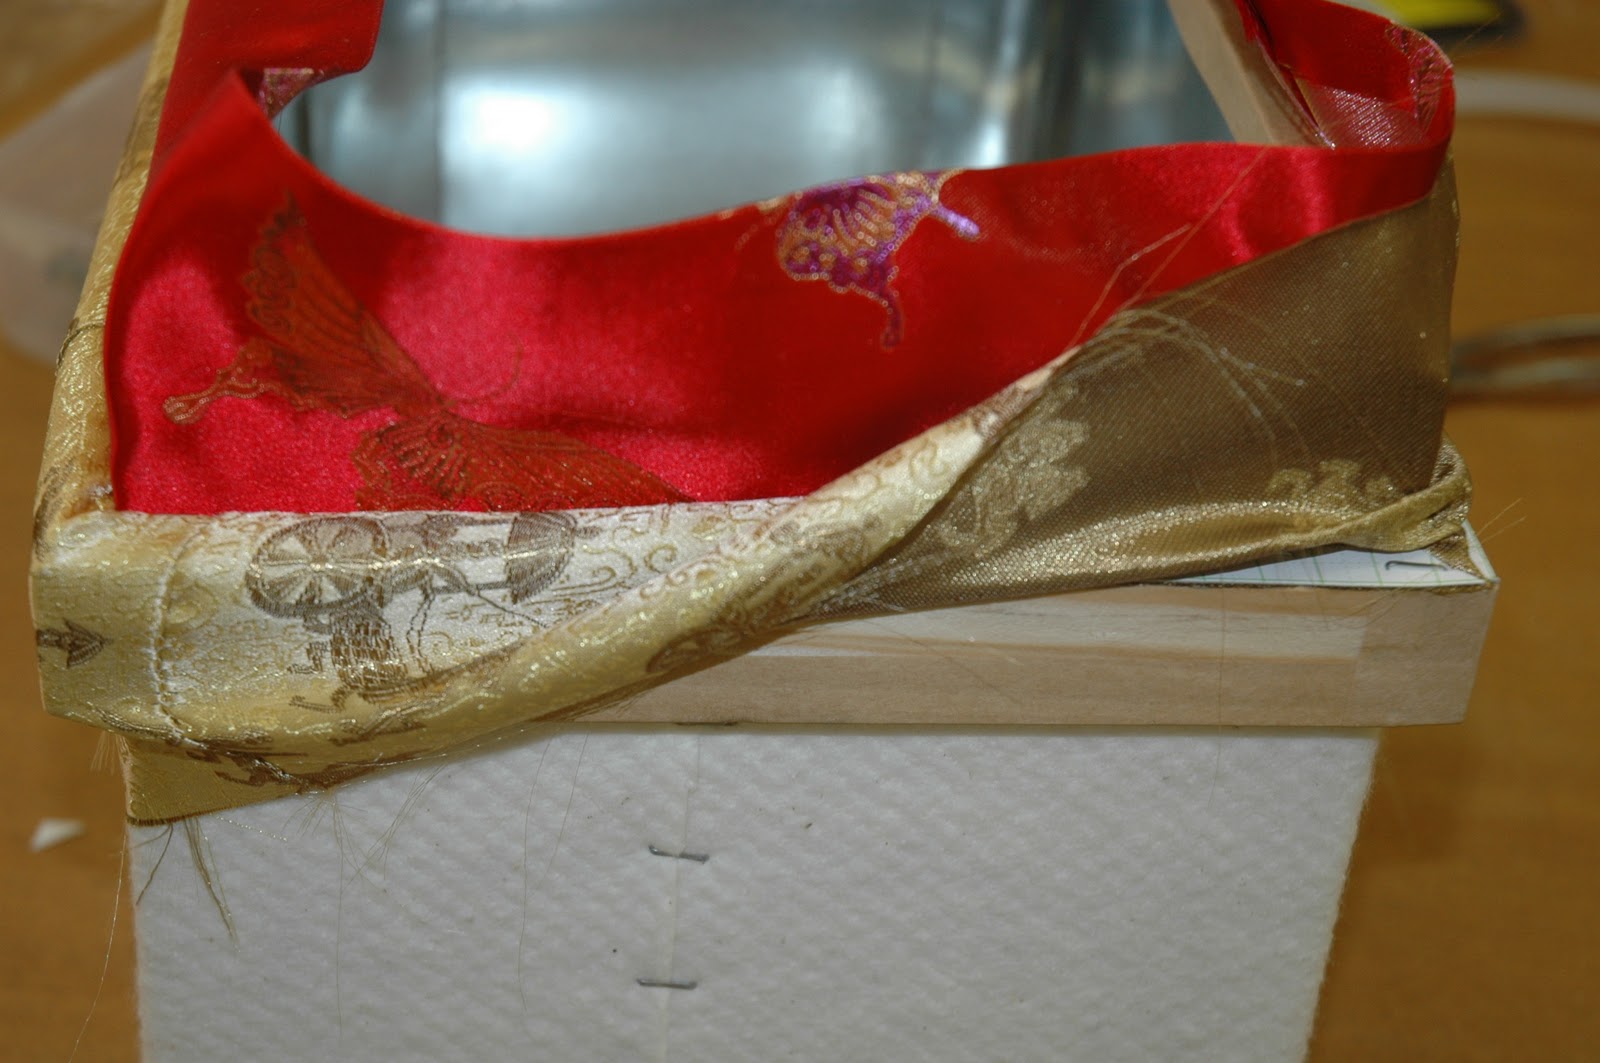
Here is my neighbor with the second piece of fabric.  If you look on the right, you can barely see her first piece, the gold.  Now, we are taking the second piece, the contrast one for the box's lip and stapling it to the lip, fabric facing down.  The white you see is a small strip of cardboard-like paper, to help make it more secure.  The hard part here, was pinching in the corners properly, so when we folded it down to cover the lip that it looked pretty.

 Here I go, folding my contrast fabric down:

Okay, so I missed photographing a LOT of steps, what can I say, my fingers started to hurt. Not only is stapling into wood a good way to get blisters, but it's VERY dry here right now, I guess I was on a roll and didn't want to stop and use my trigger finger.  Essentially, we then anchored down the contrast fabric with more staples to the bottom of the lid.  Then, we turned it upside down and with the right side of the fabric for the main part of the box facing the bottom of the lip and cardboard strip for more security, we stapled all around to anchor the fabric, again with corners tucked in.  Before the end of the main fabric, we stopped with a few inches to spare, folded it on itself and used the double sided hem tape to secure a nice looking edge and taped it down the length of the box.  Then, we double sided taped the hanging edges down on the bottom (raw not hemmed because there is a separate piece for the bottom that we placed over it.  We double sided taped the bottom piece's four sides to be nicely hemmed and then taped it on- so no staples would be showing through.   Lastly, we folded the first piece we attached down toward the inside of the box and attached it firmly with - you guessed it- double sided tape.

For the lid, we place it upside down on a piece of fabric, and folded the edges over to the inside, hemmed with tape and attached with staples. The corners of the lid were very tricky, we all needed the teacher's help.

Here is my finished product:

And everyone's.  I love all our choices of fabric, don't you?  I was the only one with thin batting, and that's why my corners look more pointy.  One is being used as a memory box for my neighbor's daughter, one is being used in my neighbor's bedroom because it matches her pillows, another isn't sure about hers yet, and mine is a gift.

Here I am with the teacher.  I hope she decides to offer another class, it was a nice break for me to leave the house and be taught something new for a change.

Actually, this lead me to thinking of all the things you could get at a craft store that are meant to be painted and jazz up with fabric and staples instead.  In fact, I bought more fabric yesterday and am already planning to get another box and make one for myself.  How cute would my tv and wii remotes look in here?

Thursday, November 18, 2010

Apple Pie in a Frying Pan


I LOVE apple pie! In fact, since I can remember, I'm the one that has always made the apple pie for my family for Thanksgiving.  It's always the same two crust pie, with apples covered in sugar and cinnamon.  I had a sudden burst of energy this weekend (probably after drinking my gingerbread latte)- and I went through stacks of old Cook's Illustrated magazines.  And this apple pie recipe jumped out at me.  I'm all about easy and one pan lately (wonder why).  I was skeptical about it once I read that there was maple syrup in the recipe, but decided to try it anyways.  Typically my apple pies have not turned out well in Japan and I have always blamed it on the apples.  This pie was scrumdiddliumptious!  This might be my go to recipe now (especially since I just realized I did not pour one whole cup of pure sugar over my apples).

CRUST:
1 cup all-purpose flour
1 TBSP sugar
1/2 tsp salt
2 TBSP vegetable shortening (crisco)
6 TBSP cold butter (they recommended unsalted, I had to use salted- noticed no difference)
3-4 TBSP cold water (yes, I actually, put ice in the water to get it colder- saw the tip online)

FILLING:
1/2 cup apple cider (I used apple juice- in the magazine, they tell you to use 1 cup juice and reduce to 1/2 cup, I did not and my pie was still delicious)
1/4 cup maple syrup
2 TBSP Lemon juice (I used fresh squeezed)
2 tsp cornstarch
1 tsp cinnamon
2 TBSP butter (again, they recommended unsalted, I used salted)
2 1/2 lbs apples (I used 4 large- you can use 5 or 6 medium)

For the crust, pulse flour, sugar, and salt in food processor, or mix with fork.  Add in the butter, cut into 1 TBSP sized pieces.  SInce the butter was cold, my kitchen-aid dough hook did not break it up, so I did put it in the food processor for a few seconds, then put it back in the kitchen-aid for the water addition.  After the butter is cut into the flour, and looks like crumble, add 3 TBSP ice water.  Mix until dough forms a ball- if necessary, add 1 more TBSP water.  Form ball of dough and wrap with plastic wrap and refrigerate for at least 30 minutes (or up to 2 days).

***Before making the filling, preheat the oven to 500'.  Note:  I was worried my pan was not oven safe past 350', so I set it at 350' and increased the cooking time.  If the oven is at 500', cooking time was suggested for 20 minutes.  I left mine in for about 35 minutes at 350', until the top was golden brown.

For the filling, peel apples and cut into thin slices (1/4-1/8")- set aside.  In small bowl, whisk together cider, syrup, cornstarch, lemon juice, and cinnamon- set aside.  In an oven proof skillet, preferably 10-12 inch size, over medium-high heat, melt butter until bubbly.  Add apples into skillet and cook about 4-5 minutes, tossing occasionally.  Do not overcook.  After the 5 minutes, turn off the heat, add in the juice mixture and toss to coat all the apples.  While this is cooling down for a moment, get the crust out of the fridge.

Lightly flour the counter and roll out the dough to approximately 10" circle.  Place the dough on top of the apples in the skillet.  Using a sharp knife, gently score the dough down the center and then two cross cuts, so it looks like it is cut into six pieces.  The explanation is that the juices will bubble up over it and make the crust crispier.

Let cool, serve alone or with vanilla ice cream.

Wednesday, November 17, 2010

Hello Kitty Dokinchan birthday part II


For each of my kids' birthdays, I've gotten into the habit of making them a special birthday outfit.  This year, I let Hazel dig through my piles of fabric to choose what she wanted her dress made out of.  She could not decide, but in the end, here, at a fabric store, she found some pink based Anpanman fabric, with Dokinchan on it.  Of course, she immediately decided she wanted a Dokinchan dress that she could twirl in.

Upon searching the internet and a few independent dress shop websites, I found the dress I wanted to make here at Sweet Plume's shop on etsy.  I didn't want to pay that much anyways, but I will say, after making a sort-of copy of the dress, it's worth every penny she's charging, with all the fabric and time that goes into it.  Ruffles are fun and slightly easy, but very time consuming to make and add to the dress.

Here are a few shots of my dress, I didn't have a pattern, I winged the whole thing.  It came out way bigger than I thought, at least it will fit for years to come.


I tried to go the homemade route with my gift.  I wanted to make a Dokinchan fleece coat.  I could not find orange fleece here.  Then, I was walking by a clothing shop and saw men's fleece jackets.  I bought a size L, for less than $20, brought it home, laid one of her coats on it, and cut out the pieces.  Since the men's jacket already had finished seams, I only had to sew the pieces together, without the hemming.  On the back, I sewed on a Dokinchan face with felt and on the front, a patch of course.  I was even able to keep the pockets on the coat when I cut it out and found an orange zipper that fit perfectly.  What can I say, she's in love, she's in love and she doesn't care who knows it:


She of course, received a Hello Kitty coat too, and today when she wore it and wouldn't take it off, she said "I look so cool don't I?"

This was my store bought gift, and of all the things she likes about it, the plastic brush and lipstick have Dokinchan stickers on them.  Yes, for Christmas, I am finally going to break out my mod podge and utilize all the Dokinchan stickers and magazine cutouts I can possibly save.

At this birthday, there were no games.  I covered my kitchen table with the art paper from Dick Blick.  I cut out dots that were pink, purple, and orange, and taped them to the table.  The kids thought this was sooo awesome, they wrote their initials on the dots and "happy birthday", and just had fun sitting and coloring- the dots kept them busy for at least 45 minutes, if not longer.  I think I have a new table cloth.

Tuesday, November 16, 2010

Hello Kitty meets Dokinchan Birthday Cakes

As a 3 year old, you have tough decisions to make, such as what type of cake do you want and what flavor you want it.  Hazel chose a Kitty cake with kitty flavor- sorry I'm not that adherent to my kids' wishes, I could not bring myself to make a cat flavored cake.  But of course, every other day, it was a different type (Dokinchan) and a different flavor (purple).  So, the plan was to use my Hello Kitty head shaped pan I bought off Wilton.com, (note:  I am not a fan of shaped pans because I can't decorate the right or get them out)- but after my success with the car cakes, I decided to give this pan a shot.  

We were going to have a giant Hello Kitty shaped cake and then some Dokinchan mini cupcakes with a few Hello Kitty cakepops with the remainder of the batter.  I decided to do Hello Kitty with chocolate cake (I was craving a chocolate cake with vanilla icing) and the Dokinchan cupcakes with vanilla funfetti cake (I had found a recipe for vanilla cake from scratch I was dying to try).

I'll let you guess what happened to the Hello Kitty shaped cake from this picture below:

Learn from my mistake, even with a greased/floured pan, an oil based cake from scratch will not behave and pop out properly, no matter how many nice things you say to it.  Needless to say, I ended up making a LOT of Hello Kitty cakepops and boy were they time consuming- yet, worth it.  Instead of using the extra cake I made for cakepops, I frosted it and turned it into a giant Dokinchan head.  This is what I ended up presenting to the birthday girl for her party:


Let me just say, the vanilla cake was mmm mmm good!  Box cake never again!

Here is the recipe I used, I found it on Annie's Eats and she found it in a Martha Stewart cookbook:

Vanilla Cake:
Oven:  350'

2 sticks butter (unsalted if you have it, I used salted)
1 1/2 cups all-purpose flour
1 1/2 cups cake flour
1 TBSP baking powder
1/2 tsp salt 
1 3/4 cups sugar
4 eggs
2 tsp vanilla
1 1/4 cups milk

Put butter and sugar in bowl of mixer (if using kitchenaid, use paddle attachment) and cream about 4-5 minutes until blended and creamy.  Scrape down sides of bowl, add eggs one at a time, scrape down sides of bowl.  Add vanilla and mix in.  In medium bowl, combine flours, baking powder, and salt.  In alternating additions, add milk and dry ingredients until just mixed.  Hazel loves sprinkles, so I decided to take the cake one step further and add in about 1/4 cup star sprinkles- this was a hit!

Grease and flour either 2  round cake pans or 1 9 x 12 rectangular pan (or 24 cupcakes).  Fill each pan 1/2 way with batter.  Bake round cakes about 30-35 minutes, mini cupcakes were in about 10-15 minutes.  

When I made this cake, I cut the recipe in half, I only made 10 mini cupcakes and a mini round cake with the batter.

Check out my "homemade funfetti cake":


This was sooo sooo good!  It almost tasted almond extracty and after 4 days,  I can say the cake is still moist and not dry!  

As for decorating it, I traced a Dokinchan from a coloring book and piped on different color icing, using ziploc baggies, by the time I did the mini cupcakes, I could have cared what they looked like, so I feel like they turned out a bit monkey-ish than Dokinchan (Hazel however, didn't think they looked like anything but Dokinchan, so I guess it was all good):


Vanilla Icing:
8 TBSP (1 stick) butter (room temperature)
2-3 cups confectioner's sugar
1 tsp vanilla
2-4 tsp milk

Cream together butter and 1 cup confectioner's sugar.  Add in vanilla, cream together.  Add in 2 tsp milk and milk.  Keep alternating additions of confectioner's sugar and milk until you reach desired consistency and it meets your taste test approval.

Now for the chocolate disaster.  I think in the end, these might have been everyone's favorite treat at the party, so I guess the old saying "everything happens for a reason" applies here.  I have spoken about Bakerella before, when I made cupcake pops for my neighbor's birthday last February.  Every once in a while I peruse her sight and feel belittled by the awesomeness of her stuff.  These Hello Kitty cakepops have been on my mind since I spied them on her site.  All summer, I subconsciously bought ingredients for these little guys, hoping for the chance to make them.

Now, they were labor intensive, but the end result can be worth it, but the road to get there, slightly frustrating if you are a perfectionist.  I had to recruit my husband to help me with the decorating.  You have to get the decorations on before the outer chocolate shell hardens and of course, you get chocolate accumulating at your fingertips, like a growing icicle.  

In a nutshell, I used my food processor to grind up the cake, I put it in a bowl with a batch of homemade vanilla icing, mixed it together so it was sticky, then rolled it into ovular shaped balls and set them on waxed paper.  I put the waxed paper on a cutting board and stuck it into the fridge to let the balls harden a bit (about 1 hour).  Then I melted a small amount of white chocolate (microwave 30 sec stir, microwave, repeat until it was melted)- I then dipped white chocolate chips into the melted chocolate and stuck them on as the ears and let them harden.  I dipped the lollipop sticks in the melted chocolate and stuck them in the balls too (I hoped the hardened chocolate would help anchor the balls to the sticks better)- Paper sticks worked way better than plastic, when coating the balls completely in the white chocolate, all the balls fell off the sticks, hence the bon bon type ones.  When I did the complete coating, I used my double boiler to melt a whole bags of white chocolate wafers and I mixed them with my whisk for a smoother consistency.  When it was done, I removed it from the burner, but left it over the pan with the hot water, so the chocolate wouldn't reharden as fast (this proved very helpful). 

For the eyes and noses, I used mini m and m's.  For the bows, two large sprinkle hearts, with a red mini m and m in the center.  I could not find an edible marker so there were no whiskers.  If you go to bakerella.com from this link, you will see her post, and I bow down to her because if I could only have had one come out as brilliant looking as hers, I would be ecstatic, let alone as many perfect ones as are in her picture.  

Hazel helped decorate a few, check out the front row and guess which one is hers:


Candle blowing time:


And she's three!