
Here you can see the inside:

At our neighborhood club, one of the waitresses is very crafty. You should see the stuff she sews and quilts that she make ALL BY HAND- yes, she does not own a sewing machine- her stuff puts mine to shame! One of my neighbors approached her about offering some classes to us so we could learn how to do some typical Japanese crafts. At first, I thought this would be quite easy, but in the end, without her help, I would not have been able to get such nice end results.
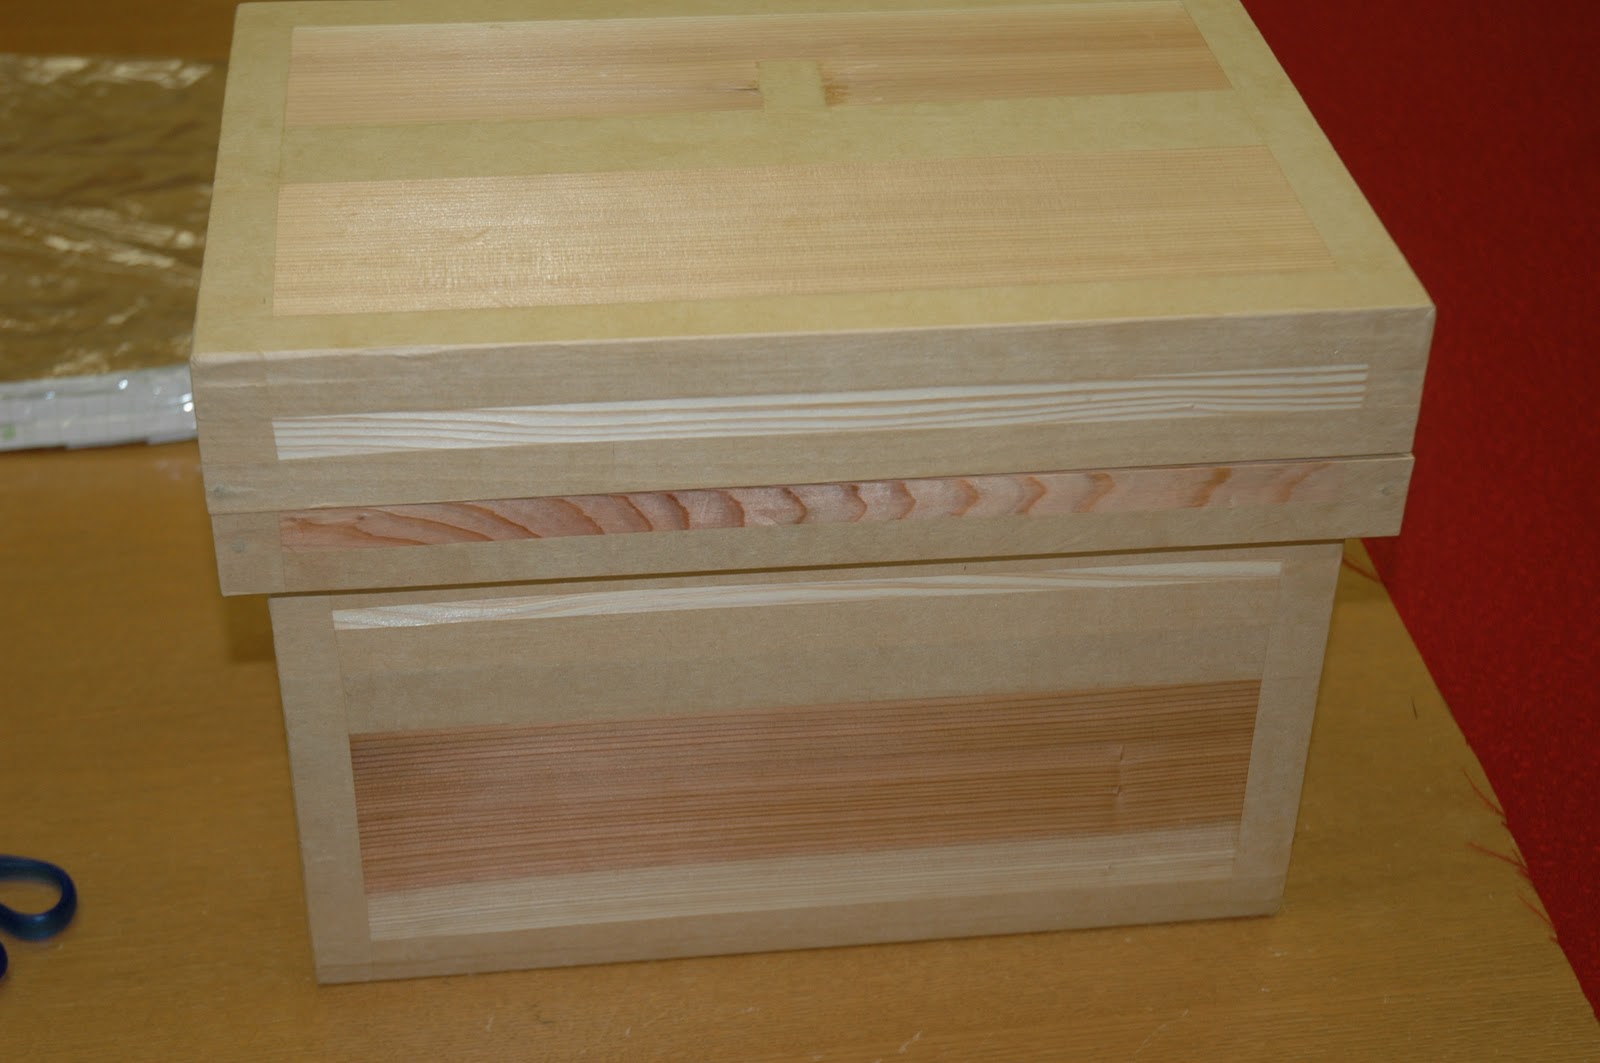
To make the box, we needed a bare tea box, some batting, fabric (as we found out, nicer Japanese kimono-type fabric behaves and looks the best- it's just pricey!), double sided fabric tape, a staple gun, and staples.
Here my fabric is laid out facing down, with a piece of the pattern ready to be cut out:

I have the lid on the batting, we needed to cut a piece to fit evenly on the top. I used thin batting, next time for the top, I'd like to use a bit thicker to make it more puffy looking.

We put batting on the top of the lid and its sides and then on the sides of the main box and its bottom, all using a carpenter's staple gun- what a way to feel powerful and get some nice blisters at the same time!

I am getting ready to attach my first piece of fabric. We hemmed it about 1/4" using double sided hem tape.

Then, we used double sided hem tape again, along the upper edge of the wide lip and pressed the back of the fabric on the non-hemmed side to it.

Here is my neighbor with the second piece of fabric. If you look on the right, you can barely see her first piece, the gold. Now, we are taking the second piece, the contrast one for the box's lip and stapling it to the lip, fabric facing down. The white you see is a small strip of cardboard-like paper, to help make it more secure. The hard part here, was pinching in the corners properly, so when we folded it down to cover the lip that it looked pretty.

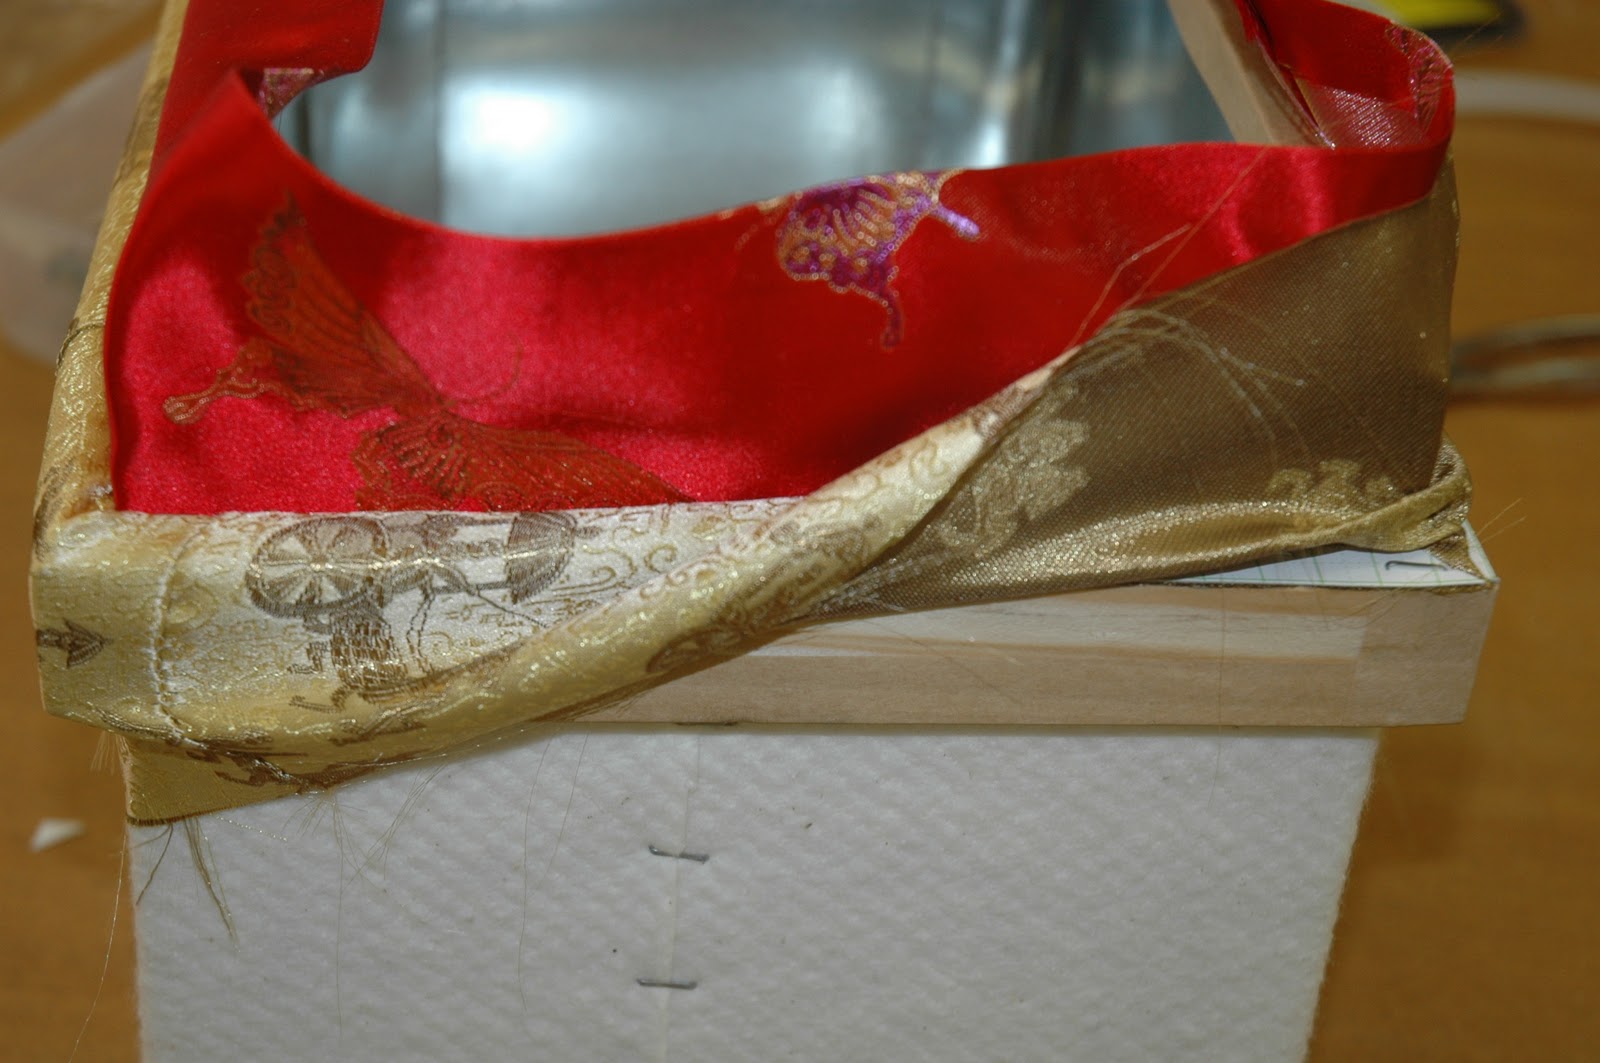
Okay, so I missed photographing a LOT of steps, what can I say, my fingers started to hurt. Not only is stapling into wood a good way to get blisters, but it's VERY dry here right now, I guess I was on a roll and didn't want to stop and use my trigger finger. Essentially, we then anchored down the contrast fabric with more staples to the bottom of the lid. Then, we turned it upside down and with the right side of the fabric for the main part of the box facing the bottom of the lip and cardboard strip for more security, we stapled all around to anchor the fabric, again with corners tucked in. Before the end of the main fabric, we stopped with a few inches to spare, folded it on itself and used the double sided hem tape to secure a nice looking edge and taped it down the length of the box. Then, we double sided taped the hanging edges down on the bottom (raw not hemmed because there is a separate piece for the bottom that we placed over it. We double sided taped the bottom piece's four sides to be nicely hemmed and then taped it on- so no staples would be showing through. Lastly, we folded the first piece we attached down toward the inside of the box and attached it firmly with - you guessed it- double sided tape.
For the lid, we place it upside down on a piece of fabric, and folded the edges over to the inside, hemmed with tape and attached with staples. The corners of the lid were very tricky, we all needed the teacher's help.
Here is my finished product:

And everyone's. I love all our choices of fabric, don't you? I was the only one with thin batting, and that's why my corners look more pointy. One is being used as a memory box for my neighbor's daughter, one is being used in my neighbor's bedroom because it matches her pillows, another isn't sure about hers yet, and mine is a gift.

Here I am with the teacher. I hope she decides to offer another class, it was a nice break for me to leave the house and be taught something new for a change.

Actually, this lead me to thinking of all the things you could get at a craft store that are meant to be painted and jazz up with fabric and staples instead. In fact, I bought more fabric yesterday and am already planning to get another box and make one for myself. How cute would my tv and wii remotes look in here?
Where did you get the box? I would love to get hold of some to cover in Washi paper
ReplyDeleteYou can order these wooden tea boxes from a company in Japan... very few make them now as it is a trade which young people were not interested in...
ReplyDeleteFinally I found some instruction to cover my tea boxes. I did a few many years ago, while living in Tokyo. I still have quite a few of these wonderful boxes, and I am going to try to make them again. Thanks for posting this.
ReplyDeleteIhave many uncovered tea boxes i want to give away also obi trim. Anneball37@gmail.com
ReplyDeleteThank you for the instructions. How much fabric do you need for the box you covered. I covered one 30 years ago when I lived in Japan and want to recover.
ReplyDeletesakarya
ReplyDeleteelazığ
sinop
siirt
van
50ZWYQ
sinop
ReplyDeletesakarya
gümüşhane
amasya
kilis
Y8L2
görüntülüshow
ReplyDeleteücretli show
FHBKY
1ABA2
ReplyDeleteGölbaşı Boya Ustası
Etlik Parke Ustası
Samsun Şehir İçi Nakliyat
Yobit Güvenilir mi
Erzurum Şehir İçi Nakliyat
Hakkari Parça Eşya Taşıma
Amasya Şehirler Arası Nakliyat
Yalova Lojistik
Rize Parça Eşya Taşıma
8FF0F
ReplyDeleteTokat Lojistik
Sakarya Şehirler Arası Nakliyat
Çerkezköy Bulaşık Makinesi Tamircisi
Tekirdağ Cam Balkon
Eskişehir Evden Eve Nakliyat
Elazığ Parça Eşya Taşıma
Van Parça Eşya Taşıma
Denizli Şehir İçi Nakliyat
Nevşehir Şehir İçi Nakliyat
106FA
ReplyDeletemardin canli sohbet chat
Kırıkkale Kadınlarla Görüntülü Sohbet
sivas sesli sohbet odası
parasız görüntülü sohbet uygulamaları
siirt canlı sohbet bedava
adana yabancı canlı sohbet
balıkesir canlı sohbet odaları
gümüşhane rastgele sohbet
maraş random görüntülü sohbet
83769
ReplyDeleteBtcst Coin Hangi Borsada
Paribu Borsası Güvenilir mi
Kaspa Coin Hangi Borsada
Clubhouse Takipçi Satın Al
Kwai Takipçi Hilesi
Bitcoin Kazanma
Sonm Coin Hangi Borsada
Nonolive Takipçi Satın Al
Bitcoin Kazma Siteleri
6B48F
ReplyDeleteCoin Nasıl Üretilir
Bitcoin Hesap Açma
Bitcoin Oynama
Kripto Para Madenciliği Nasıl Yapılır
Aion Coin Hangi Borsada
Ceek Coin Hangi Borsada
Bitcoin Nasıl Üretilir
Bitcoin Mining Nasıl Yapılır
Bitcoin Madenciliği Siteleri
7EA04
ReplyDeleteledger wallet
eigenlayer wallet
desktop ledger
arculus wallet web
ledger
eigenlayer
web avax
web ronin
trust wallet
30F10
ReplyDeleteArbitrum Coin Hangi Borsada
Okex Borsası Güvenilir mi
Kripto Para Kazma
Luffy Coin Hangi Borsada
Trovo Takipçi Hilesi
Binance Referans Kodu
Youtube İzlenme Satın Al
Kripto Para Madenciliği Nedir
Instagram Beğeni Satın Al
C3102
ReplyDeleteSoundcloud Beğeni Satın Al
Bone Coin Hangi Borsada
Sweat Coin Hangi Borsada
Paribu Borsası Güvenilir mi
Facebook Beğeni Satın Al
Twitch İzlenme Hilesi
Soundcloud Dinlenme Satın Al
Referans Kimliği Nedir
Lovely Coin Hangi Borsada
5150D
ReplyDeletesatoshi
trust wallet
shiba
trezor suite
poocoin
ledger desktop
defilama
safepal
arbitrum
شركة مكافحة النمل الابيض بالجبيل 6dT4tU2Hcs
ReplyDelete9C2479AB67
ReplyDeleteCasino Games Real Money
List of Gambling Sites
Popular Now in Betting
Sports Betting Online Sites
Best Online USA Casinos