Monday, November 1, 2010

New Zealand

Now that I'm finally feeling better and Halloween is past us, I am finally getting around to organizing our pictures from our trip to New Zealand (two weeks ago).  We knew that our time here in Japan is quickly coming to an end, so we started making a list of places we'd like to visit from here that would be very difficult for us to get to once we leave.  Being pregnant, and sick, I opted to choose New Zealand for this trip, as it is an English speaking country and I knew there'd be food I'd enjoy- Thailand will just have to wait.

WARNING- this is a long post.

We arrived in New Zealand at 5:45 am, after an 11 hour "overnight" flight.  The kids barely slept on the flight and I think I slept maybe 20 minutes. The agenda for our first day consisted of getting to the hotel as fast as possible to shower, change clothes, and brush our teeth.  We went to eat breakfast in downtown Auckland, walked around a bit, and headed straight back to the hotel for a NAP.

A first view of the city from the highway:


Here's the bakery selection:


Dave sipping a "flat white"- New Zealand latte- our friend raved about them, so we had them almost everyday:


After the nap, we went to a grocery store, it was so fun to be in a big grocery store again, and we walked up and down every single aisle looking at all the items they sold.  We finished off the day with pizza at a restaurant across from the grocery store and were in bed by 6 pm.

For our second day, we had quite a drive, I believe it was over 3 hours to get to our next destination.  One of the things we wanted to do while we were there was see dolphins and orcas (mainly orcas).  Also, something unique is that in New Zealand, you can swim with the dolphins (in the US you can't).  Our hotel for that night was in a beach town in the Northeast part of the country.  It was a pretty drive, but with four overtired kids in the car, we were sure glad to find our hotel that night.  There are tons of cafes along the roads, the highways were not big, many were one lane, so you could stop and visit a lot of local places along the route.  And, unlike what I'm used to in the US, almost all of the shops we stopped at had highly decent cups of coffee.

Here's the one we stopped at our first day:


We also stopped in a park to look at the ocean, here are the kids in front of a cool tree:


Here I am on the back of the dophin boat with Owen and Hazel:


Here's a cool rock, they call the shark fin rock:


We did see dolphins, but no orcas- disappointment.  People went in to swim, but Nathaniel and Addison were too scared of killer whales to get in:


The area we took the boat ride was called Bay of Islands, I think there are something like 140 islands here.  We stopped on one for lunch, there was a nice cafeteria there.  You can actually arrange to stay overnight there in some cabins.  It would have been fun to do that, wish we knew (next time ;)).

Look how blue the water is from the beach:


After our boat ride, it was off to our third hotel, a beach front apartment.  We only had a 2 hour drive this day across the country, it was nice, and we got to see some cool sand dunes.  If we came back again and I was't pregnant, I'd like to try the sand surfing down the dunes.  These dunes were across from our hotel, they were the location of the filming of Lawrence of Arabia.


The kids were excited to see a pool (they became quite the fish over the summer)- so of course, I called their bluff and let them go in.  It was cold like I said, but I challenged them to be "polar bears" and they all dunked in order to get an ice cream for dessert the next day.

They are all geared up to get in:


An initial reaction to the water temperature:


This is how we were dressed (to give you an indication of the temperature):


And, our fish didn't care:


The next morning, we were off to go stay on a farm.  This drive was long, about 3 to 4 hours.  We stopped at a cool cafe along the way that sold all homemade arts and crafts items.  While we were sitting in the cafe, there was a hail storm, the kids had never seen one before.  Before the day was over, we experienced two more hail storms, even one while we were outside, so that was fun.

We stopped along the way to look at some kauri trees. They are among the largest trees in the world.  We went to see the biggest one in New Zealand.  This picture does not do it justice, but our reaction was "HOLY #$%#" when we turned the corner and caught our first glimpse of it.

Here is a sign explaining the tree:


Try to compare the trunk size to Hazel:


Here it is, this totally doesn't do it justice:


At the farm, we arrived in time for the kids to help feed the sheep.  Then they played some tennis with Dave- now they all want lessons.   This was a nice break for us because the kids were able to run around and play, instead of sit and fight in the car.


We had to get up early and leave because we were booked on a tour of the Lord of the Rings film set for Hobbit town.  Lucky for us, they are getting ready to film two new movies, so they are actually rebuilding the set to its original form and our tour was going on during the construction.   The kids didn't necessarily appreciate it, but we did.  There are some crazy fans out there!  Unfortunately because of the fact that the movies haven't been filmed yet, we had to sign an agreement that we would not post any pictures we took of the set.  The only one I thought I could post, is this cute one of the kids because it doesn't show any of the set, but yes, it was taken on grass that will be in a famous movie!


We still had another two hour drive to get to our hotel for that night, in a city of Rotorua, which is famous for its hot springs and lava pools.  We were warned it would stink like sulfur, but it actually wasn't bad at all.  We stayed in a small two bedroom house for two nights, so it was a treat, a whole day without driving.  We went and saw some colorful lava pools and mudbaths, which were very cool.

It was VERY stinky here.  Check out her face:


Champagne pools, these were my favorite, the gas from underground makes the water look like it's fizzing:


Being very sensitive to smells, I ended up deciding to rush through, Addison joined me, guess we know who has a sensitive nose in our family.  This was our favorite pool, the Devil's Bath- loved the color:


Here is the bubbling mud, we could have sat here for hours:


And this is why we couldn't (the smell):


We ended the day by going to a geothermal spring and Dave and the kids all went in for a few hours.


Here are the kids on the lawn of our cottage, it was right on the lake, very nice spot:


Our next to last day, we were in the car again, this time heading to Waitomo to see some glo-worm caves.  This was one of the kids' favorite days.  We went on a long drive through someone's farm on narrow twisty roads and ended up at the cave.  We all got to wear hard hats:


Then, we walked into the cave, got into a rubber raft and floated in to see the tens of thousands of glo-worms lighting up the ceiling like stars in the night sky.  Below, you will see the strings of the glo-worms (silk)- but the guide didn't want us taking pictures once all our lamps were off, so I could not get  a good shot in the dark of the glo-worm lights because I didn't have a tripod.


That night, we stayed at the coolest motel ever, it was called Woodlyn Park!  You had your choice of sleeping in an airplane, a train, a boat, or a hobbit house.  The lady who helped us book the trip booked us in the hobbit house, I think she thought we were diehard fans since we went on the set tour.  Even though we didn't get to stay in the airplane or train, the kids were not disappointed.


Here's some views of our hobbit house:


On the way back to the airport for our 12 am flight, we stopped at a bird sanctuary and saw Kiwi birds.  They are nocturnal birds, which evidently dig holes in the ground during the day to sleep.  We couldn't take a picture of the bird because the room was dark to keep it awake and trick it that it was nighttime.  Of course, for a New Zealand souvenir, each kid got a stuffed kiwi.  It's confusing, the word kiwi can be used to refer to a New Zealander, the bird, or the fruit.  You can see a statue of the bird in the picture below:


All in all, thumbs up, but word of advice if you ever go, go during the warmer months and rent a camper van and don't schedule too many specific activities so if you want to stop you don't feel rushed.  There were camper vans everywhere there, all shapes and sizes, it was interesting.  We saw more than I've ever seen in my life from mini-van size, all the way up to the huge ones you would see driving up to Mt. Rushmore in the month of July.

Friday, October 29, 2010

M is for Monster

With the approach of Halloween, for the past two weeks, our topic of study was monsters.

Our letter collection grew with the addition of the M for monster:


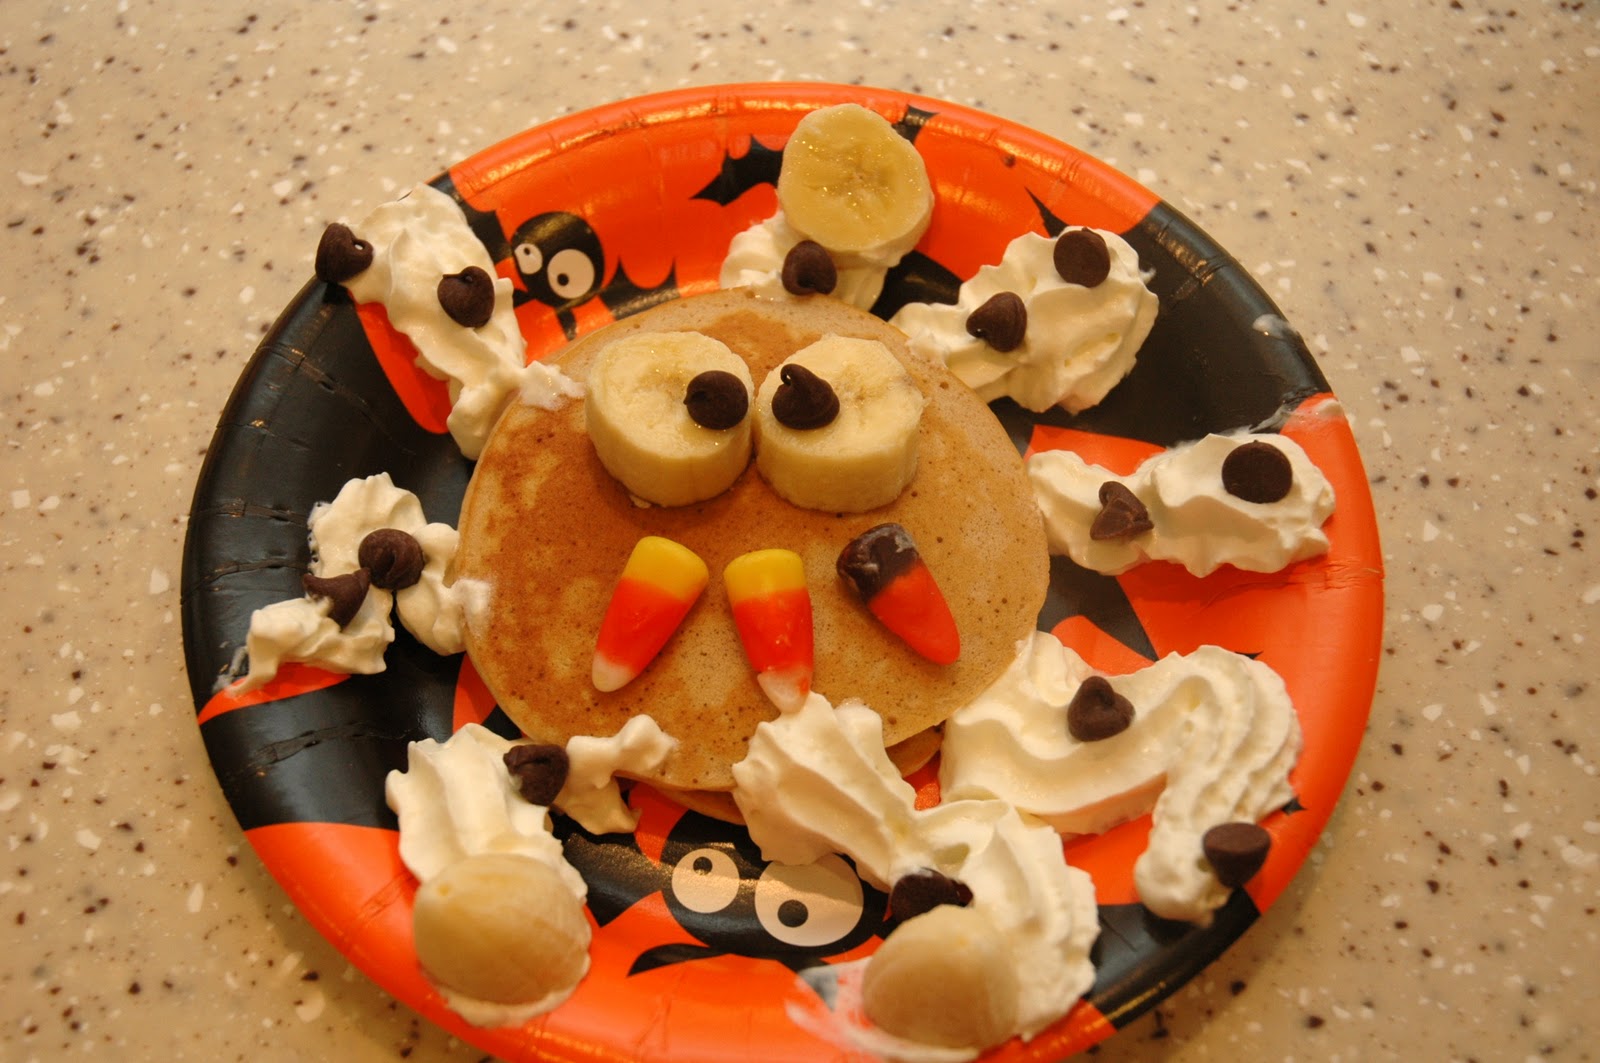
We had monster pancakes for breakfast.  Who knew that the addition of a few candy corns would make the kids eat their bananas with no fight and no one even asked for syrup!


We made monster cupcakes.  I love the eyeball decorations, we got them here, I think it's the kids' favorite part of decorating things.


I made the dracula, skeleton, and spiderweb ones.  The skeleton is my alltime favorite one to make, I saw it in a Family Fun magazine years ago.  It's so simple, you open the cupcake liner a little, place a half of a large marshmallow in and frost over it, then use two large brown or black candies (junior mints or m + m's)- you can use slivered almonds for teeth.  For me, it might look better, but I don't want almonds on my food, so I'll take the toothless one that I'm going to consume all of.

For dracula, I was inspired by a photo in a Martha Stewart magazine.  In hers, dracula was on a mini cupcake, mounted on a larger one posing as his clothes.  However, that seemed like too much cake to me so I opted for the face on its own and my kids were arguing over who could eat it.  I used sprinkles for the eyes and fangs and colored icing for the hair and smile.

For the spiderweb, you'll have to wait until I post my Halloween sugar cookies.

We made a page of "thumbprint monsters":


We drew pictures of a famous monster, Frankenstein, I love Addison's on the left, how he wrote "Evil" in the top corner.


We drew self portraits of ourselves if we were a monster:

Nathaniel:


Addison (again with the evil):


Owen (so precious):


Nathaniel made up 10 nouns, verbs, and adjectives that he thought had to do with monsters.  Addison used these words to practice his writing, he LOVES to write words.  Owen used them to try to write his letters.  Nathaniel used them to practice using proper grammar in sentences and drew pictures to go along with each.  I love the paper that we use to practice writing and drawing.  I got it at a teacher store- it teaches him to properly size all the letters in a word and use a space between words.


Saturday, October 23, 2010

Eye LOVE these t-shirts!

Last year, I found so many ideas for Halloween, I was overwhelmed.  Something that stuck with me all year, was the idea for these t-shirts.  I thought I'd make them over the summer, but never found the time.  As I was feeling better this week, I set my mind to making these t-shirts, so the kids could at least enjoy them before Halloween.  Here is a link to the website where I got the idea, creative kismet.  Mine aren't as good as hers, I did them from memory before I went back to her blog.  I wish I made the eyes bigger and did the red lines.  Oh well, the kids love them and were already asking me to make some more for their friends.

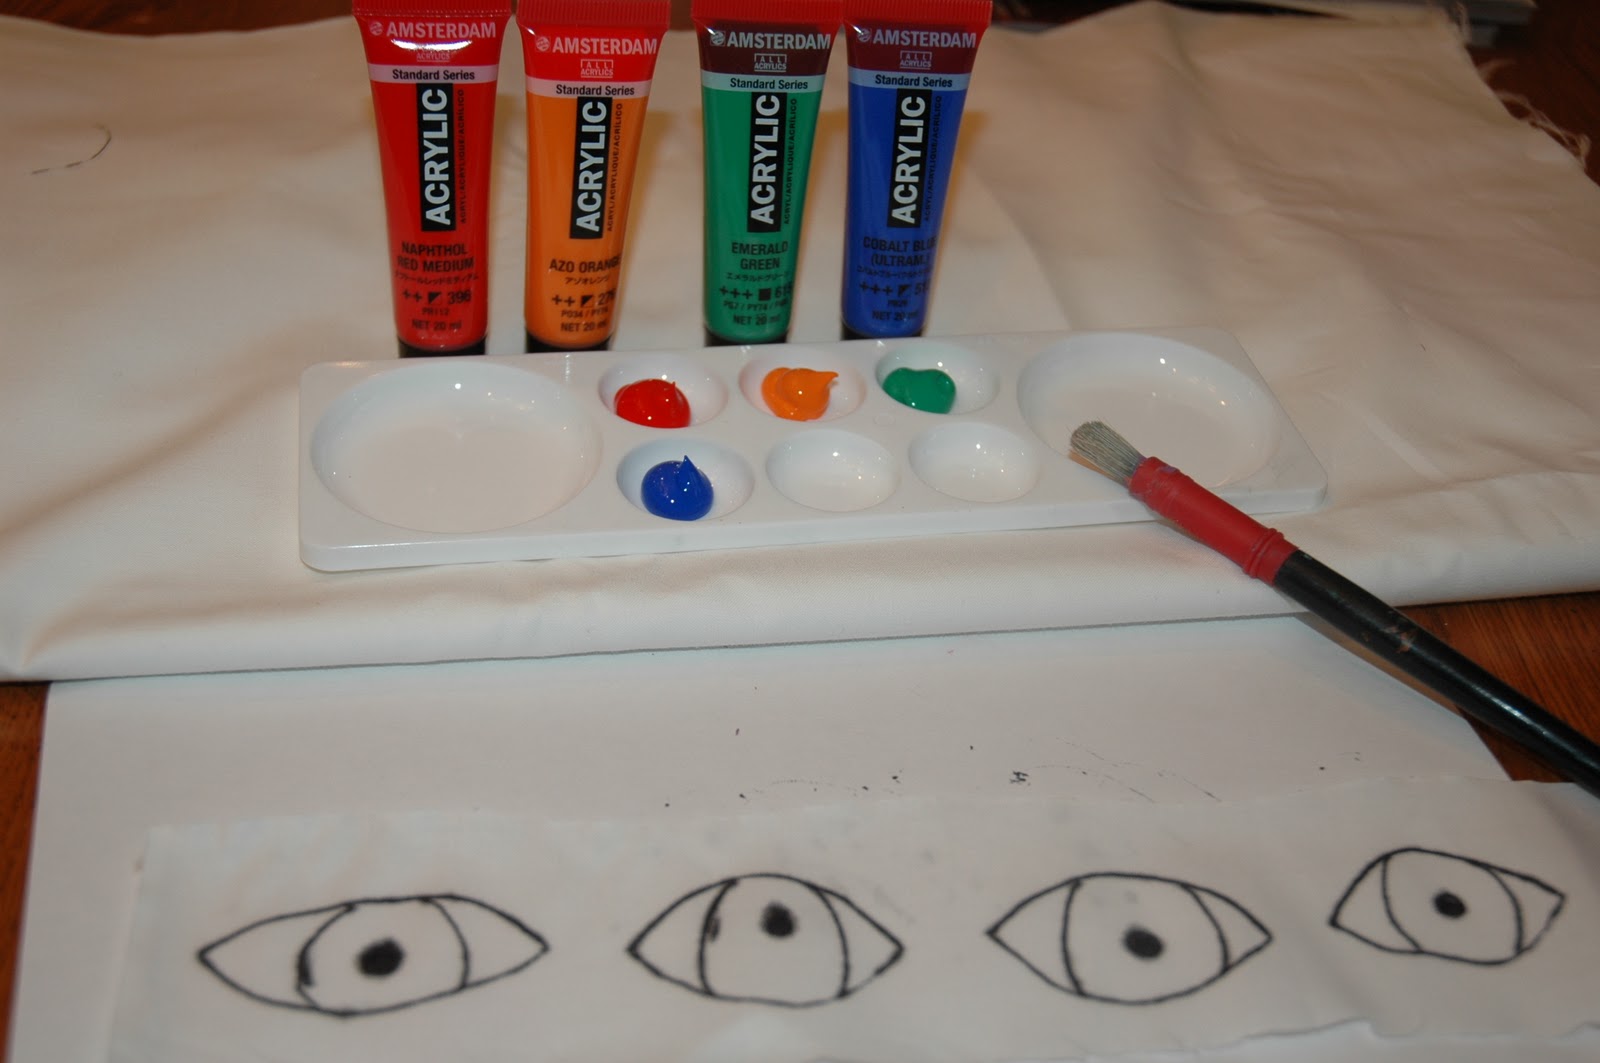
To start, I drew eye shapes with a sharpie (and colored in the pupil black)- I would recommend to not draw the outer eye shape, since when you sew, the shape will be formed by the shirt.


Then, I used what I thought was acrylic craft paint to paint the eyeballs.


I washed the strip of fabric before I sewed in the eyeballs and I'm sad to say, the paint was not exactly craft, but it did stay, just not as brilliant as the original painting.  That is one of the pitfalls of having to shop at a japanese craft store, hoping you bought what you thought you did.

I turned the t-shirts inside out and pinned the eyeballs, darker color down to the shirt.


I sewed around the eyeballs, leaving about 1/4" between the stitch and the eye.   Then, I turned the shirts right side out, pulled up, so I was holding just the t-shirt, and cut out an eye shape to reveal the inside painted eye.  I tried to leave an upper lip so it looked like a droopy lid, but I think I didn't leave enough, the kids could have cared less though.


I did put one on each of their backs too.

Friday, October 22, 2010

Pumpkin Whoopie Pies


A few years ago, my sister made pumpkin whoopie pies for a cookie exchange that we had.  I couldn't believe how good they were and that I'd never heard of them before.  Growing up, the only whoopie pies I'd ever known were chocolate with vanilla icing.

My son came home last week with a note from his teacher saying they were having a pumpkin taste testing and could each kid try to bring in something pumpkin flavored for the class to sample.  This was perfectly timed with the arrival of canned pumpkin in a package from my mother.  I knew immediately that I wanted to make the pumpkin whoopie pies.

The funny thing is, the teacher sent home a note asking what whooopie pies were and all my friends that asked what I was making had no idea what a whoopie pie was either.  They didn't realize that they have unleashed a beast and now they will be trying like four or five different flavors of whoopie pies over the coming months that I have been planning on trying out.

The recipe I used was in a family cookbook, it was my mom's cousins- I'm not sure if she made it up or got it from somewhere else, either way, it's very very good.

Pumpkin Whoopie Pies:

Oven:  350'

2 cups brown sugar
1 cup oil
15 oz pumpkin puree
2 eggs
3 cups flour
1 tsp cinnamon
1 tsp salt
1 tsp baking soda
1 tsp baking powder
1 tsp vanilla

Icing (my recipe):

8 TBSP butter (1 stick)
3 TBSP milk
1 tsp vanilla
2 1/2 - 3 cups confectioner's sugar

For the cake part, mix together dry ingredients in medium bowl and set aside.  Mix together oil and brown sugar until combined, add in eggs until combined, scrape sides of bowl, add in pumpkin puree and vanilla.  Slowly add in dry ingredients until combined, scrape sides and mix again.  I used a medium scoop that I got from Pampered Chef (that I LOVE), you can also use a tablespoon to scoop up some batter and drop it onto the ungreased cookie sheet.  Since the whoopie pies are sandwich-like cakes, I would recommend not making them too large.  I was able to make about 40 small whoopie pies with this batch.  Bake in oven approximately 15-18 minutes.

While the cake part is cooking and cooling, make the icing.

Cream the butter with about 1 cup confectioner's sugar.  Add in about 1 TBSP milk and 1 tsp vanilla, then add more confectioner's sugar, then more milk, continue this method until you reach your desired consistency/taste.  I actually used my hand mixers on low to do this and it came out really good.  The consistency I wanted was thick enough that it did not immediately drip off the mixers, but thin enough that when I put a dollop between the two cakes, when I smooshed them together, it spread out to the edges easily - without dripping out.  It is best to wait to put the frosting in until the cakes are completely cool, otherwise, the heat will make the icing melt and drip out.

Thursday, October 21, 2010

Happy Fourth Anniversary to Me

Four years ago, along with my three boys, then aged 3, 20 months, and 4 months, my sister, 1 big stroller, 3 car seats, and 19 suitcases, I arrived at the Osaka airport in Japan.  It's hard to believe that the time has passed so quickly.  Looking back to how I felt when I first arrived and how I feel now, it's amazing the transition I've undergone.  At first, I was thinking "just three years- that's it", now I am thinking, "I don't want to leave next year, we've got to figure out a way to stay".  I was so nervous to be so far away from my family and felt like it would seem like an eternity between visits.  I have had so many adventures, and have had so much fun discovering new things in this country (and travelling to some other ones as well)- that it seems like the time passed in the blink of an eye.  

It's been really fun to give family and friends the opportunity to come and visit us and share what our life in Japan is like.  It has been so enjoyable to take everyone around and point out all the unique things about Japanese culture.  I have been having a lot of fun lately pointing out some of these things on this blog too.  I really regret that I did not think to start it sooner.  As I am feeling better though, I will be going through my photo archives and adding more stuff to the blog from our early years.

Speaking of the early years, here are some photos from our first year:


Now look at us, we are no longer 5, but 6, with 7 on the way.  Dave has lost over 20 lbs, without even trying, two of the kids have started school, someone lost a tooth, no one is wearing diapers (at least for the next few months), two kids can ride two wheeled bikes and have learned to read and write, some of us can speak "okay" japanese and read the characters, and the kids can recognize flags from all over the world.  It's amazing what has happened in four years time!


This was taken last week on our trip to New Zealand.  That post will be coming soon (when I find the time).  As I was searching for a picture, I realized how few I am actually in since I am usually behind the camera.  

As our time here is coming quickly to a close, if you haven't had a chance to visit and you want to, you should try to come in the next year.  This is a wonderful country with lots of adventures to be had.

Tuesday, October 5, 2010

Super Mario has his eyes on you!

For our first art project of the year, I had Nathaniel do a self portrait.  It took quite a few days for us to finish the project, but in the end, I think he was happy with the result.


I got the idea to use a black sharpie to outline the finished product, here at Deep Space Sparkle blog.

I was worried that it was going to be like pulling teeth everytime we did an art project.  Surprisingly, when I decided to do our second project a few days later, which was an extension of the self portrait, he was very excited.  That was because I told him he could do a portrait of whatever he wanted, but make it kind of Halloween-ish.  Do you know what he decided to do a portrait of??  SUPER MARIO, of course.

I didn't have to do any poking or prodding to get this project rolling.  The orange outfit of course, is his pumpkin disguise, and the extension on the self portrait was that we made the eyes movable so they can follow you- SPOOKY!  I found the idea here at That artist woman's blog.


Is he looking right?


Is he looking left?

The kids are having fun moving his eyes around, I can see that we will be doing this art project again!

Friday, October 1, 2010

Chicken Pot Pie


Chicken pot pie is one of my favorite meals to make for many reasons:  it's easy, all the kids eat it, it's delicious, but most importantly, you can make a lot at once and freeze the extras.  The extras come in handy on nights when there just isn't time to make a healthy meal or I'm just feeling like I'm going to topple over- I can just reach in the freezer, pull one out, and pop it in the oven.

I have an all time favorite recipe that I found in my Cook's Illustrated Make Ahead Meals cookbook (go figure)- but recently, on Annie's Eats, I stumbled across another recipe I was dying to try.  With a combination of the two, I have found one darn good chicken pot pie that in my opinion, is super easy to make.  I have always made my own pie crusts, and I know people that are just too afraid to go there, afterall, rolling out a crust can be very tricky.  This crust recipe is a no brainer, it's so easy to make and tastes great too!

Filling:
1 large potato
2 small carrots (or 1 large japanese carrot)
1 cup frozen peas
1 medium onion
2 tsp thyme
1/2 cup heavy cream
3 cups chicken stock
6 TBSP butter
1/2 cup flour
2 boneless chicken breasts, cut into pieces

Crust:
2 sticks butter (16 TBSP) room temperature
3 cups flour
1/2 tsp salt
8 oz. cream cheese

Oven:  375'

Baking time:  25-30 minutes

Peel the potato and carrot, dice into small pieces, place in a saucepan with 2 TBSP butter and 2 tsp thyme, and saute- stirring frequently, until they are cooked through (about 15 minutes or 20 if you like them softer).

For the filling, melt butter in large saucepan over medium low heat,  finely chop the onion and add it in, with a dash of salt.  Saute the onion until cooked, about 7 min.  Add in flour, make a paste- stir until becomes tan and crumbly.  Whisk in the chicken stock and stir constantly over medium heat until there are no lumps.  Slowly add in cream.  Heat mixture over medium until thickens slightly, like a cream soup- if it's too thick, you can add a bit more chicken stock to thin it out.  Add in your raw chicken and cook in the sauce mixture about 10-15 minutes, until cooked through.  When chicken is cooked through, remove from pan and cut into bite sized pieces, then add back in.  (An alternative to this is if you have leftover pre cooked chicken, or you buy a precooked rotisserie chicken, you can just rip up the pieces and add them into the sauce).

Add the cooked veggies, and frozen peas to the sauce mixture.   Pour the filling into your pie dishes.

For the crust, put the butter, cut up into 1 TBSP sized pieces into your mixer with the flour.  Using the dough hook, mix together, until the flour looks like pea sized crumbs, you might need to stop once to scrape the sides.  Once the butter and flour are combined, add the 1/2 tsp salt and the cream cheese, turn the mixer back on and let it mix until the mixture forms a smooth ball on the hook.  Remove dough from hook.  Roll balls from the dough for the number of pies you are making.  I made 6 individual and one small family sized one, so I rolled 6 small balls and 1 big one.  On a lightly floured surface, roll the balls out with a rolling pin to about 1 inch wider than your dishes (should be on the thick side, like 1/4 inch thick).  Place the dough on top of your dish and press down around the outside edges, should be about a 1 inch overhang.

I cooked my individual ones on a cookie sheet, so I wouldn't have to wrestle all the little dishes out of the oven and in case there was overflow.  I put the crust on the large pie and put saran wrap on it and stuck it in the freezer for another time.

Season with salt and pepper and enjoy!